I love most candies that are basically just sugar + food coloring, so it’s no surprise that I adore candy corn (mellowcreme pumpkins are the best)! But there’s only so much candy corn one human can eat, and they don’t have it here in Bahrain anyway. They do, however, have butter, sugar, and flour, which means that I can make a cake that looks like a giant candy corn… and tastes even better.
To accomplish this towering candy corn of goodness, I baked a delicious white vanilla cake, divided the batter into three parts, and dyed them using gel food coloring. You can use liquid food coloring, if you prefer, though gel is nice because you don’t have to use a ton so it doesn’t affect the flavor.
You could use a box mix for this (although you’ll probably need two boxes), but if you’ve never made white cake from scratch, you really should try it at least once. It’s not that complicated (even if you don’t have a stand mixer), and it is SO delicious. I always add a little more vanilla than the original recipe calls for, too.
Oh, and don’t even get me started on homemade frosting. Even if you use a box of cake mix, you HAVE to make the frosting yourself. It only takes a few minutes, tastes amazing, and you have control over the consistency and the taste!
The key to icing this cake (or any layer cake, particularly one that is darker than it’s frosting) is a crumb coat: a thin layer of frosting all around the cake to seal the crumbs in. Once you cover it with the crumb coat, stick it in the refrigerator for at least 20 minutes (longer is fine). Then you can finish frosting the cake without worrying about crumbs getting in the way.

The frosting/blending method I used is one I learned from watching this video from Sweetapolita, which you probably will want to watch yourself. I don’t have an offset frosting knife or a turntable, so I just turn the cake myself and use butter knives and a flat frosting spatula. You can also use a bench scraper if you have one, and you probably could do the whole thing with just butter knives if necessary, it just won’t be quite as smooth. The basic idea is to really load the frosting onto the cake, then use a frosting spatula or other flat tool to smooth everything out. You’ll take a lot of frosting off the cake in the smoothing process, so you’ll want to keep a bowl of warm water or a paper towel handy, and you want to start with a lot of excess frosting so you’ll have enough to take off.
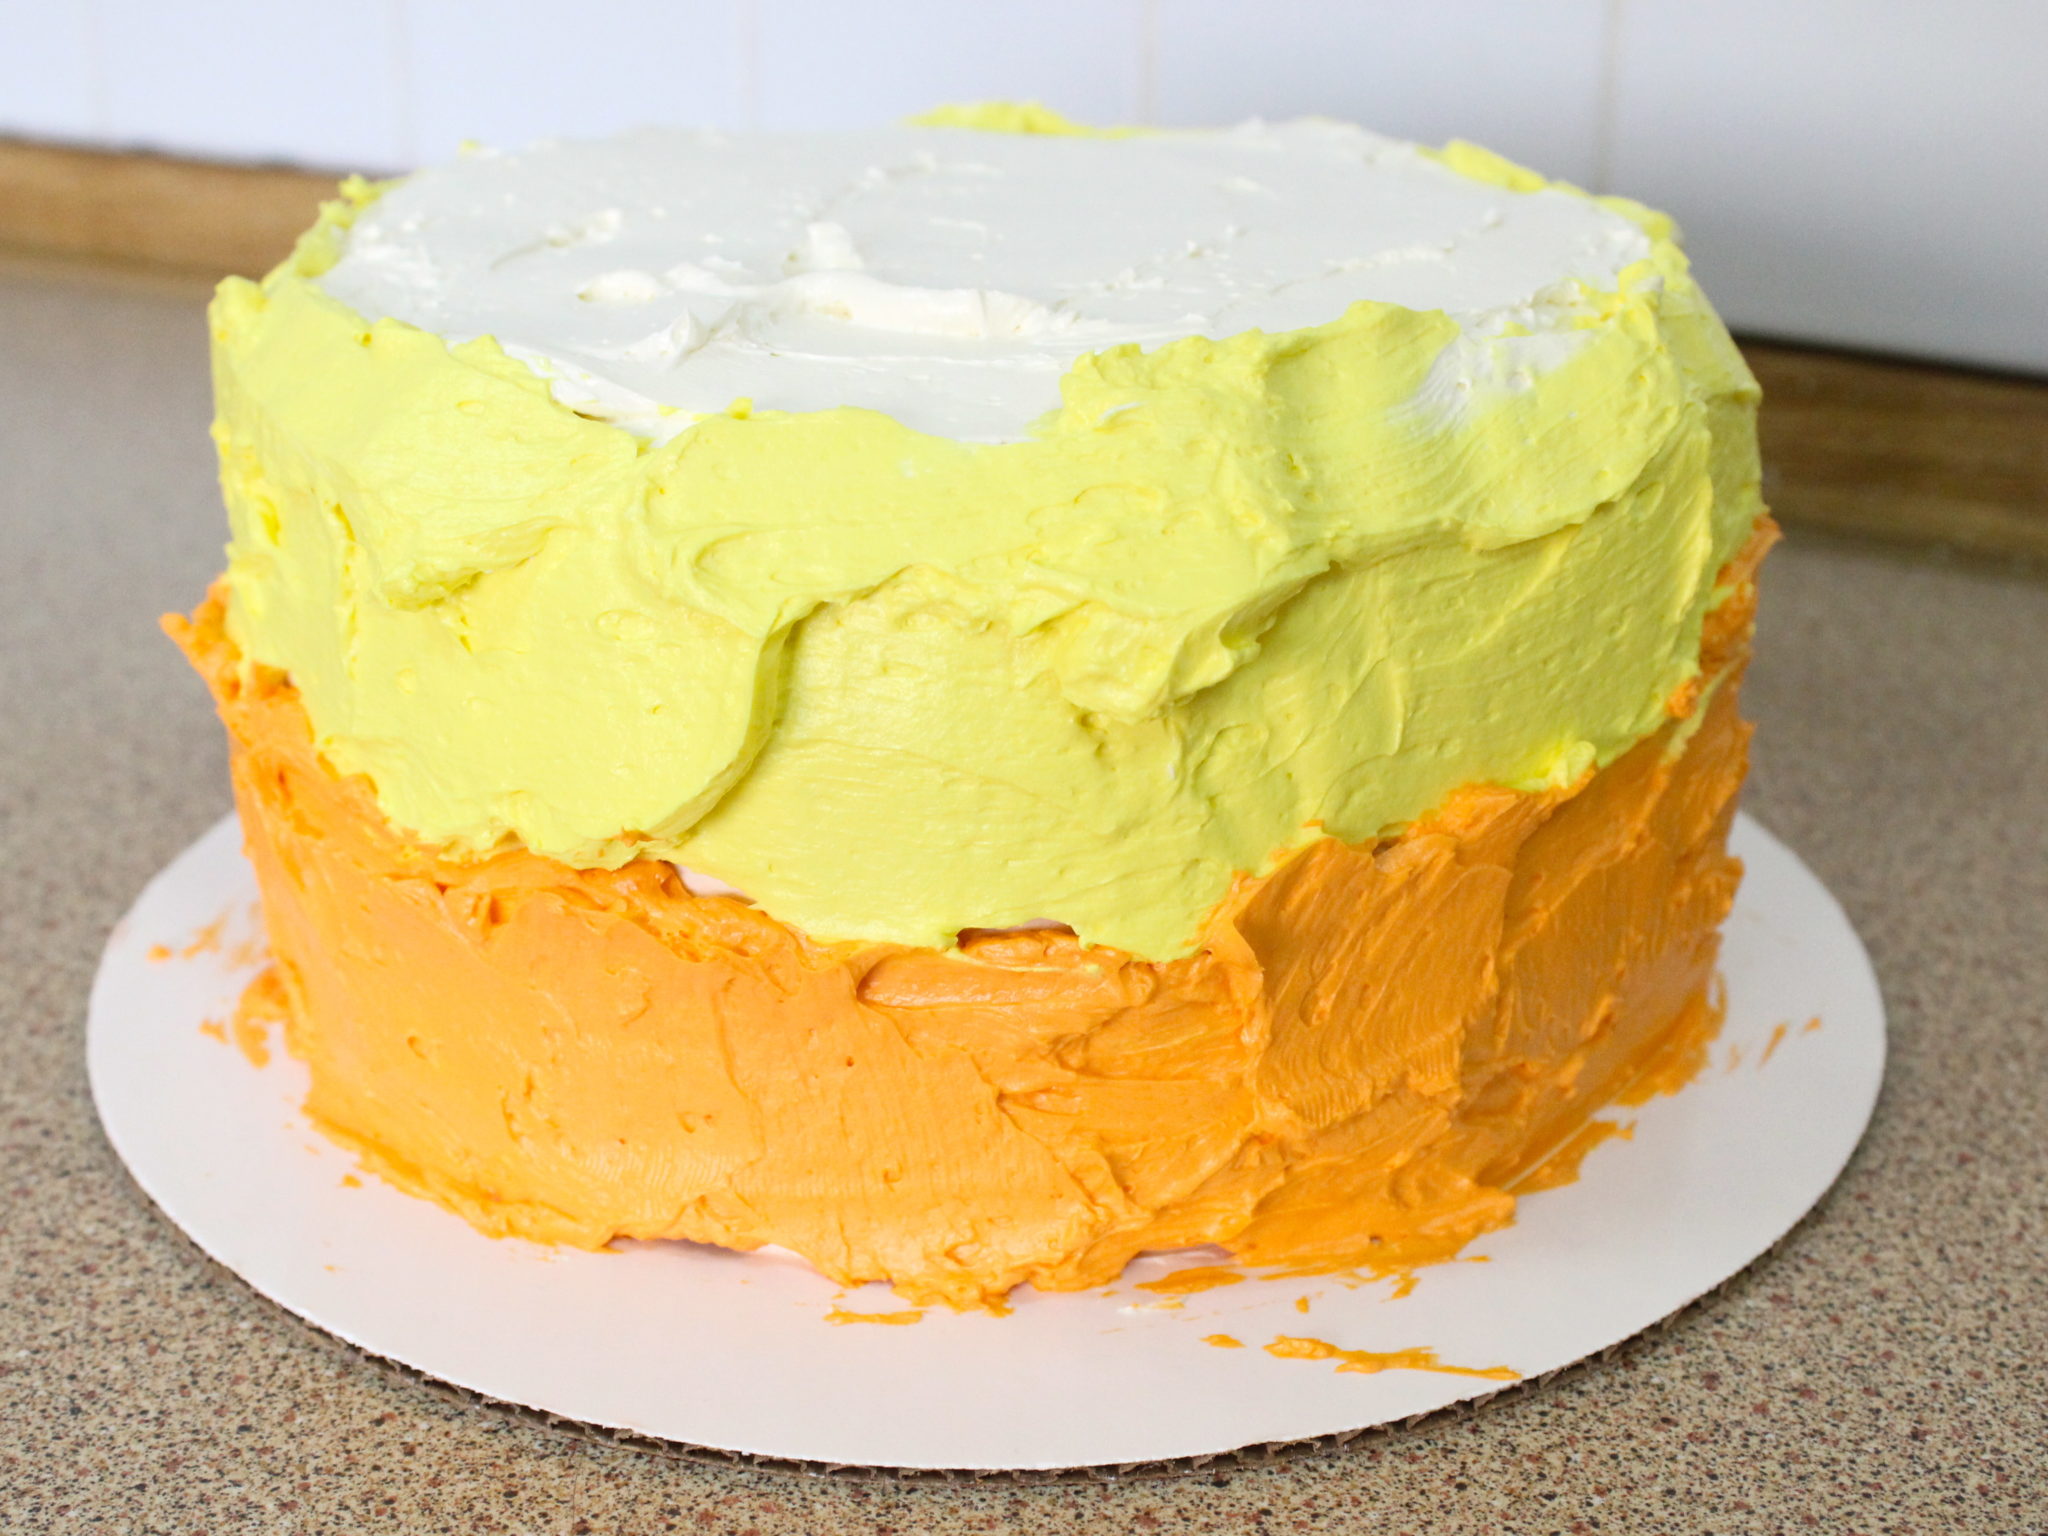

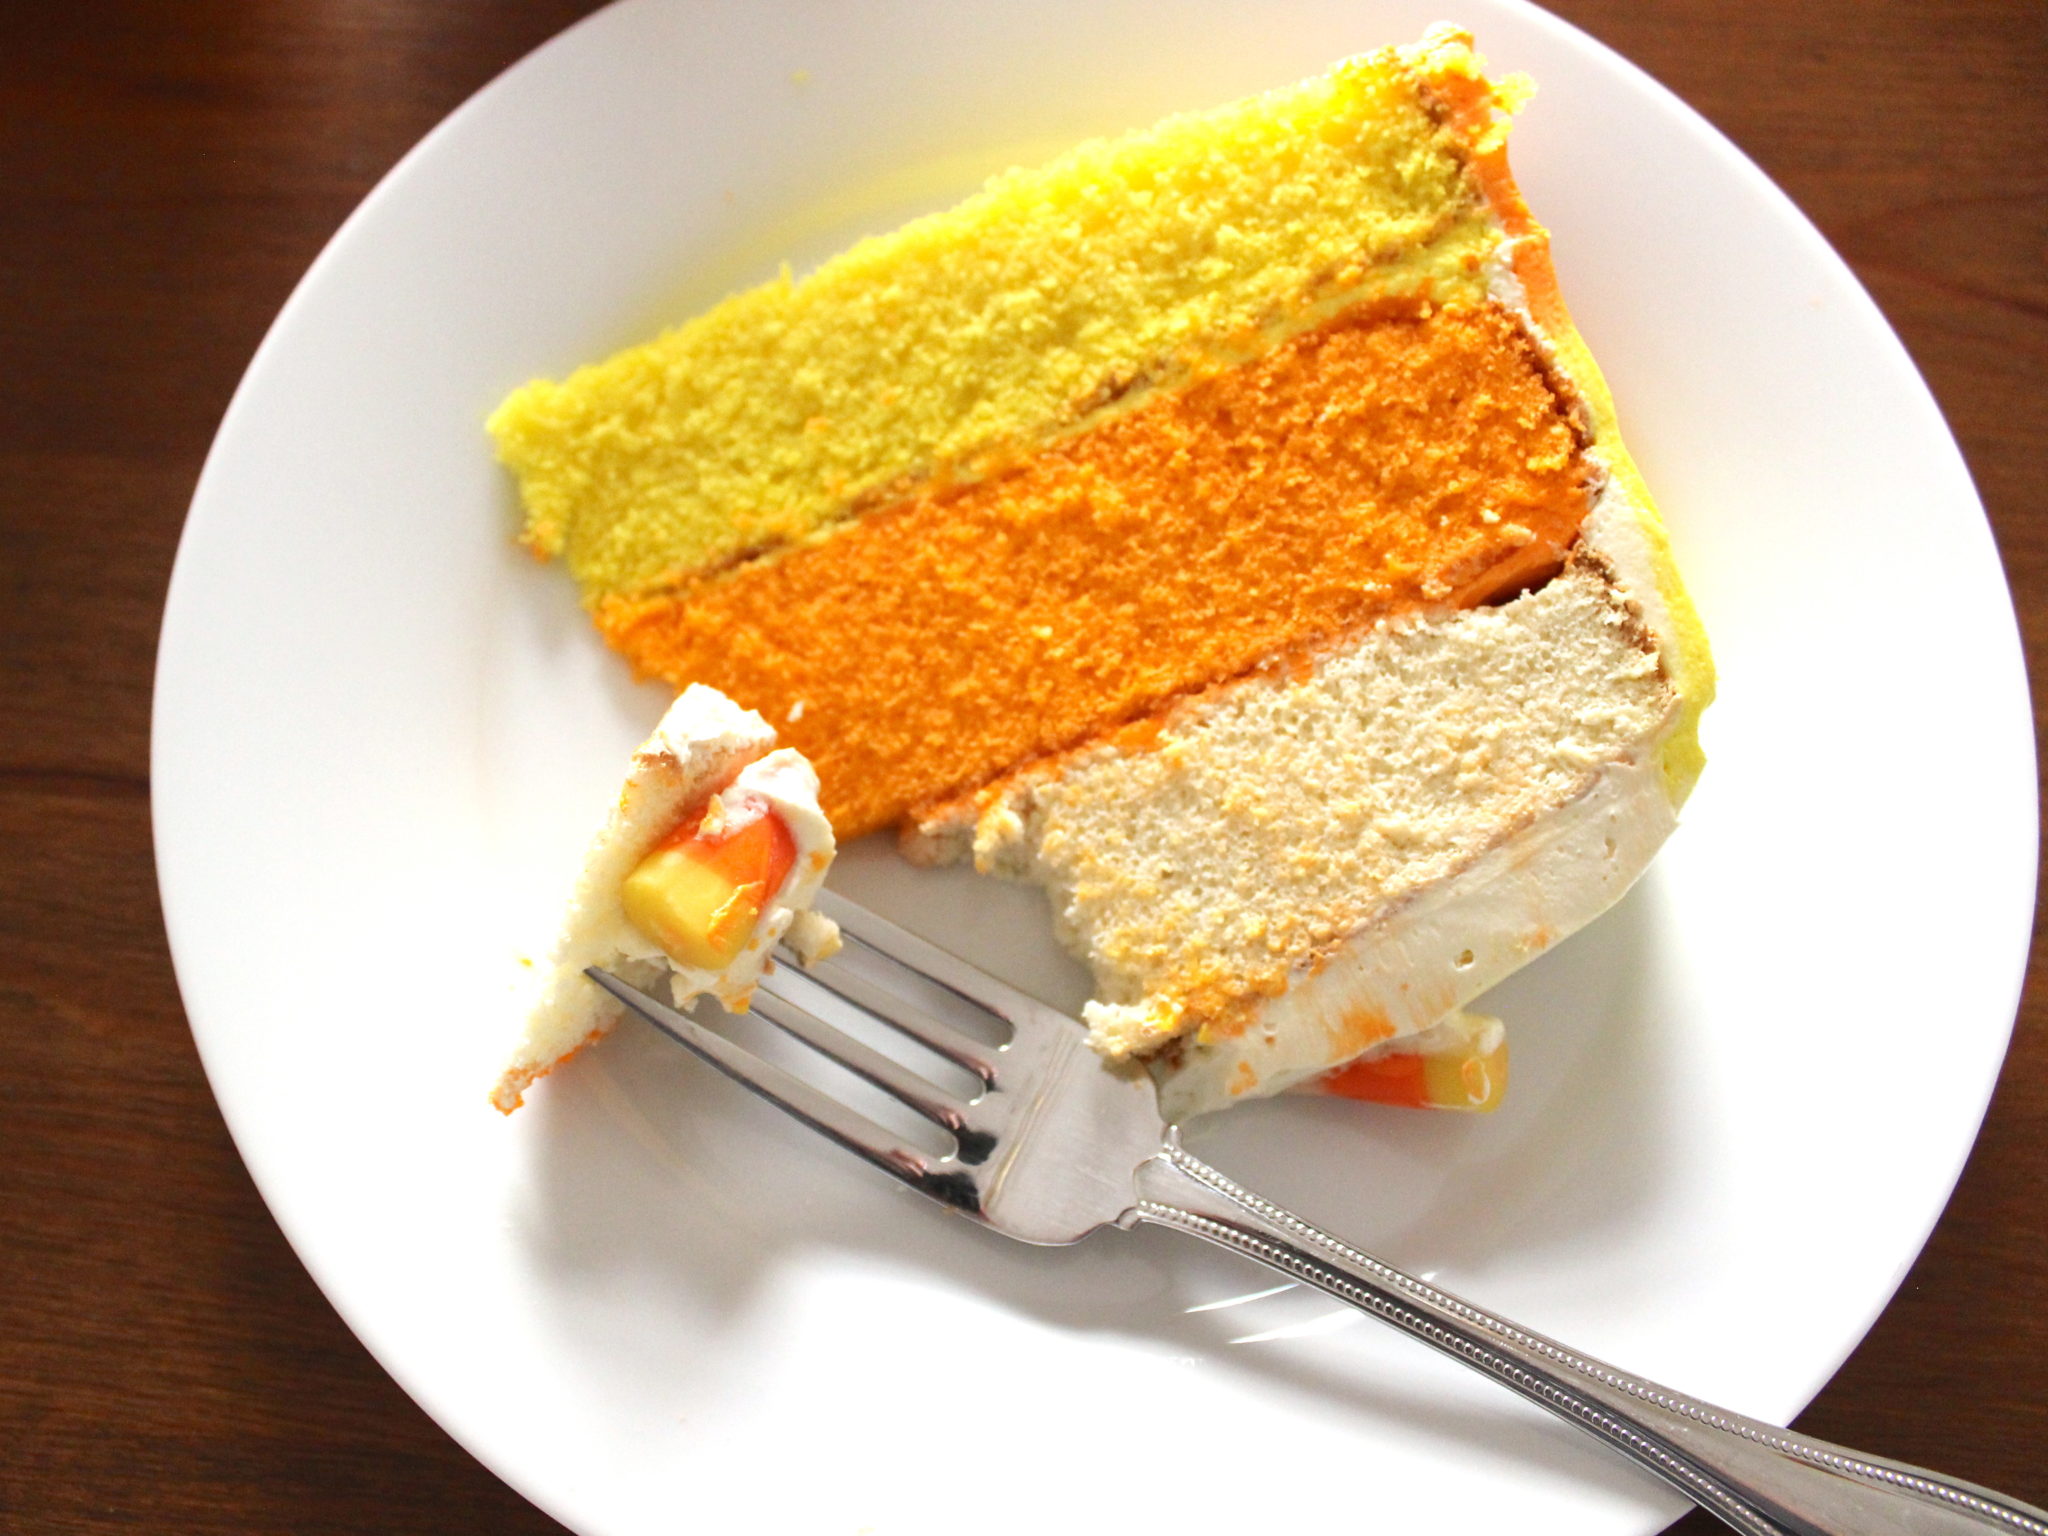
My cake isn’t totally smooth, and the colors sort of blend together on the top and the sides, but I actually really like it that way — it still looks pretty, but it is more homemade-looking than a perfect grocery store cake. I topped it with some autumn mix candy corn (the only kind I had, since it had to be sent from the US!), but orange and yellow sprinkles would also look great.
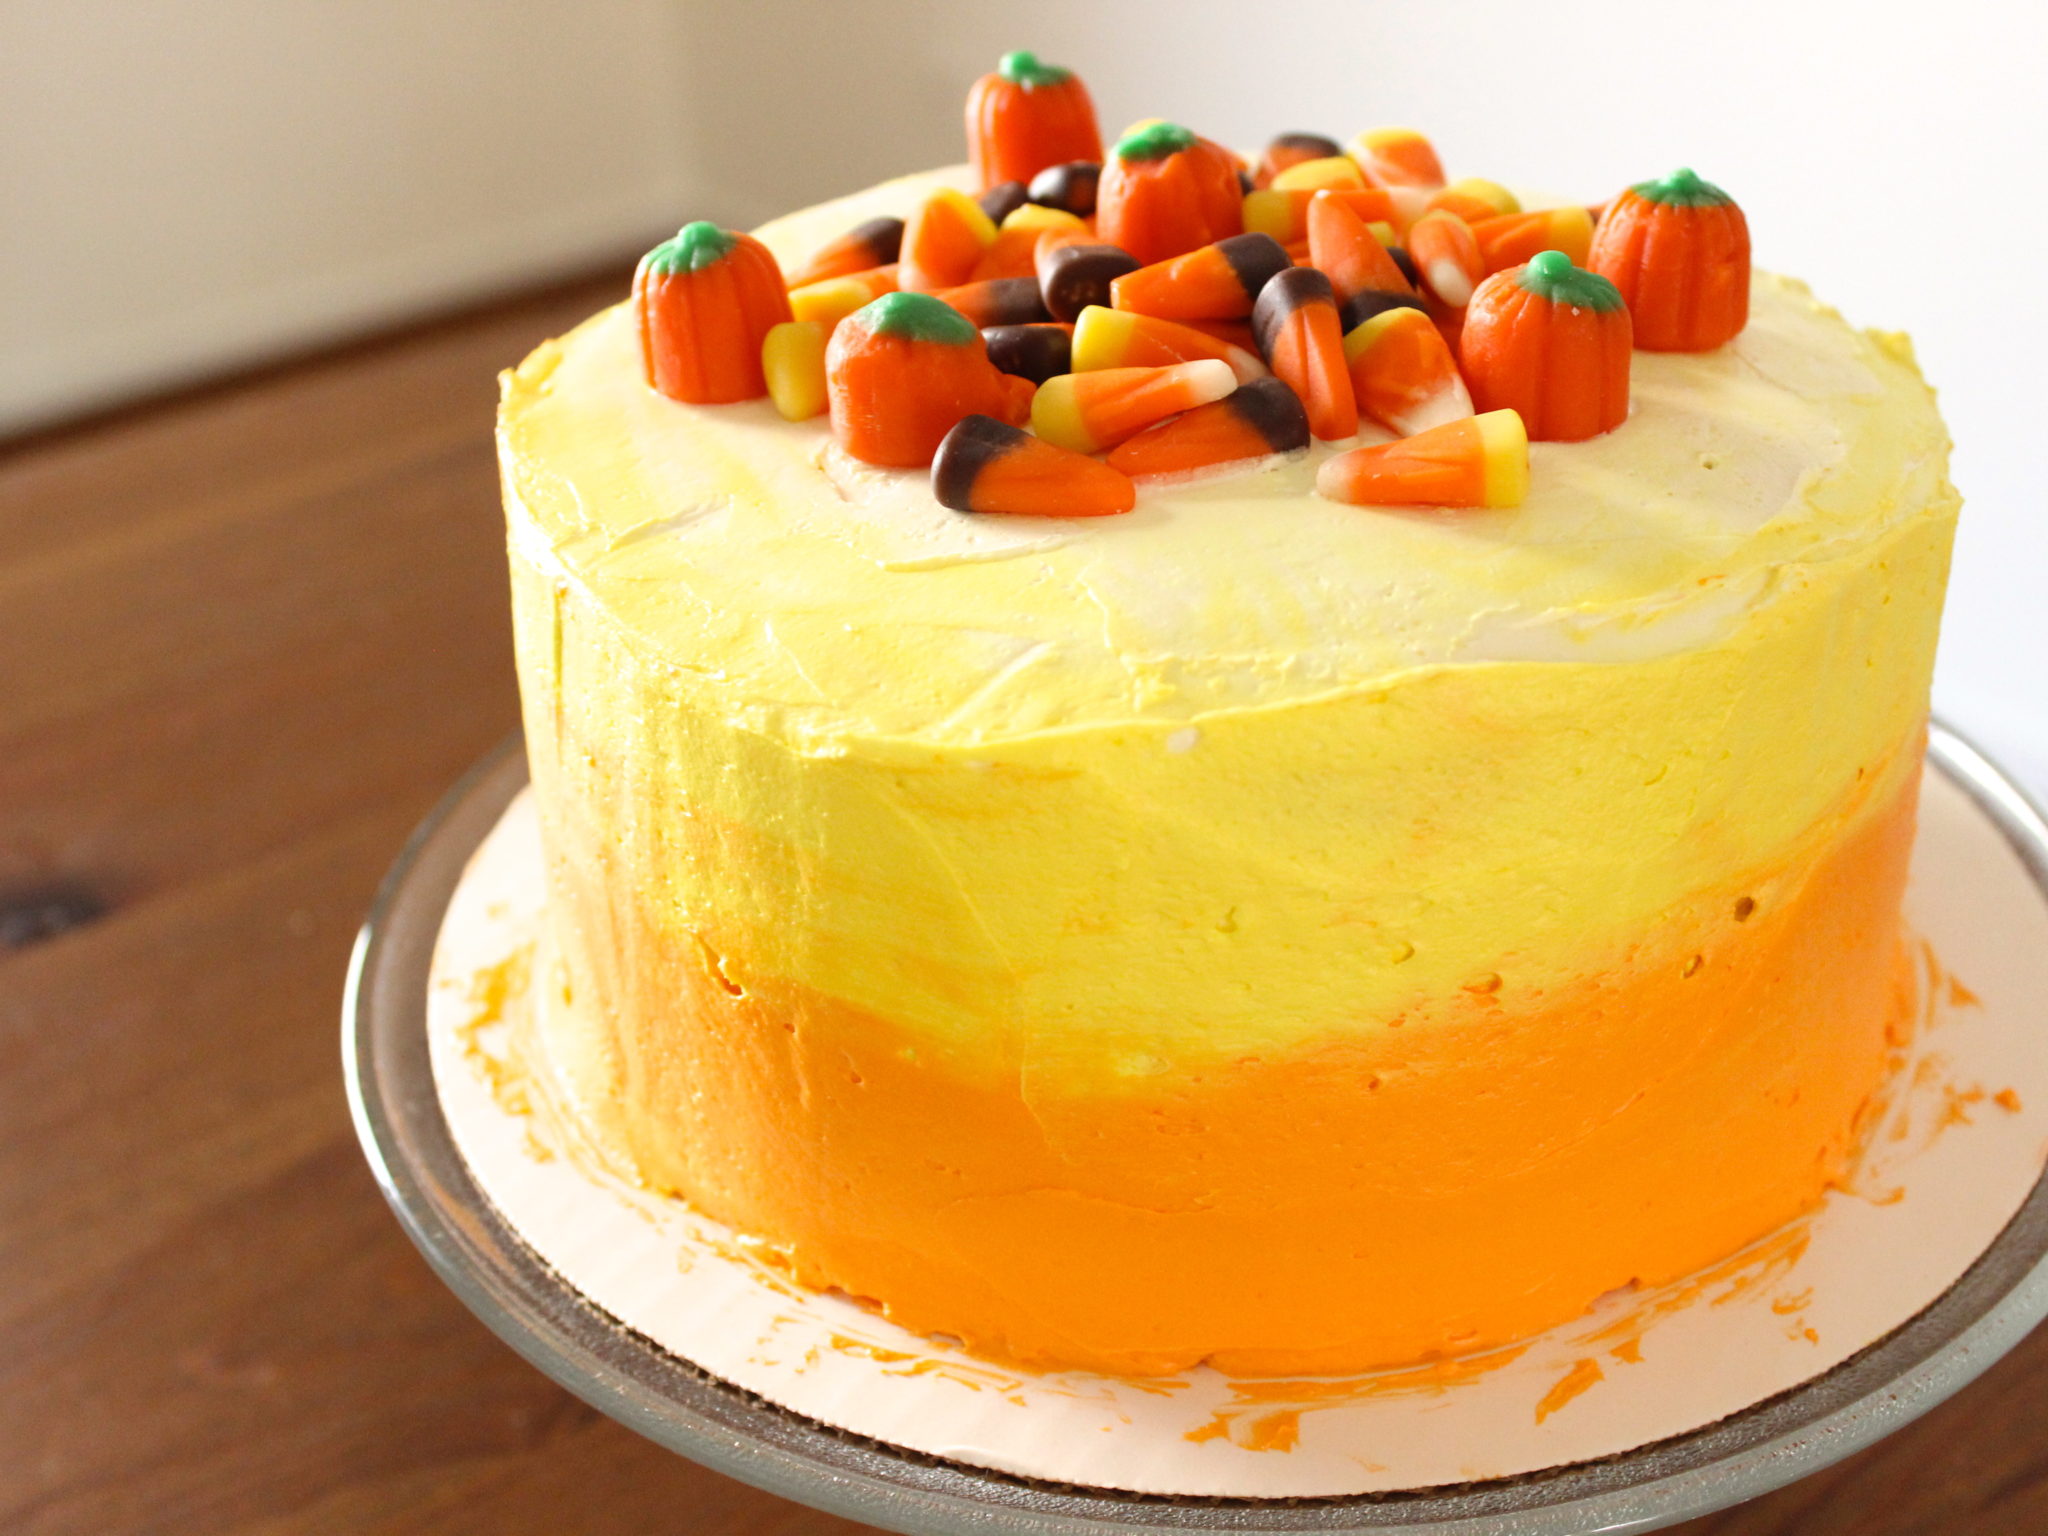
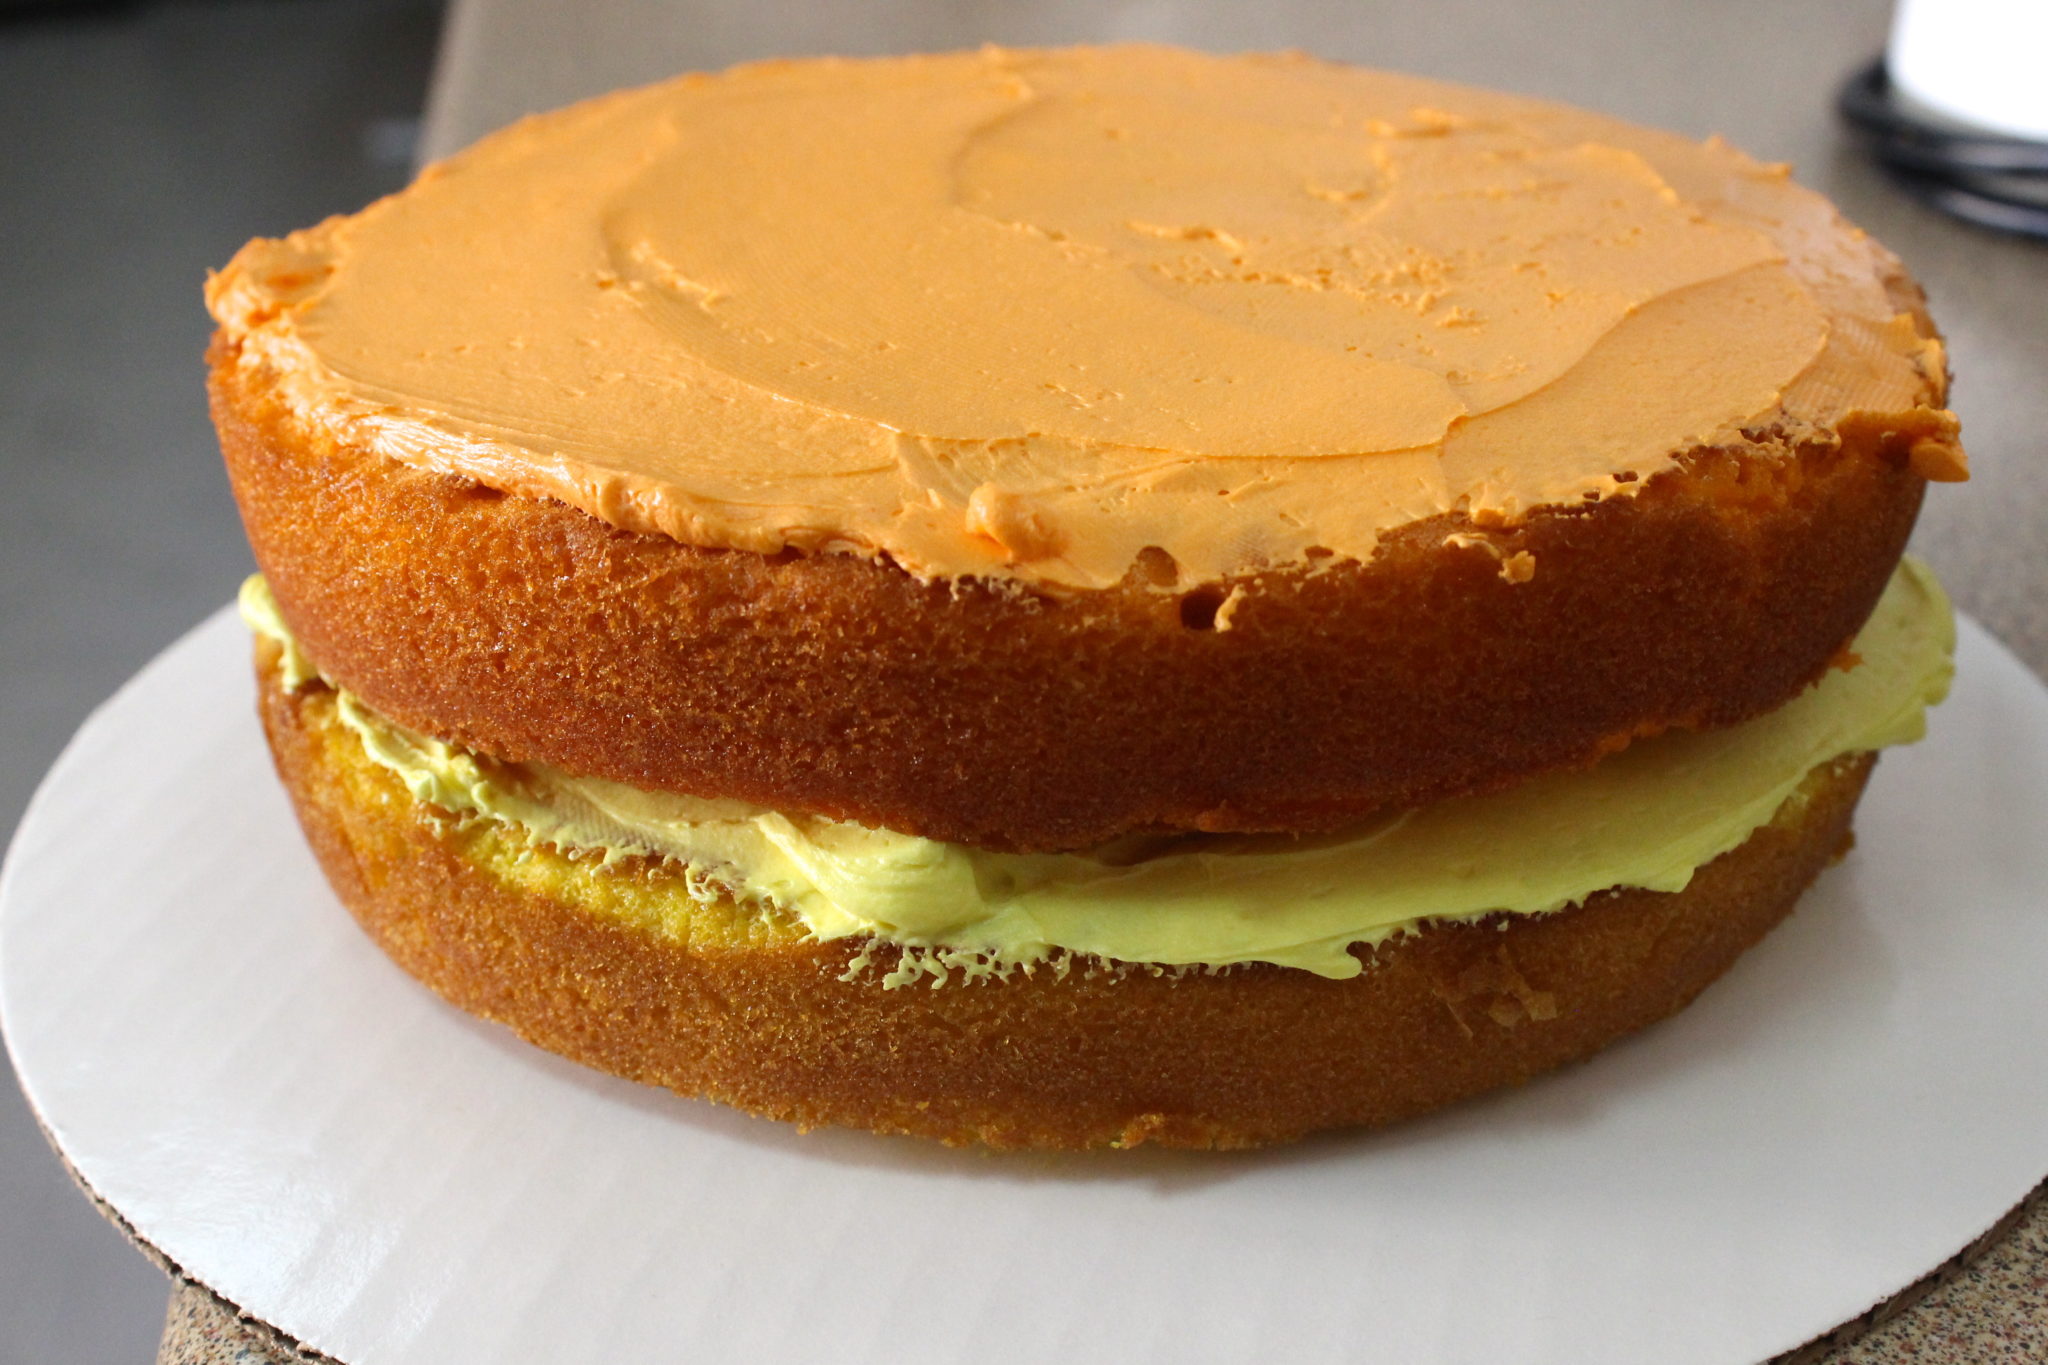
As you have probably noticed by now, I managed to stack the layers of the cake in the correct color order, and then frost the cake in the wrong order. Whoops. It still looks pretty, of course, but it would clearly be better if the color of the icing on the outside and the cake on the inside matched.
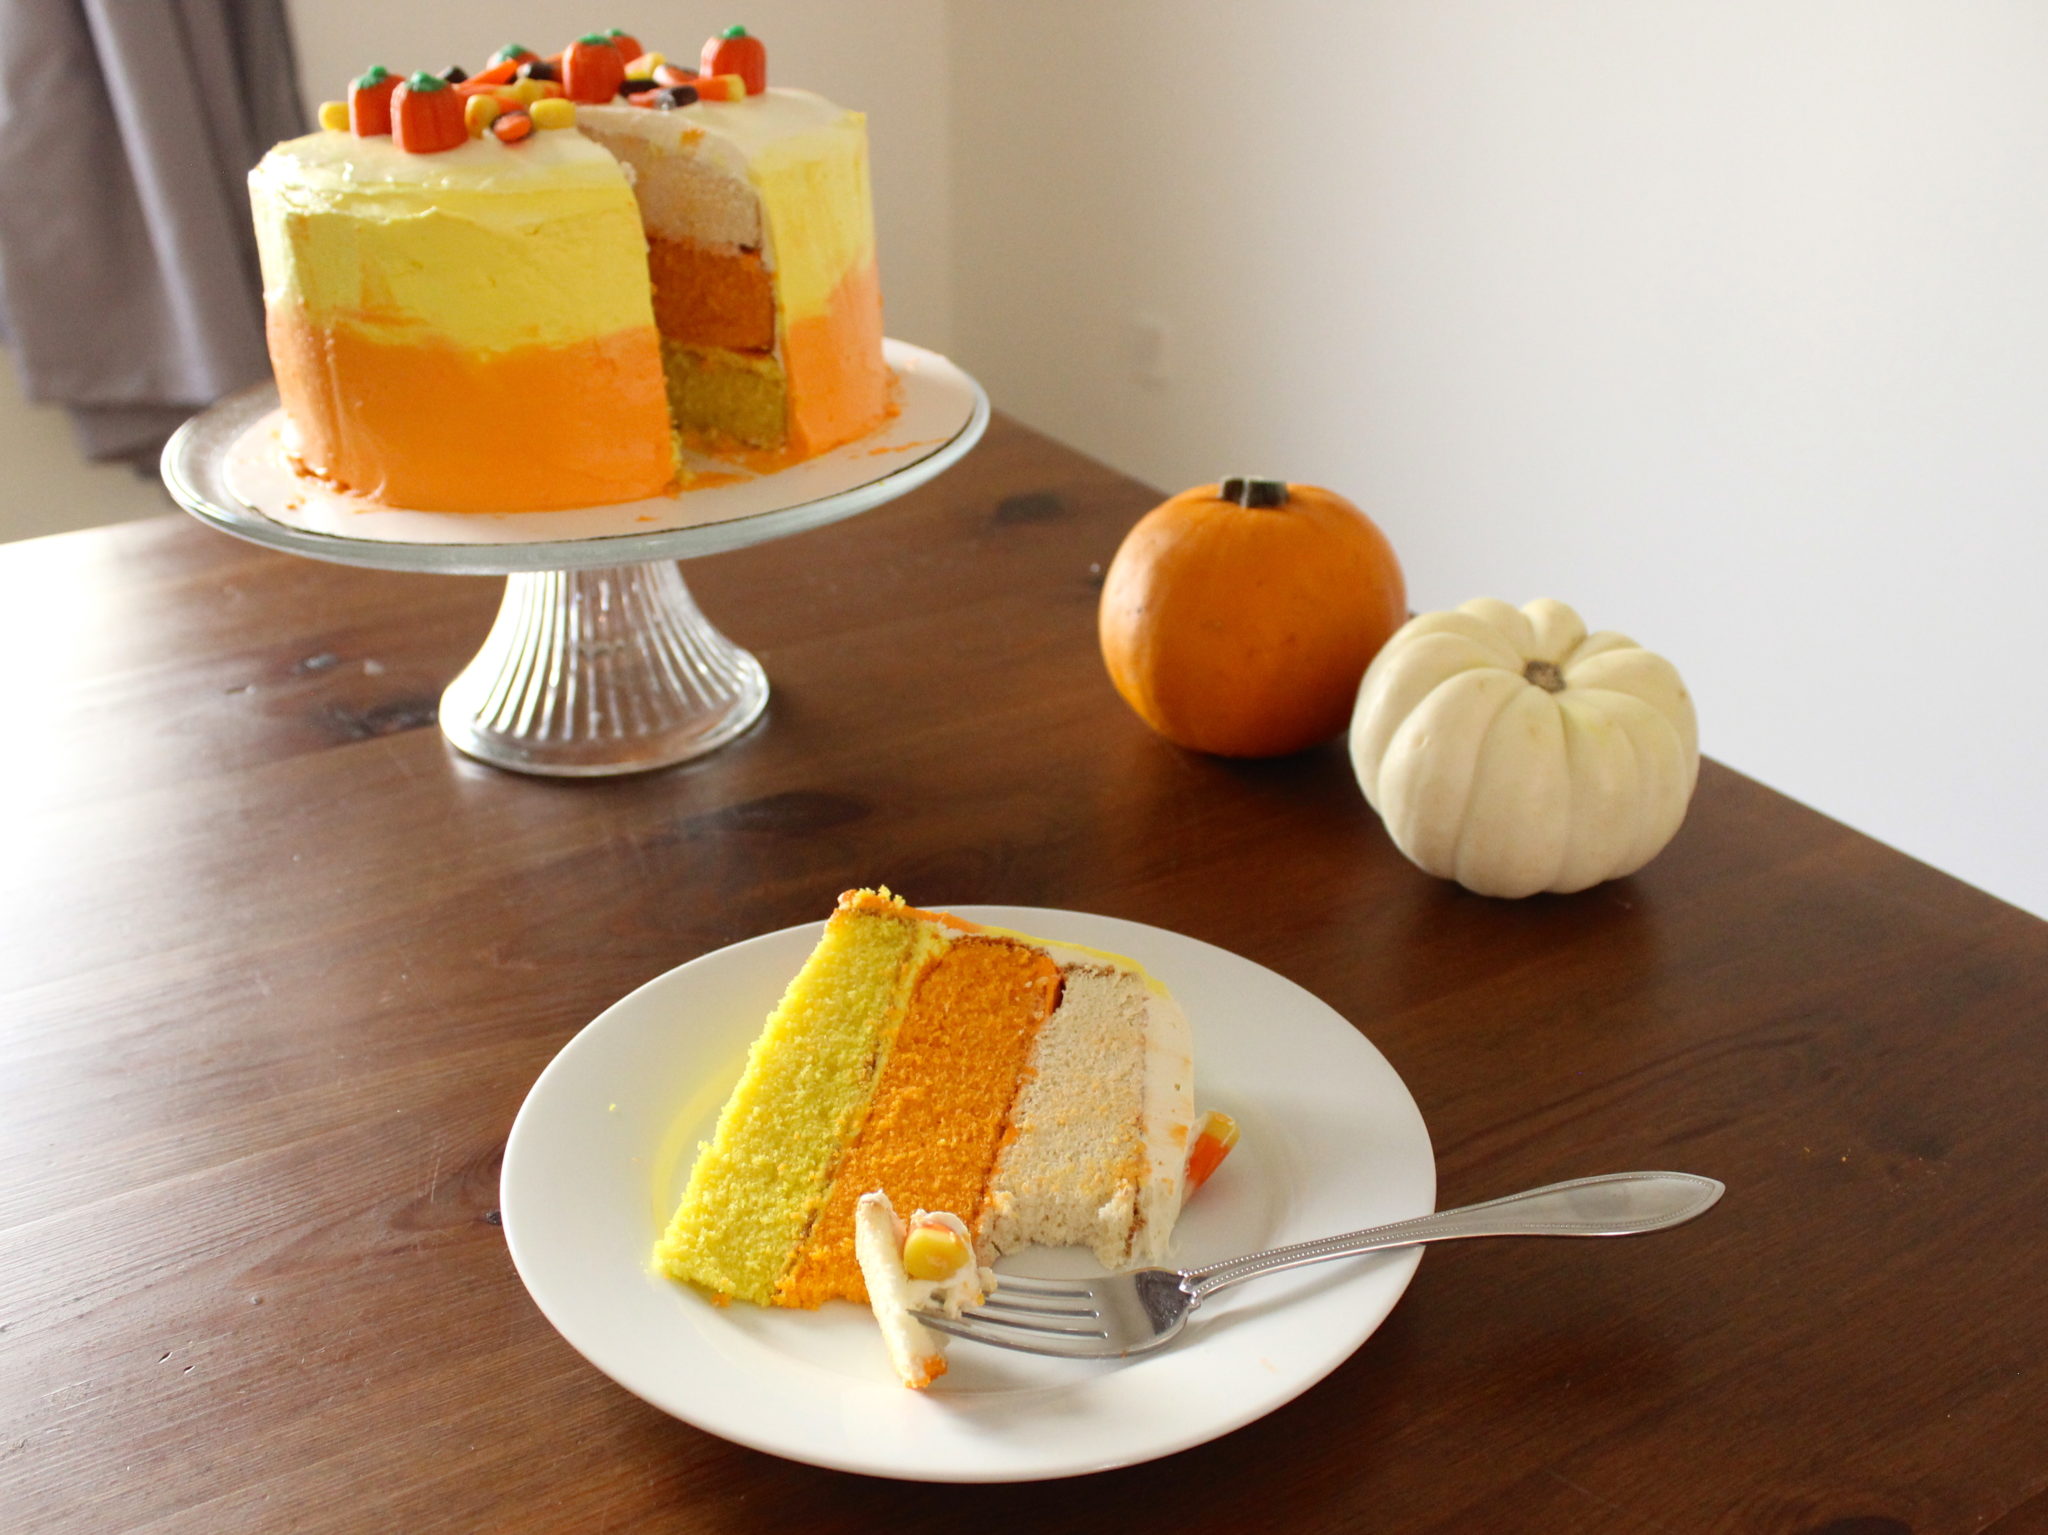
The correct candy corn order is: yellow on bottom, orange in the middle, and white on top. And yes, I had to Google that.
Candy corn cake (Makes one 3-layer 8-inch round cake. Adapted from King Arthur Flour)
2 3/4 cups cake flour
1 2/3 cups sugar (superfine sugar is preferred; the sugar here isn’t as finely granulated as in the US, so I put mine in the blender and blended it for a few seconds first)
1 tablespoon baking powder
3/4 teaspoon salt
3/4 cup (12 tablespoons or 1 1/2 US sticks) unsalted butter, at or near room temperature
4 large egg whites plus one whole large egg
1 cup whole milk
2 teaspoons vanilla extract
Yellow and orange food coloring (I also used white food coloring, but you don’t have to)
Frosting (recipe below)
Candy corn or sprinkles for decorating
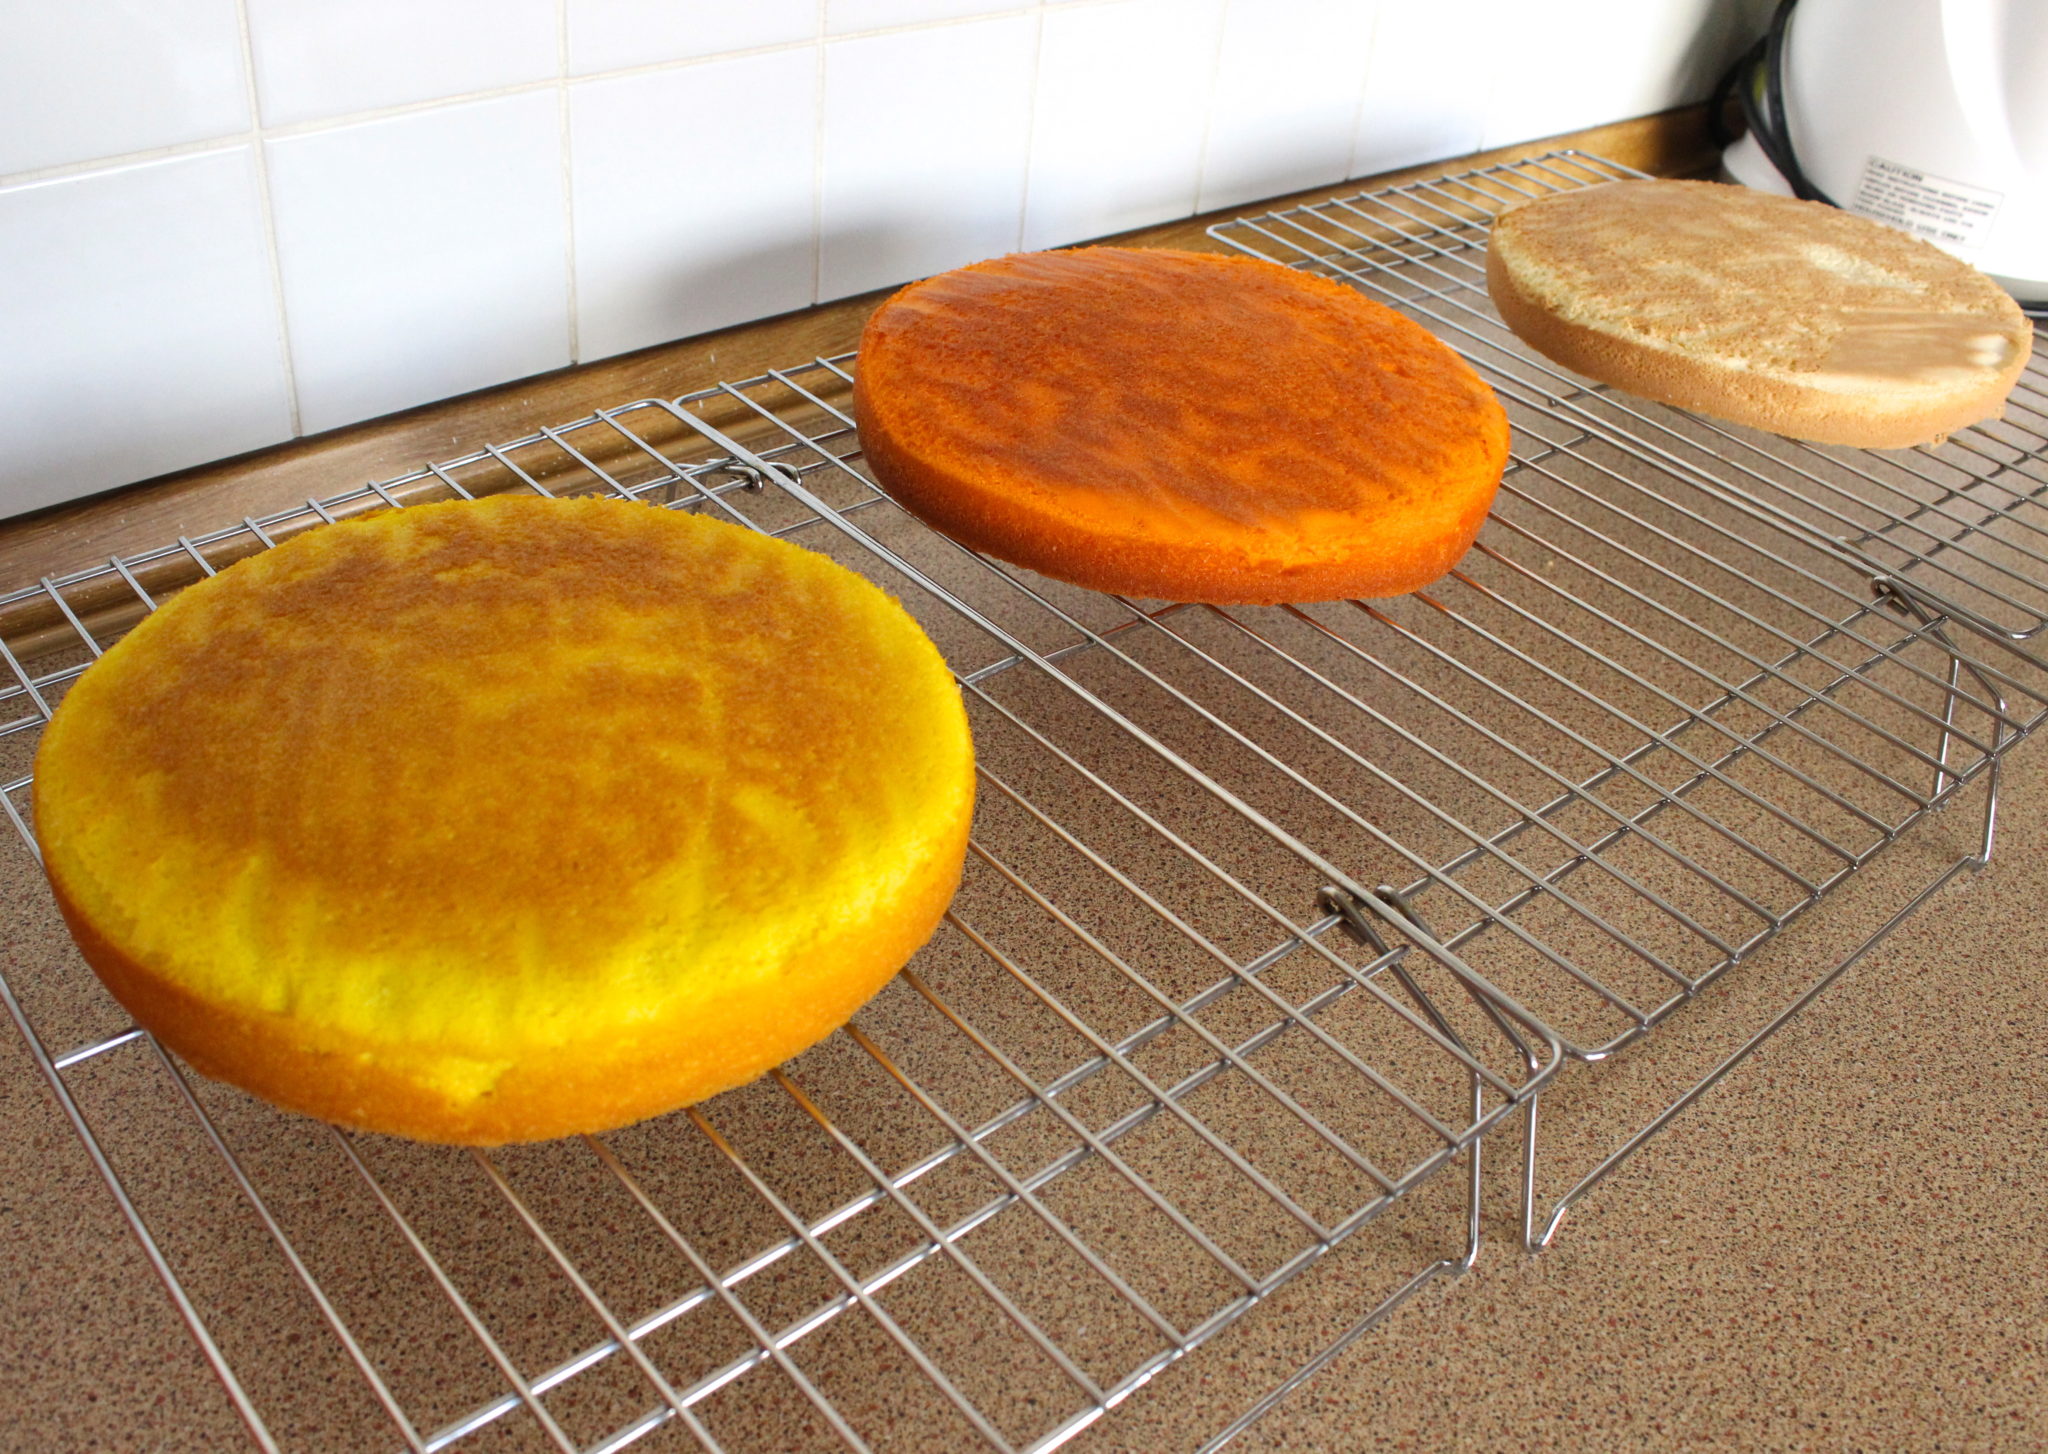
Preheat the oven to 350F and grease three 8-inch round cake pans (I only have two, so I bake two layers, wash one of the pans, and re-grease to bake the third), then place parchment paper circles inside of each pan and grease that. Also, make sure you have two clean mixing bowls available for coloring the dough.
Place the flour, sugar, baking powder, and salt in the bowl of a stand mixer (or large bowl, if using a hand-held electric mixer) and blend on low speed for a few seconds to combine. Add the butter and mix until it’s even and looks like wet sand (or paste).
Add the egg whites one at a time, mixing and scraping down the sides of the bowl with a spatula after each one, then add the whole egg and mix well.
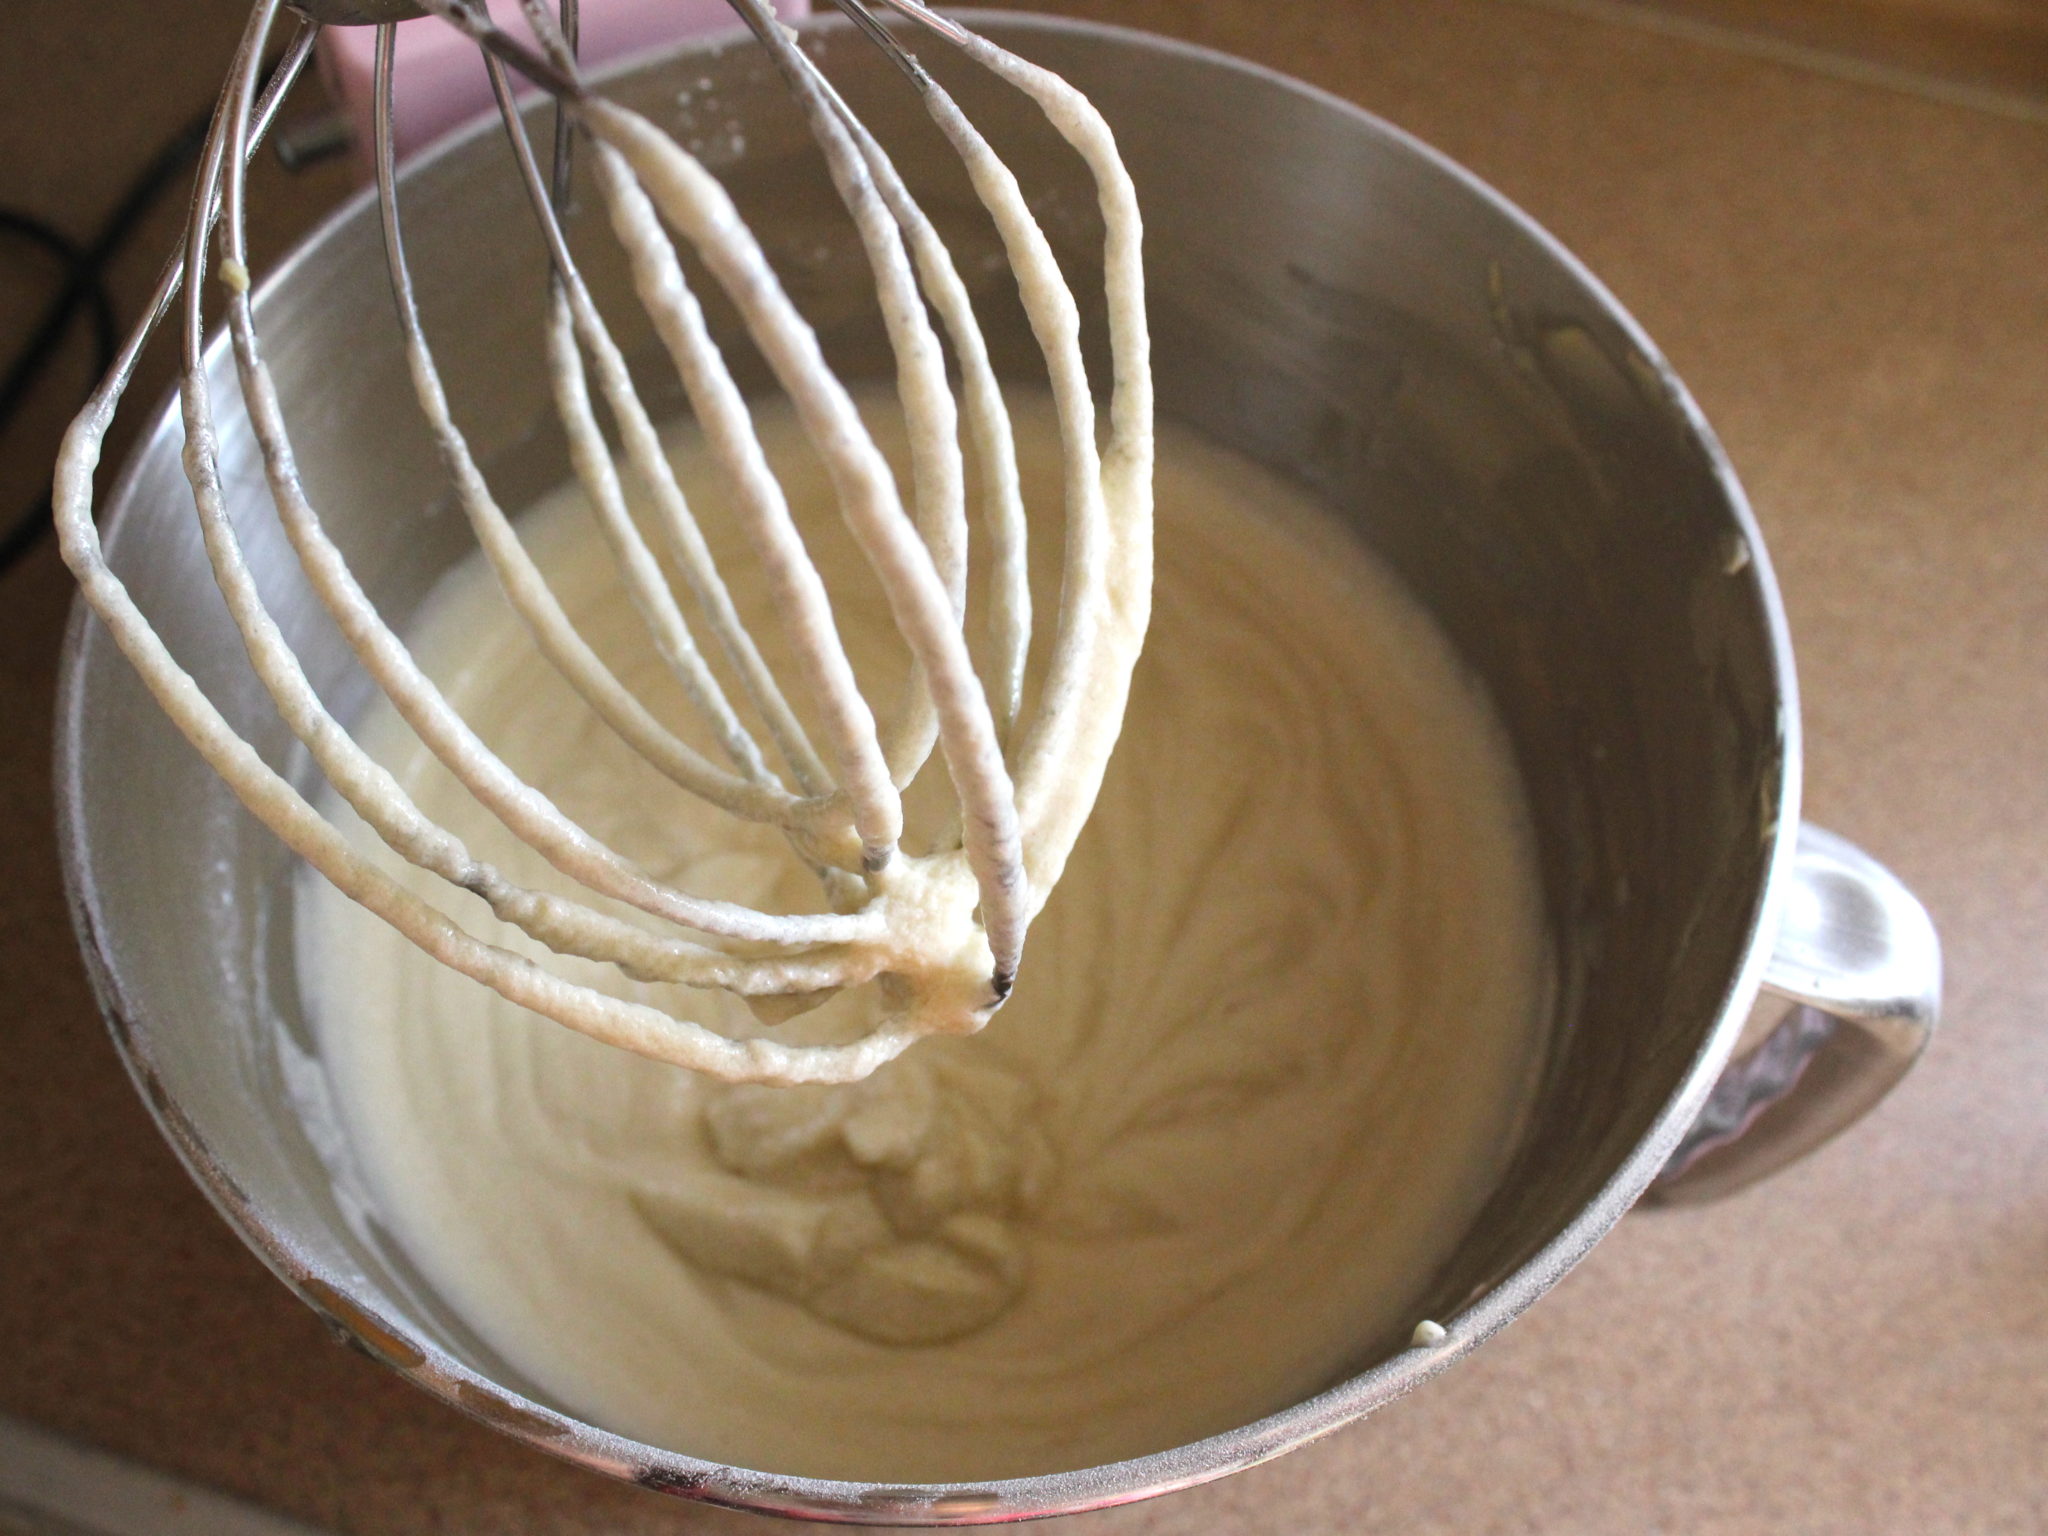
In a small bowl or measuring cup, stir the vanilla into the milk. Add about 1/3 of it to the batter, then mix on low for 1-2 minutes. Add another 1/3 and beat for another minute, then add the last of the milk-vanilla mixture and beat until the mixture is fluffy.
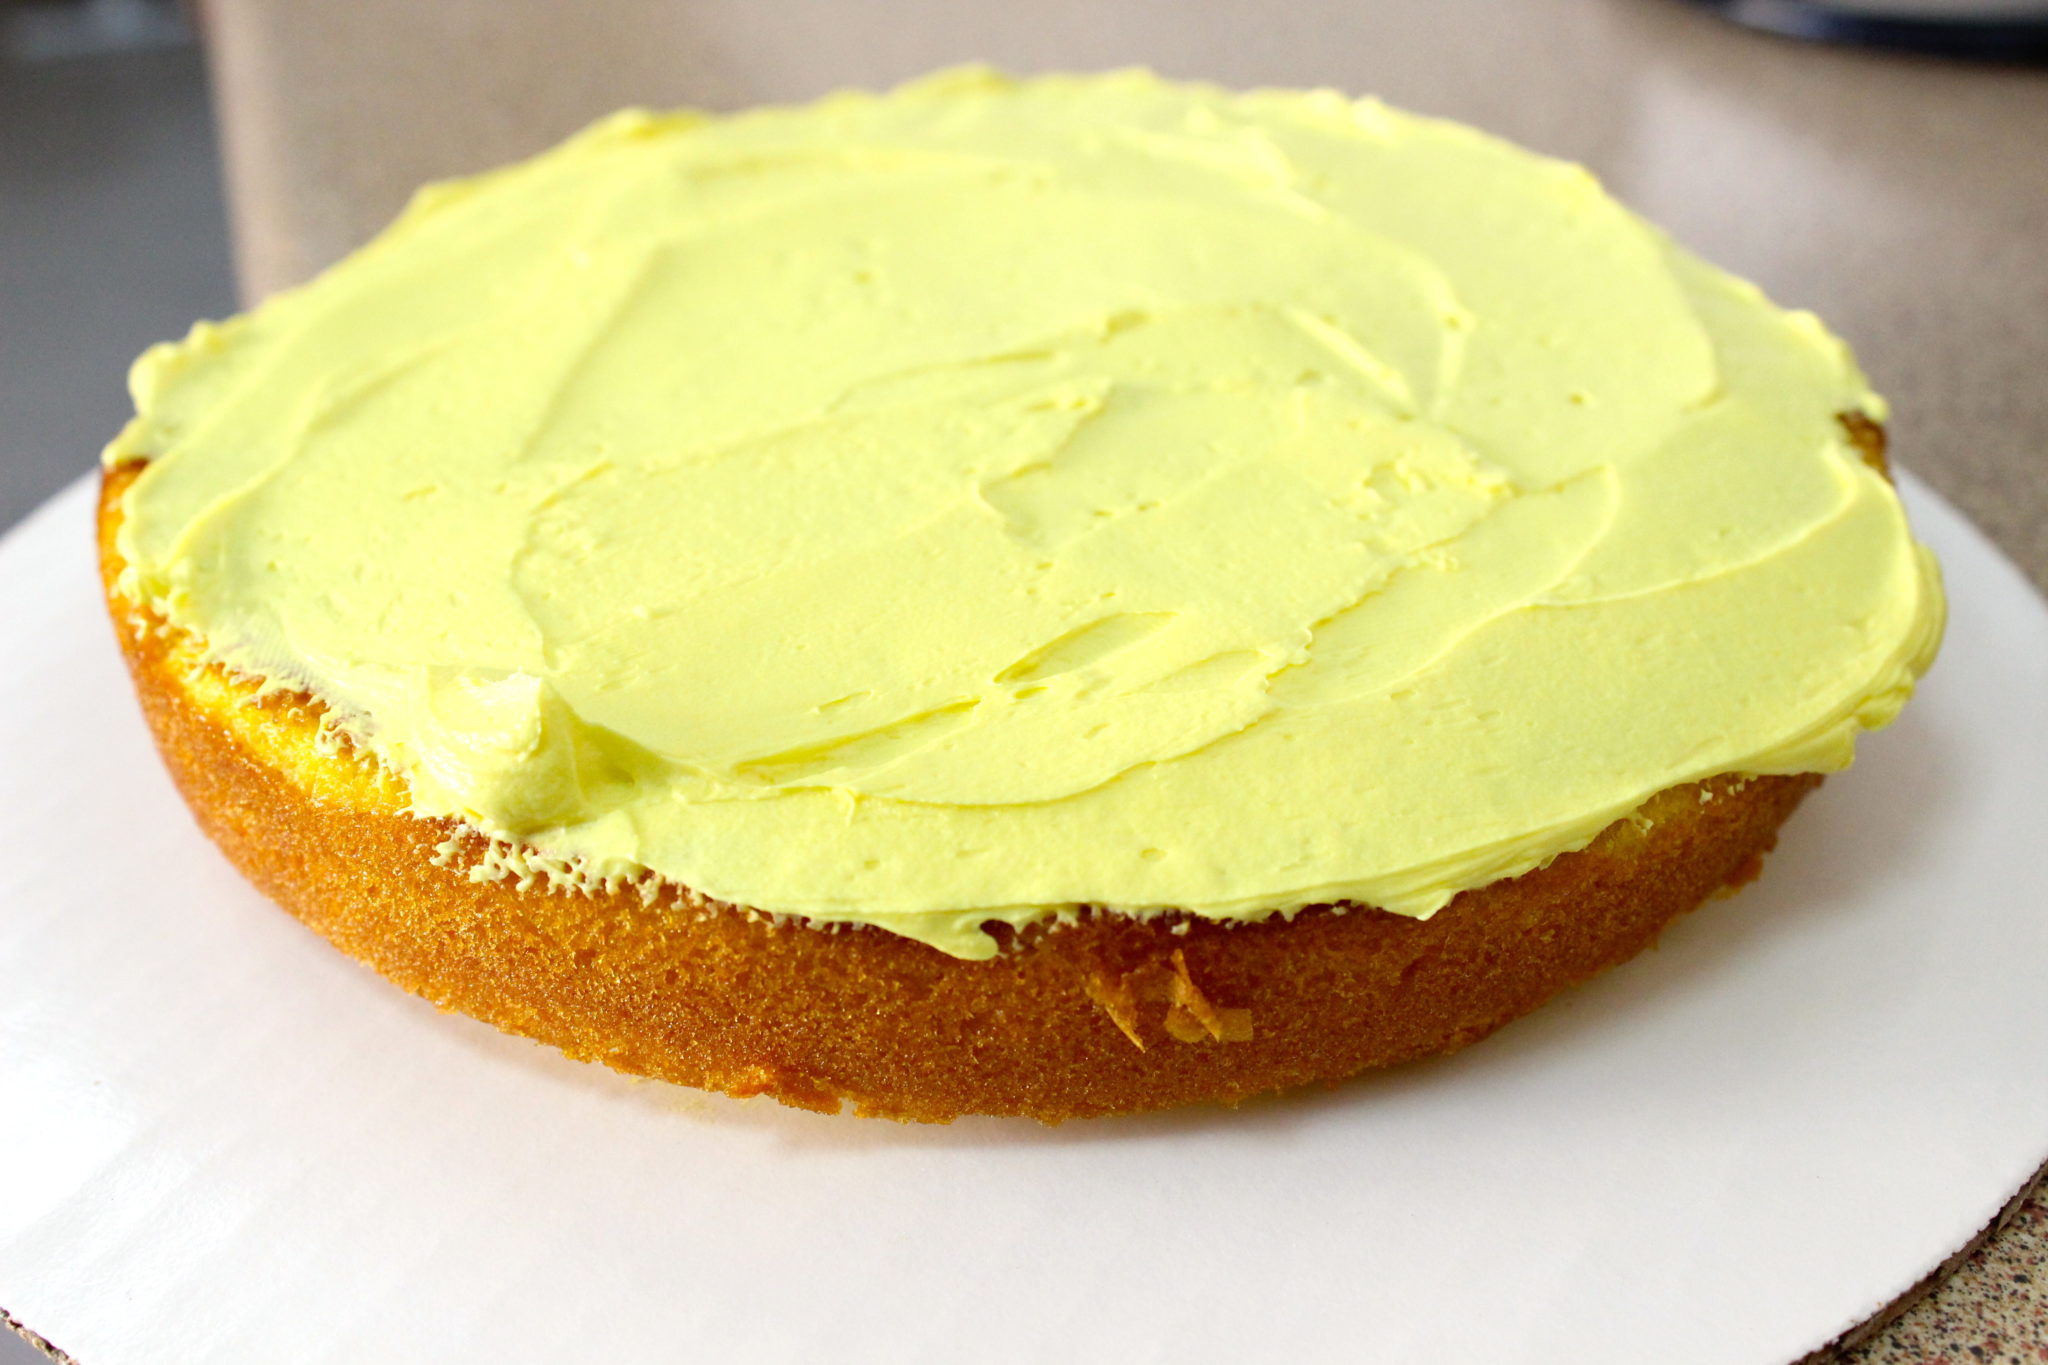
Seperate the batter into three equal parts — I have found it to be a little more than 1 1/2 cups per bowl — then use food coloring to dye one part yellow, one part orange, and one part white (or just leave that one without food coloring).
Bake the layers for 25-30 minutes, until the middle looks set and springs back when touched lightly with your finger.
Allow the cake to cool completely before frosting.
Frosting
2 cups (4 US sticks) unsalted butter, at room temperature
6 cups powdered sugar (plus or minus a cup)
2 teaspoons vanilla
whole milk as needed
Orange and yellow food coloring (I also used white)
Place the butter in the bowl of a stand mixer (or in a large mixing bowl, if using a hand-held electric mixer) and beat it for a few minutes, until it’s very light and fluffy. Add the powdered sugar about a cup at a time, beating on low to combine between each addition. When you’ve added 5 cups, taste the frosting — if you don’t think it needs any more sugar, don’t add more.
Once you have the desired amount of sugar in the frosting, add the vanilla, beat to combine, and then turn the mixer up to medium-high and beat for a few more minutes, until the frosting is very light and fluffy. Add a little milk if needed (maybe a few tablespoons) to make the frosting a spreadable consistency, and beat to combine.
Seperate the frosting into three roughly equal parts, and use food coloring to dye one part orange and another part yellow. Build the cake starting with the yellow layer and yellow frosting, then the orange layer and orange frosting, followed by the white layer on top. Cover the entire outside of the cake in a thin layer of the white frosting, then refrigerate the cake for about 20 minutes (longer is fine).
Once the crumb coat has set, take the cake out of the fridge and pile a bunch of white frosting on the top of the cake (go ahead and smooth it out now if you’d like), then put a thick layer of yellow frosting around the bottom half of the cake and orange around the upper half. Once the frosting is totally covering the cake in a thick layer, use a frosting spatula, bench scraper, or other similar tool to smooth and blend the frosting, wiping the excess frosting back into the bowl or onto a paper towel as you go. Once the cake looks how you’d like it to look, top with candy corn and/or sprinkles.
Happy Halloween!