When our Bahrain BFFs asked me to make a 3-shaped cake for their adorable son’s third birthday party, I had some ideas but wasn’t quite sure of the best way to build it. We had both seen 3-shaped cakes on Pinterest, of course, but there didn’t seem to be a lot of tutorials out there. So I started thinking and managed to create what I think was a pretty adorable cake — without nearly as much work as you’d imagine.
The first decision I had to make was whether to use a bundt pan or a tube pan. I went with tube, because I wanted the cake to be flat on top — to serve as a road for Lightning McQueen. You could also use a regular cake pan and just cut circles out of the baked cake, but that seems like a lot of extra work that isn’t necessary if you already have a tube pan in your cupboard.

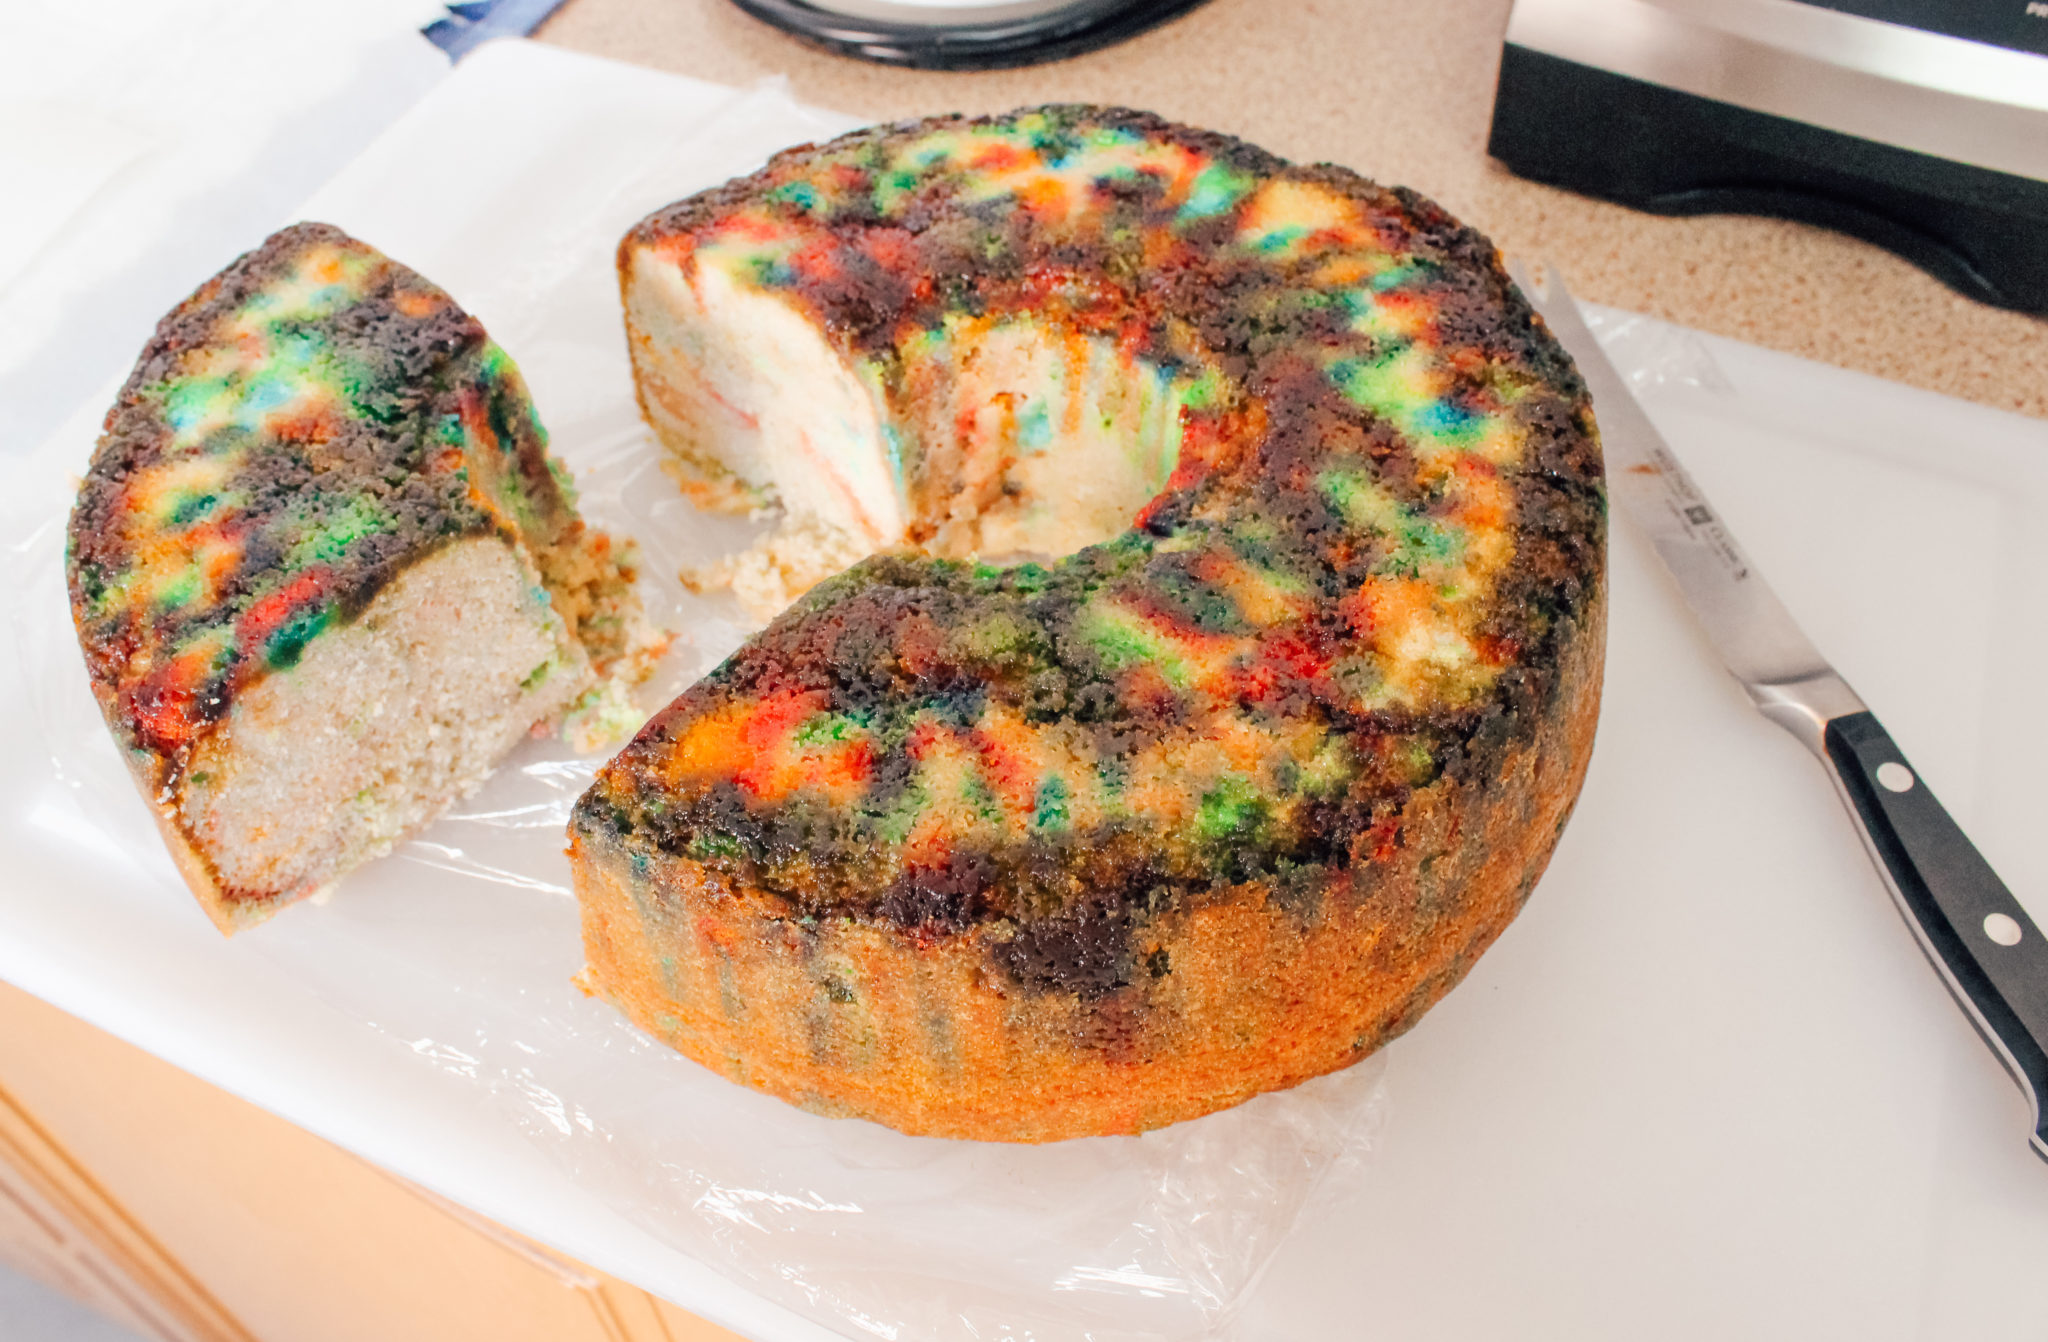
I decided to use my normal white cake recipe and add rainbow sprinkles for a funfetti effect, but as you can see, all the sprinkles sank to the bottom. I also ended up making this cake batter three different times, because the first time I somehow managed to drop the mixer bowl and sling batter all over my kitchen. It looked like a unicorn had thrown up in there. The second and third times were for the two cakes.
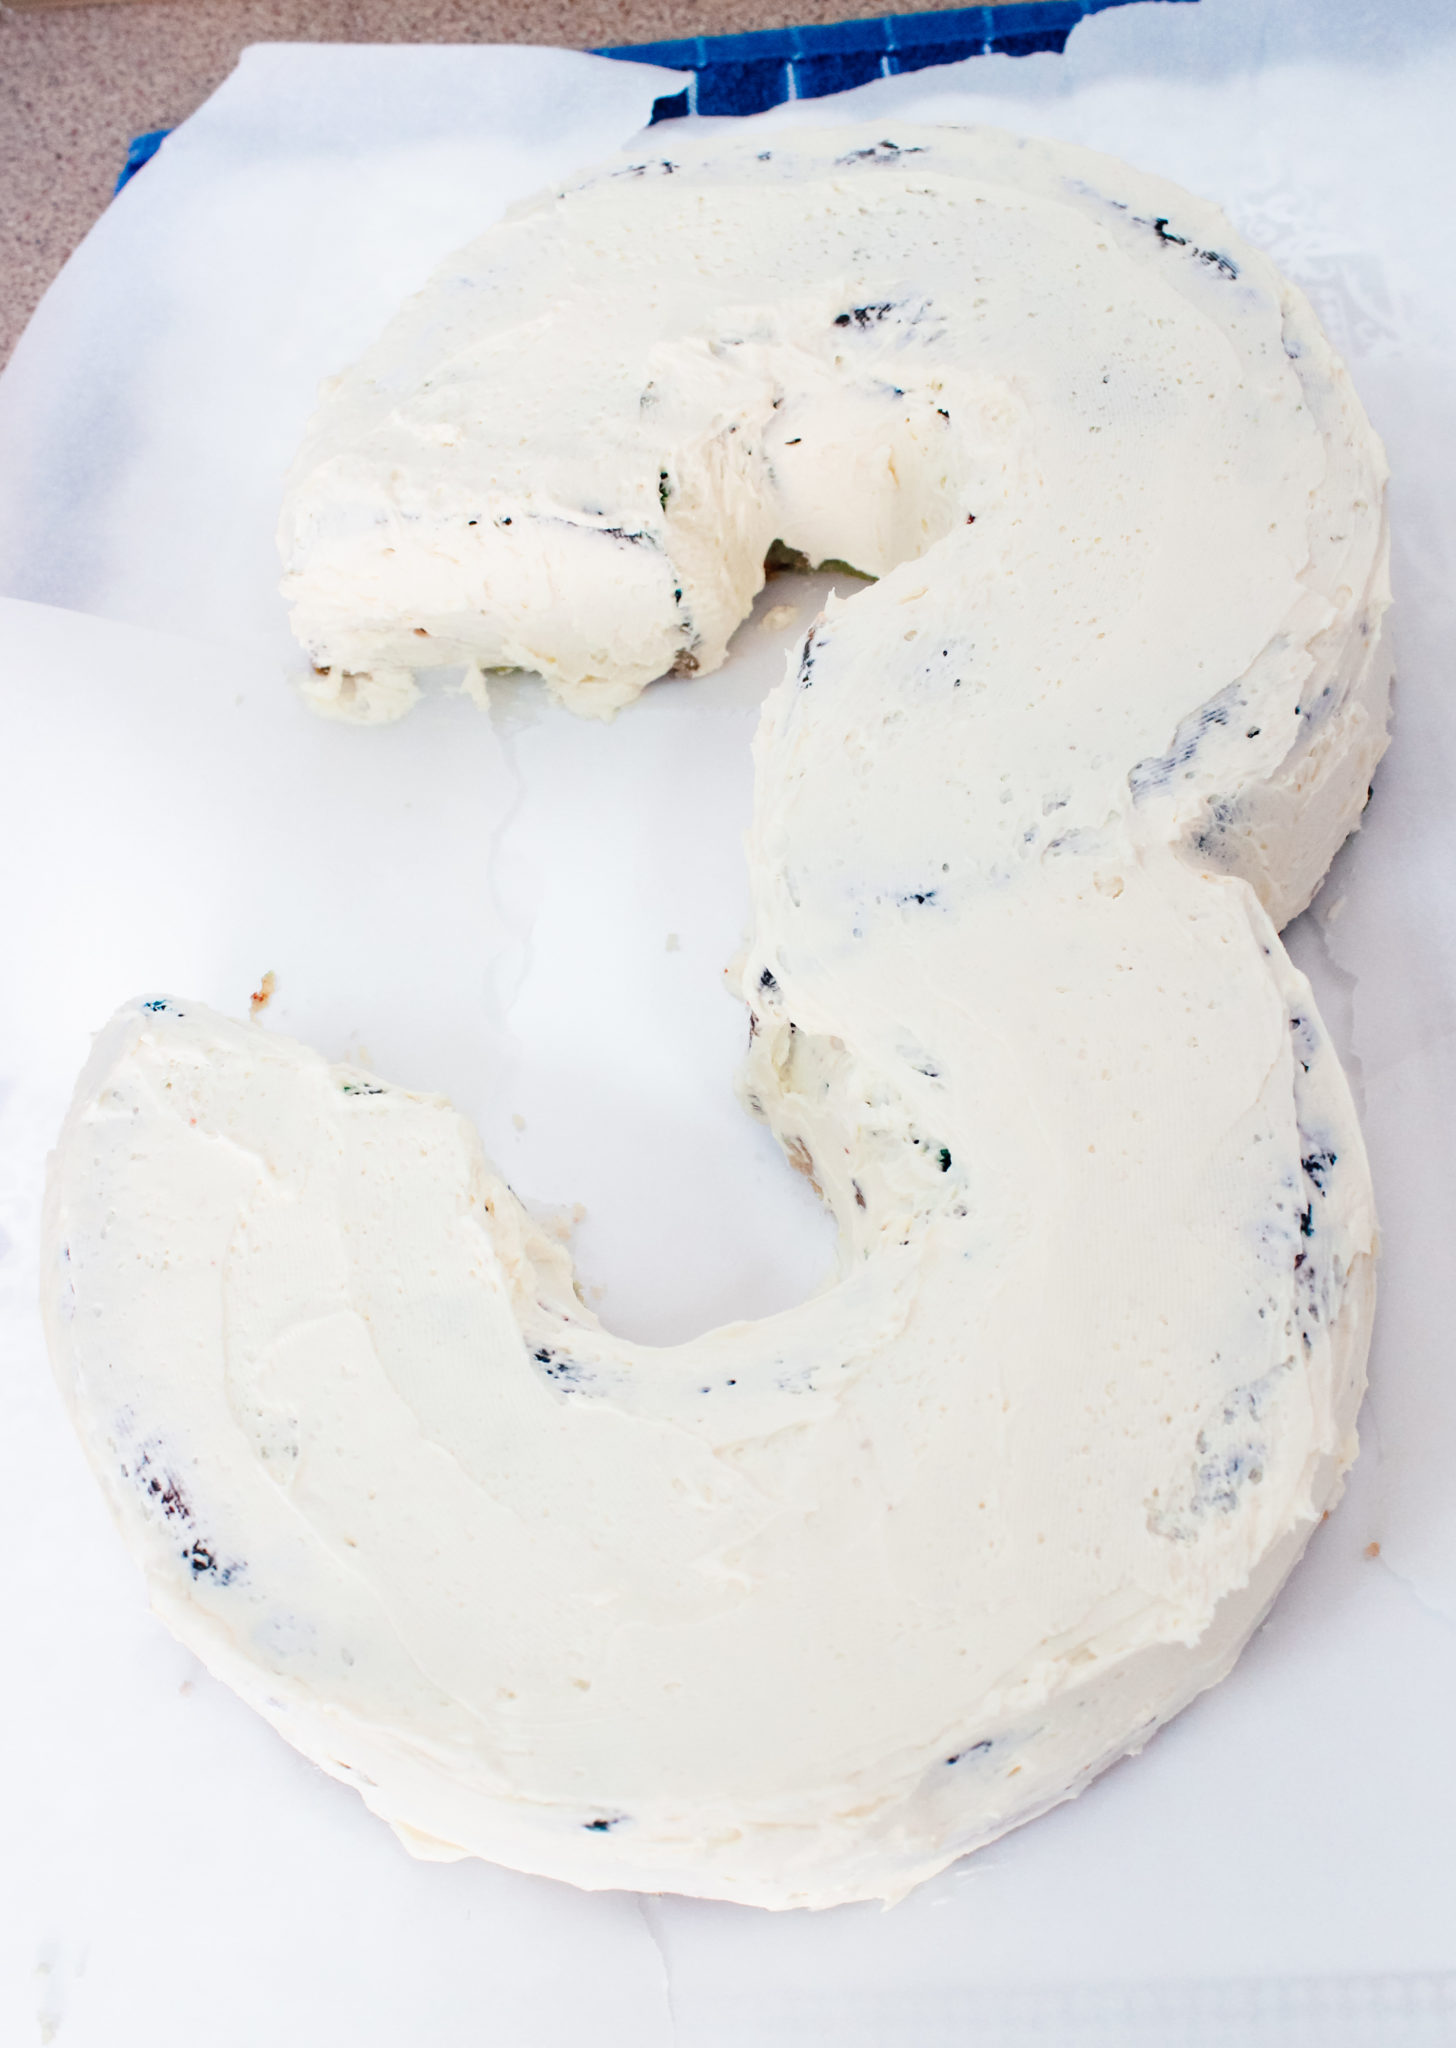
Once the cakes were baked and cooled, I cut them and placed them next to each other, then trimmed a little extra to make a three shape. I didn’t have a stencil or anything, but I would recommend just cutting a small chunk out of the first cake and then putting the second cake next to it to see how much you’ll need to cut from that one. It’s pretty easy to shave off any extra before you put on the crumb coat. And, of course, the great thing about the crumb coating of frosting is that it seals everything in and sticks the two pieces together, forming the three you want.
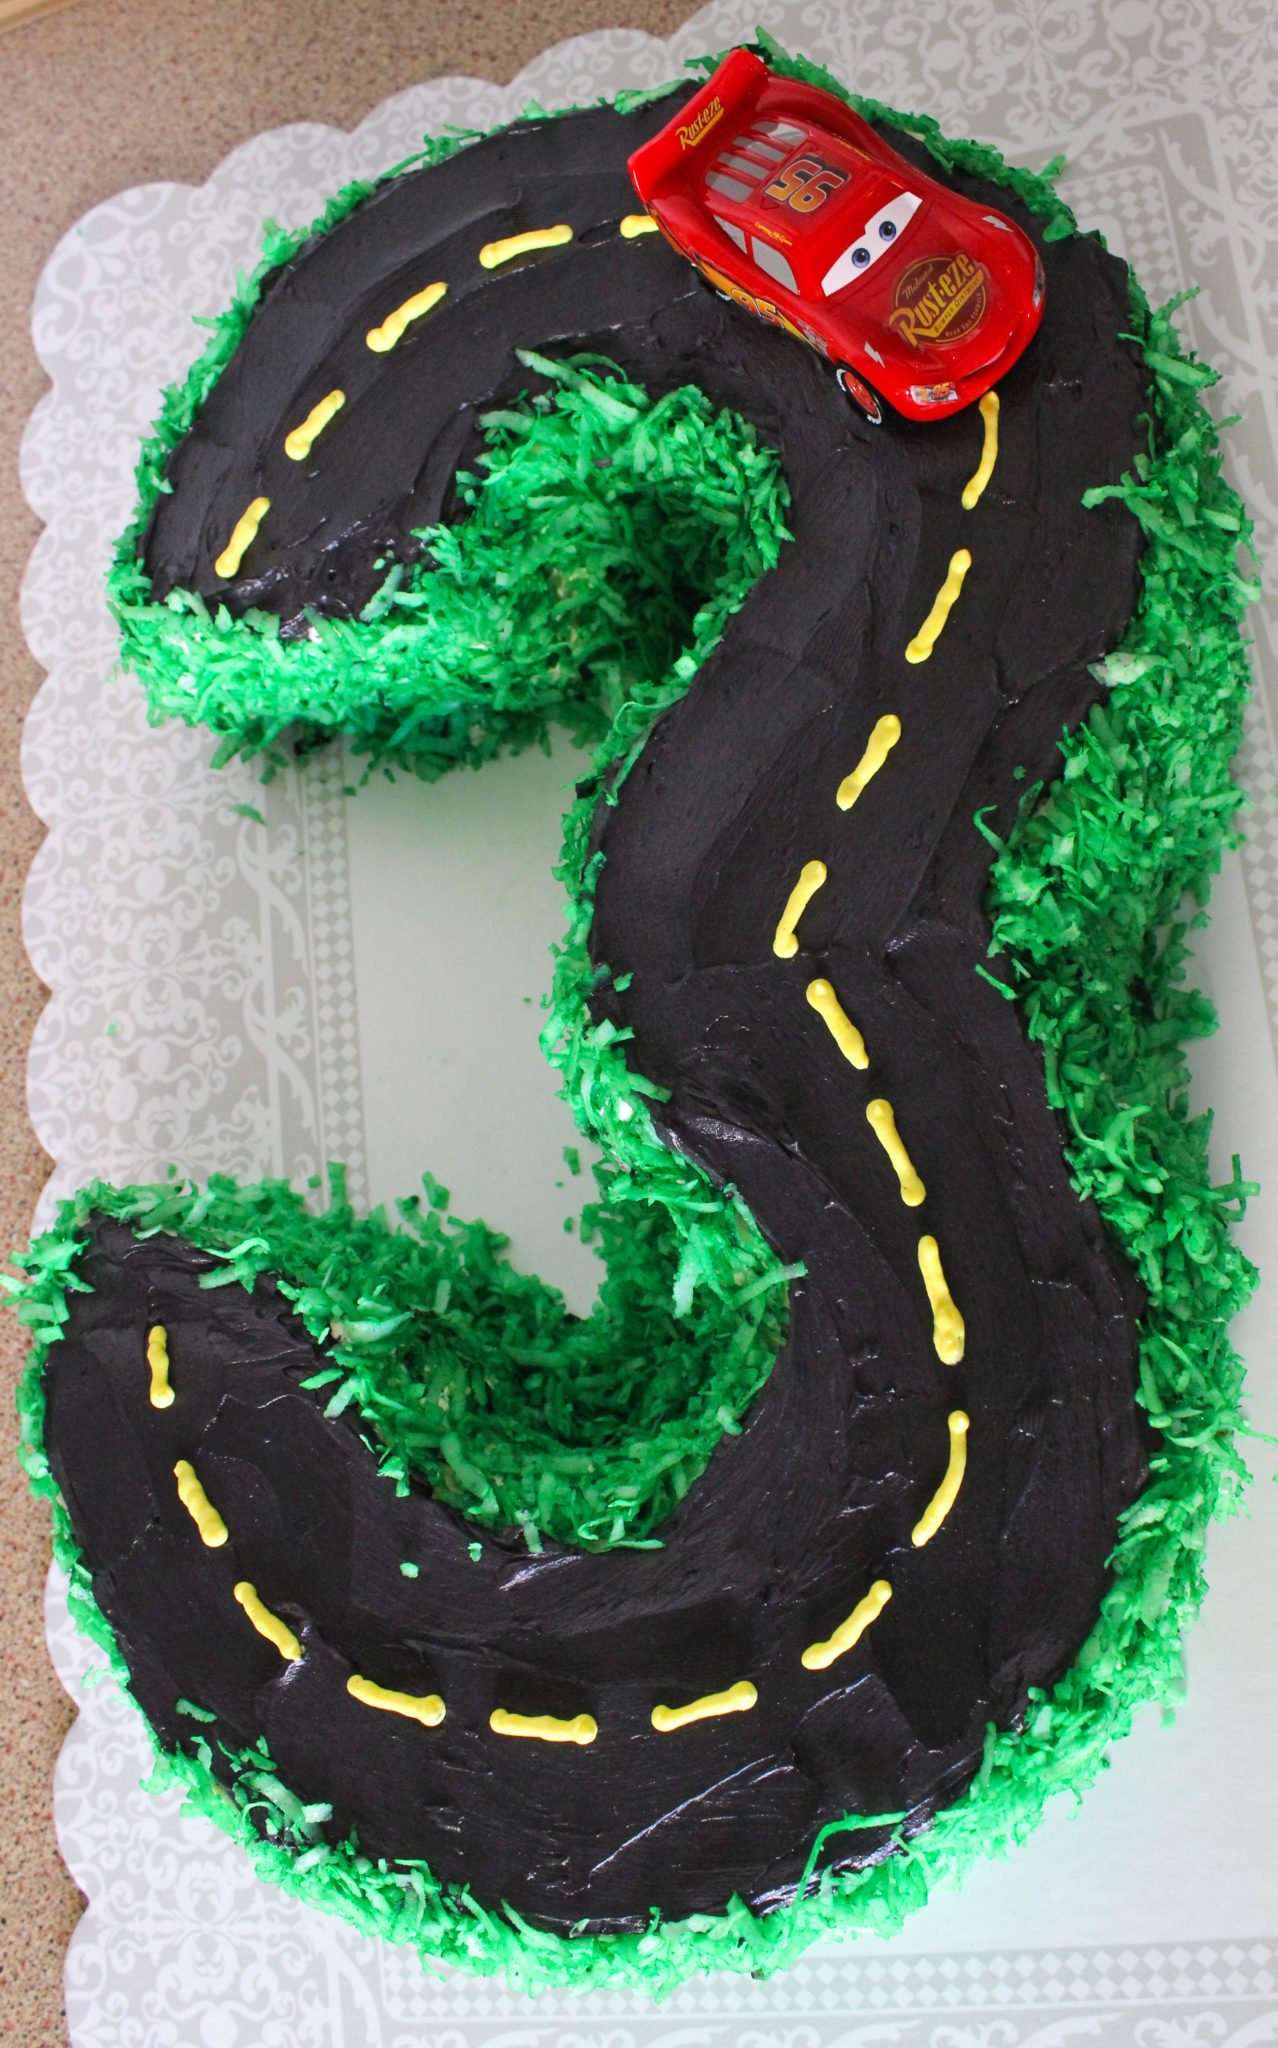
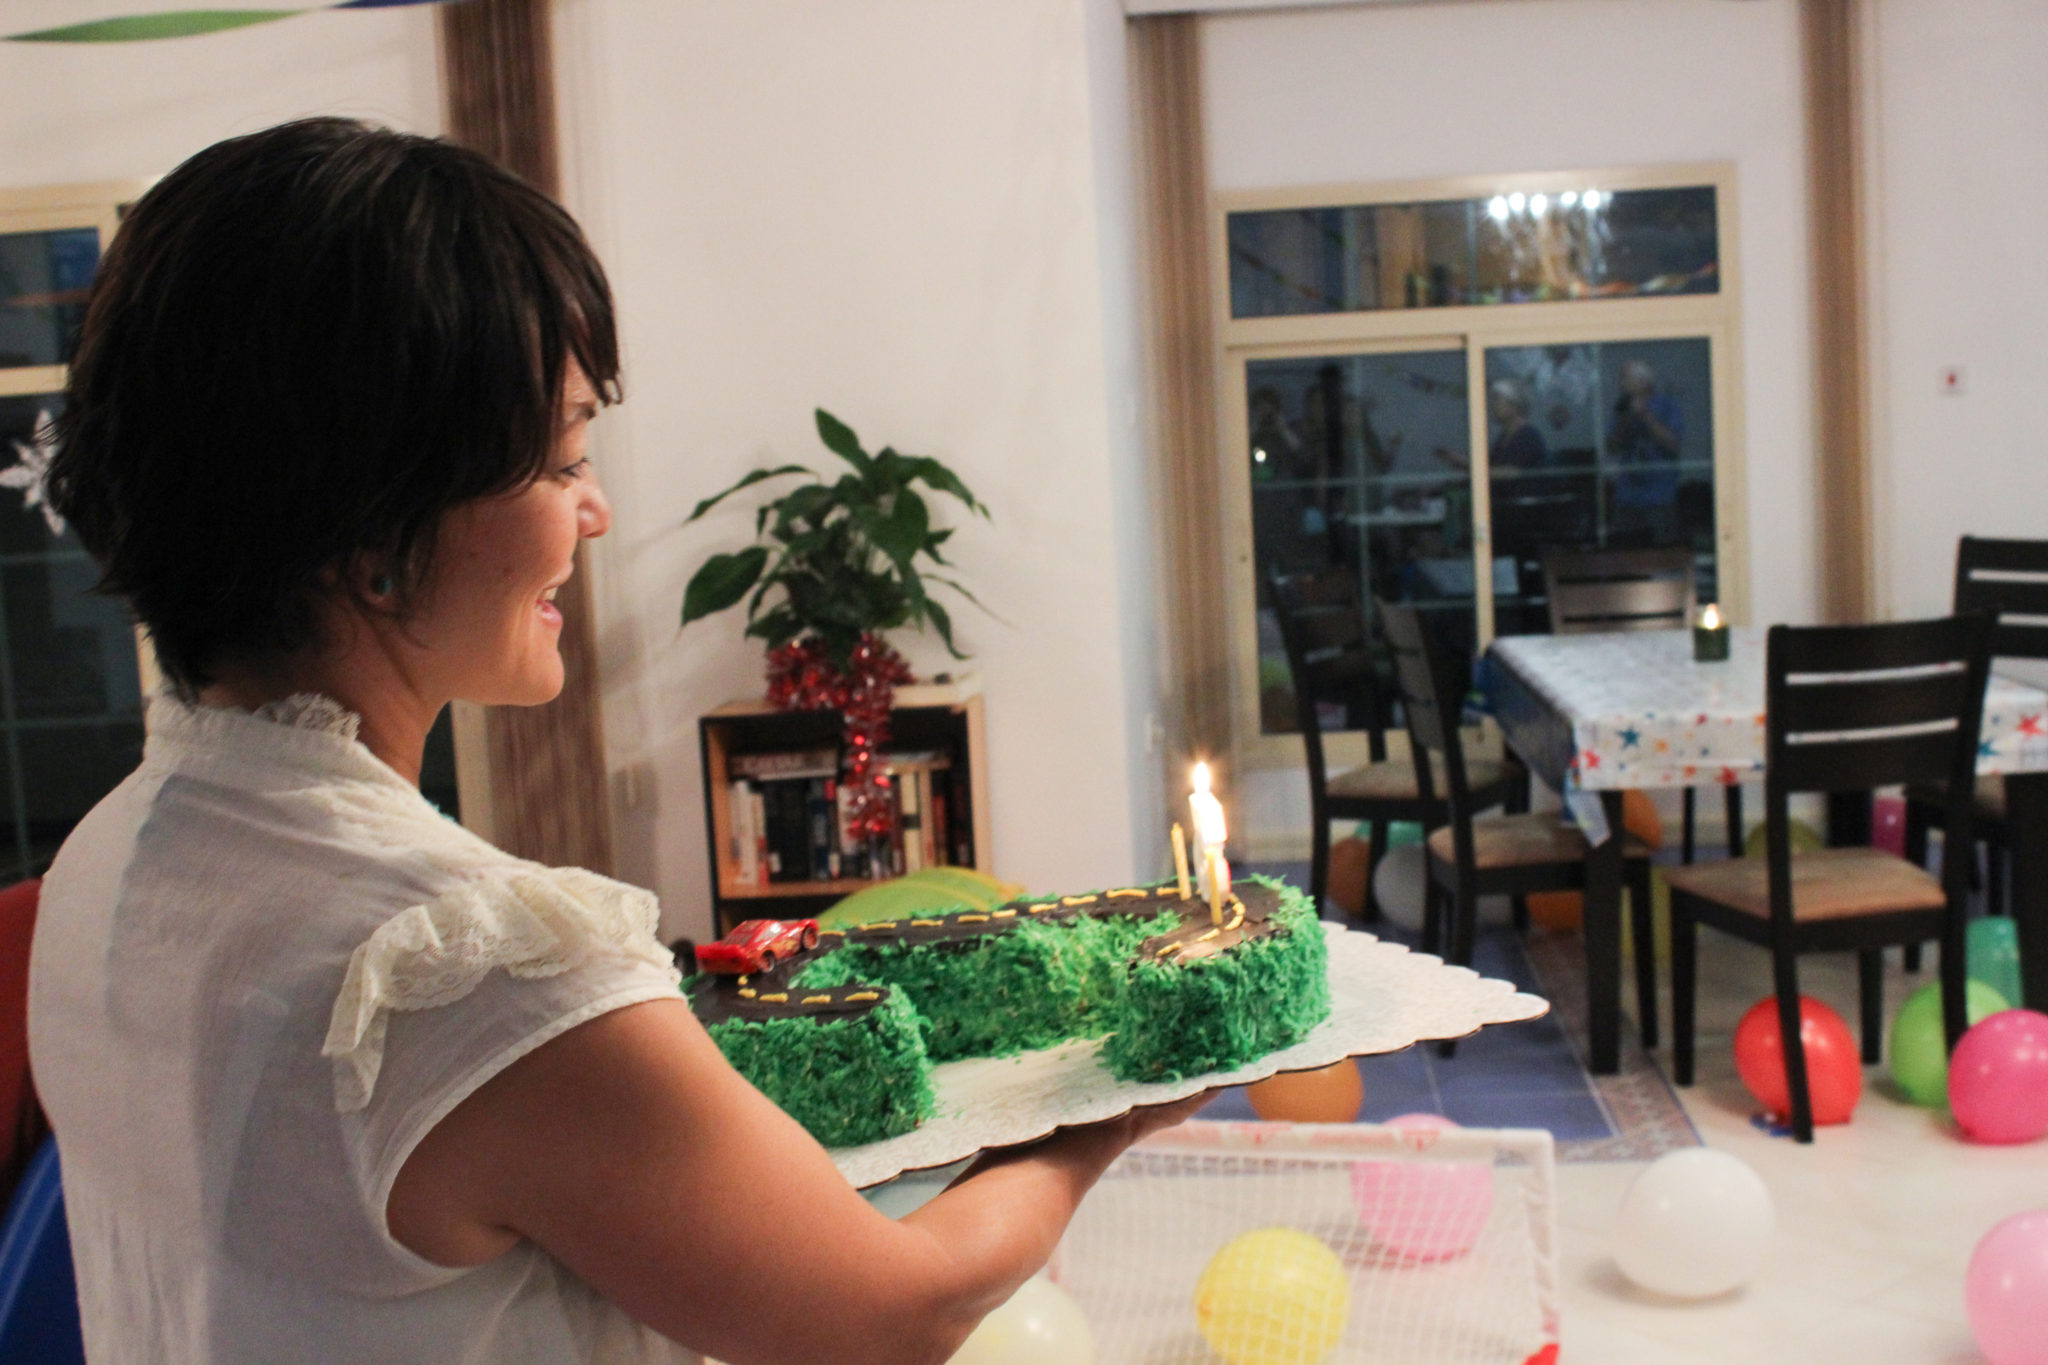
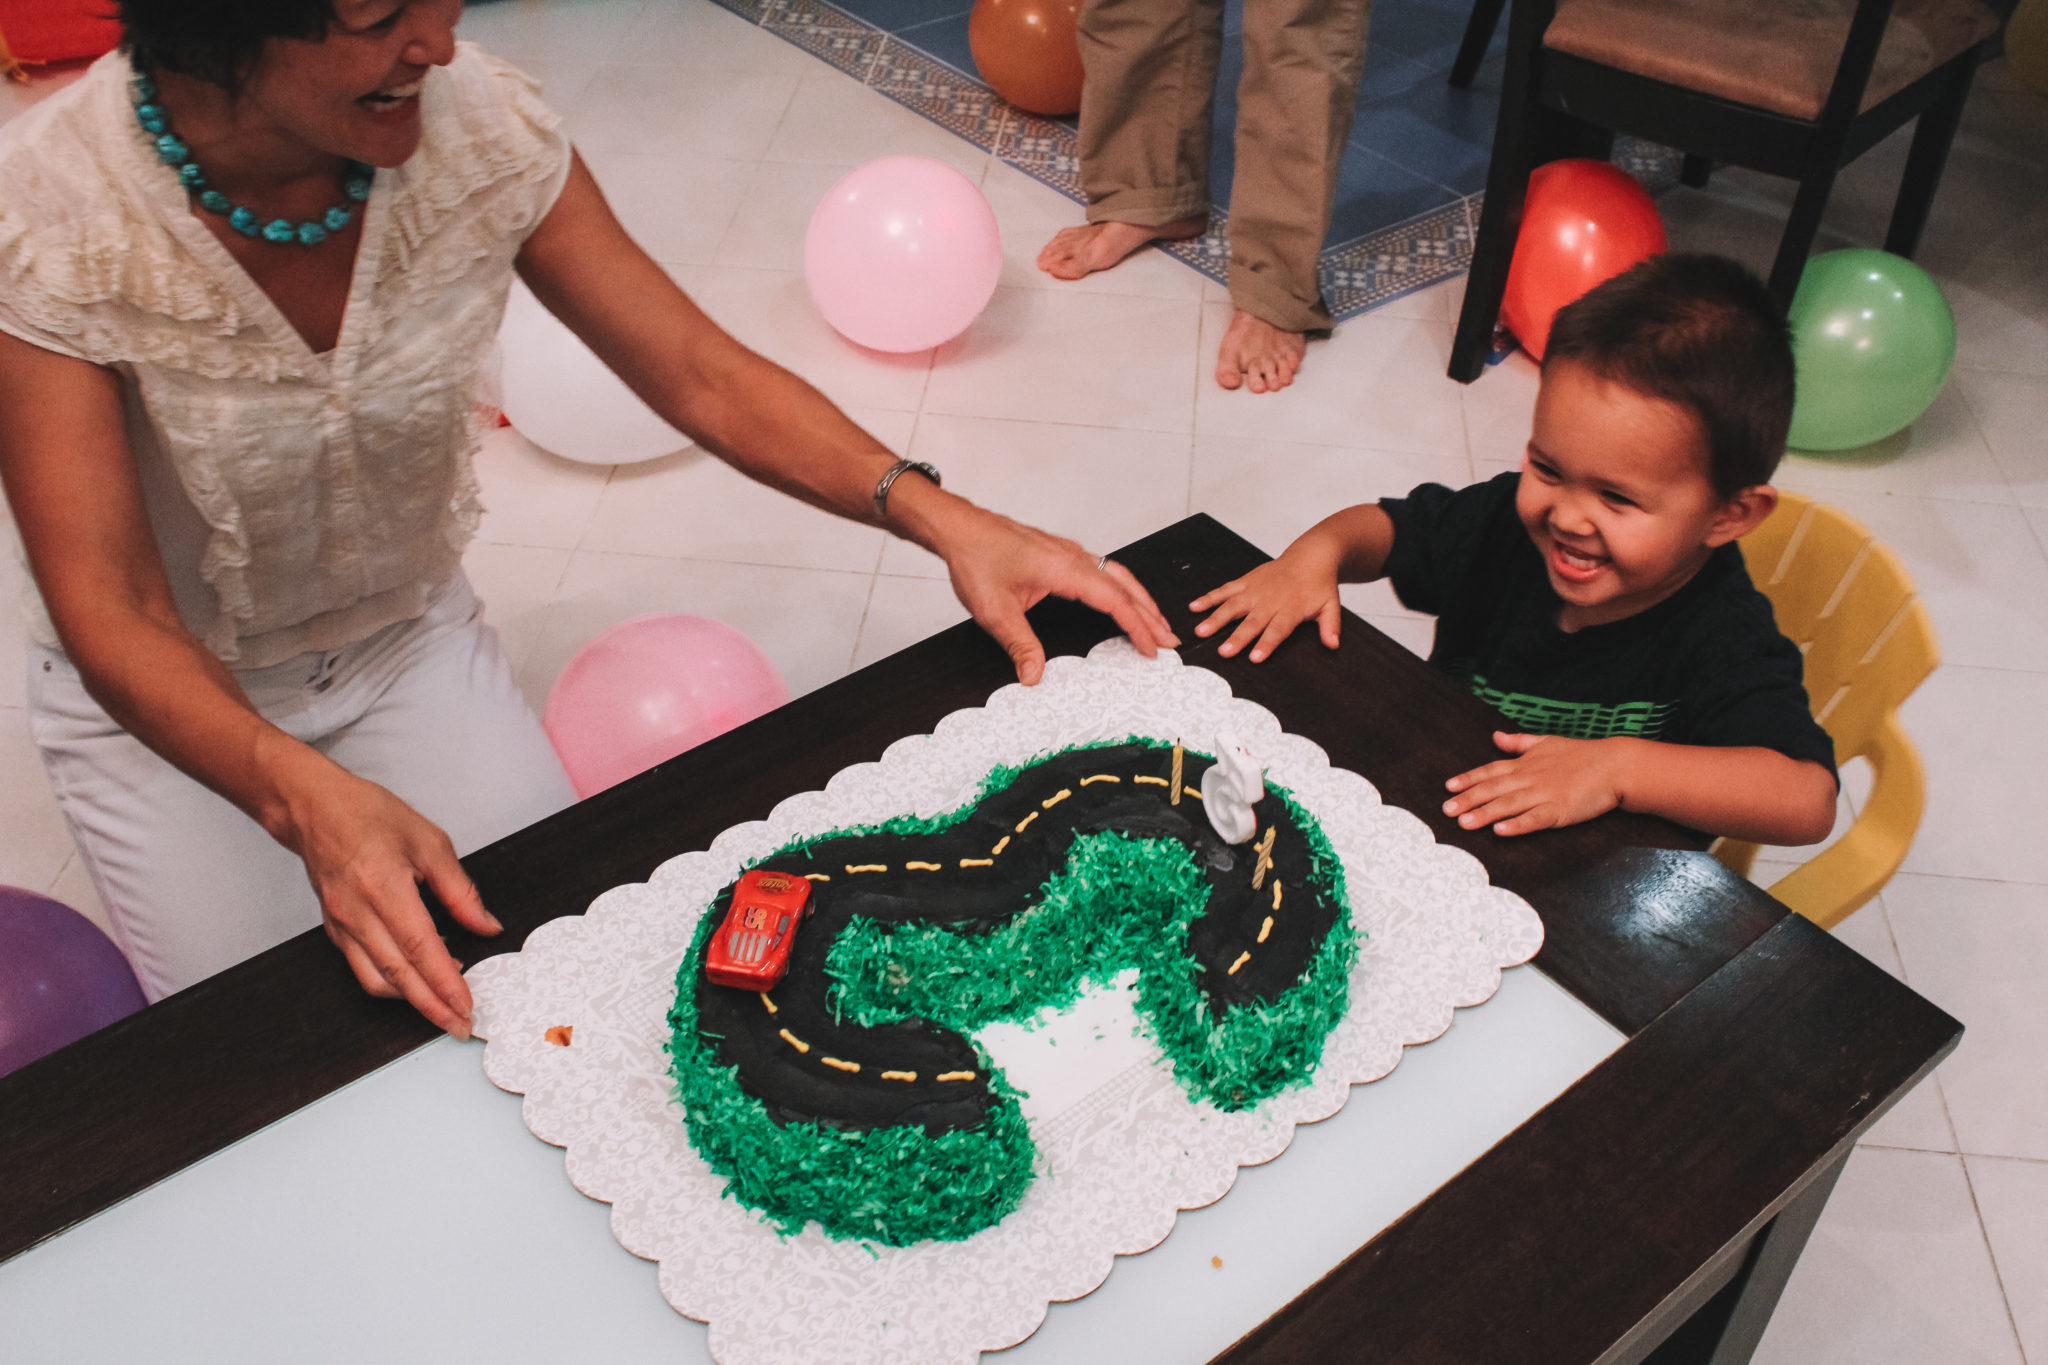
After you have the cake cut, placed on a cake board (or really large platter) and frosted with a crumb coat, you can decorate it any way you choose. I went with a road and a Lightning McQueen toy on top for this one, but I made a different 3-shaped cake a few months later that was decorated like a train track, with a Thomas the Train toy on top.
The biggest struggle I had with this cake is frosting the sides. It’s not hard to get some frosting on the sides, of course, but getting it all smooth and really into the corners and internal curves is virtually impossible. I compensated by dyeing some sweetened coconut green and pressing it all around the sides of the cake to resemble grass (and it may have resembled grass a little too closely — the birthday boy was afraid to eat it!). You obviously don’t have to do that, but you probably do want to consider putting some candy or sprinkles or even piped frosting swirls on the outside to save yourself some trouble.
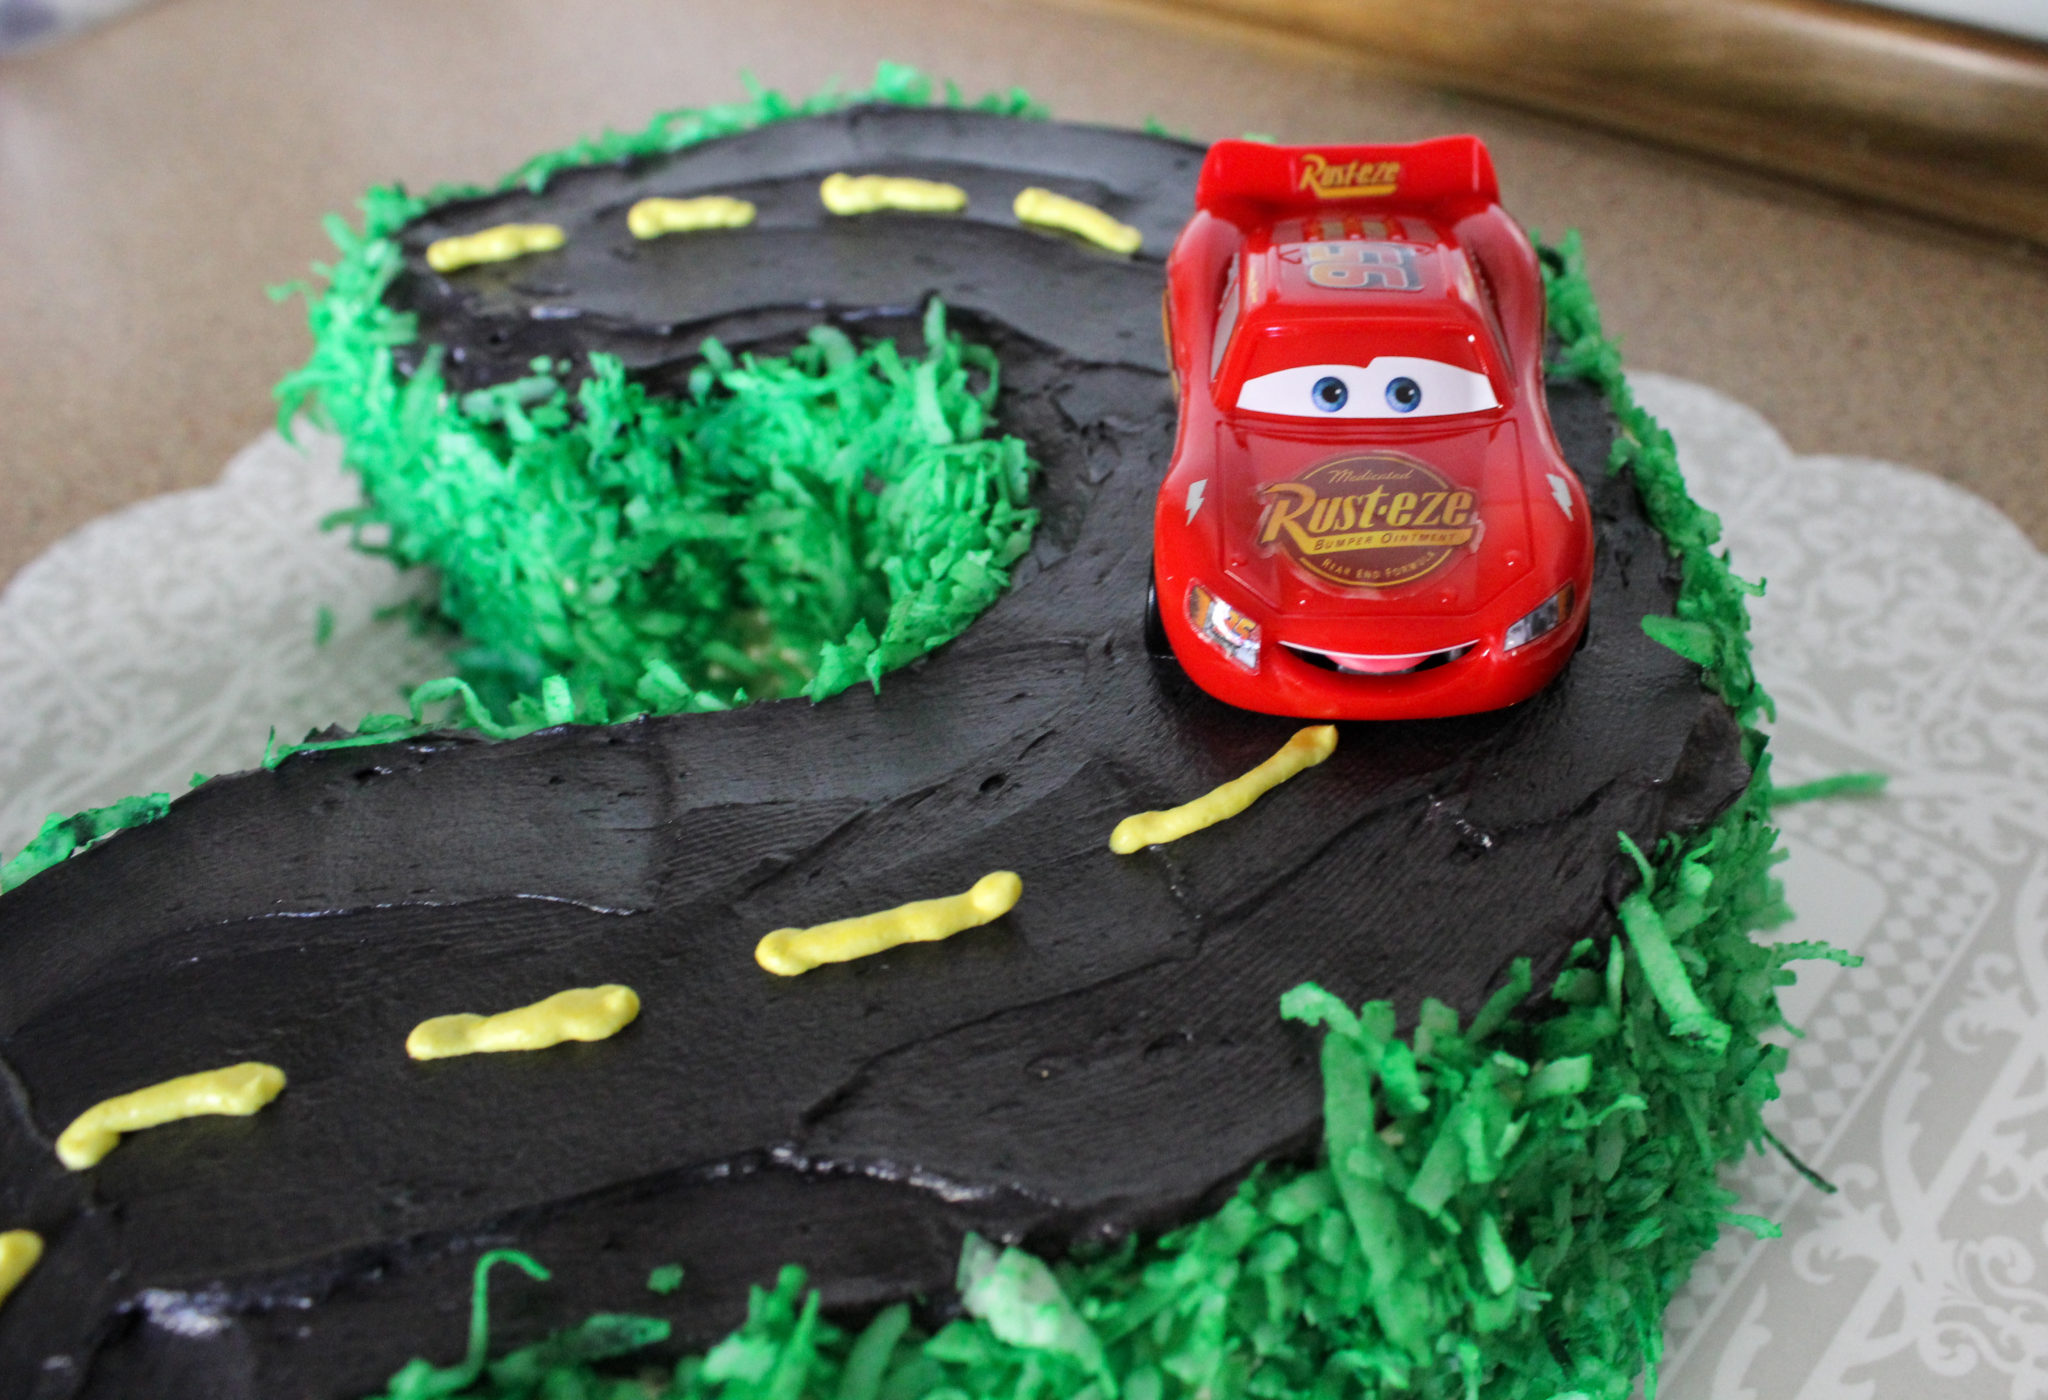
Something else I learned from this cake is that it is about a million times easier to buy a small toy to put on top of a cake than to make a cartoon character out of fondant. And, as an added bonus, the birthday child gets to keep the toy.
To make your own Lightning McQueen 3-shaped cake, you’ll need: Two round cakes with holes in the middle (preferably baked in a tube pan), a bunch of frosting, food coloring gel, sweetened flaked coconut, and a Lightning McQueen toy. You’ll also need a big cake board or a very large tray.
Once you have the cakes and frosting ready, take one of the cakes, cut about a quarter out of it and remove it. Place the cut cake on the board or a platter and arrange it so it looks like the top half of the number three. Place the other (uncut cake) next to the first cake, and make a note of how much you’ll need to cut for the bottom half of the 3. I ended up cutting about half of the cake off for that piece. Then, arrange and smoosh the two cakes together and take a look at it. You may need to trim a little bit more cake off of the top or bottom half to get it to look right.
After the cake looks like a 3, put a little frosting in between the two cakes where they meet, and then frost the entire outside. Put the cake in the fridge for about 20-30 minutes while you prep the coconut and colored frosting.
For this road design, you’ll need to dye a bag of sweetened flaked coconut green (I put the coconut in a bowl with a big drop of green gel food coloring, then stirred it until all the coconut was green). You’ll also need some black frosting for the road and a little bit of yellow frosting for the lines. For the sides of the cake, you can use basically any color (or uncolored), though green is probably the easiest (in case some of the coconut falls off).
Frost the sides and top of the cake, and then, once the top is basically done and looks how you want it (you can wait on the yellow lines until later), use your hands to press the green coconut all around the sides of the cake. Pipe the yellow lines on the road if you haven’t already done it, then put the car toy on top (press it in a bit so it will stick to the cake).
Coconut was a great idea! Big time (and hand) saver over a grass tip and it has the same effect/look!
Thanks for sharing! This looks pretty easy, cute decorating too.
That was awesome!!! I showed my son and he liked it.. he’s a big F1 fan
I love this and now I think I can do this for my grandkids thanks for posting it
This is so cute. My little girl loves cars.