When my friend Isabel asked if I wanted to take a sugar skull class with her, I immediately said yes. Then I tried to figure out what the heck a sugar skull is.
Turns out, sugar skulls are skulls made of sugar (go figure) that are decorated and traditionally used to adorn the special altars that are made for Dia de los Muertos — Day of the Dead.
Day of the Dead is a Mexican holiday celebrated at the beginning of November, with roots that date back to an Aztec celebration of the goddess Mictecacihuatl, the Lady of the Dead. I had seen lots of colorful skull decorations and merchandise, but I never quite knew the significance of the holiday (or the skulls themselves.)

Luckily for Isabel and I, there is an awesome store in San Diego called Vintage Religion, and they offer a class that teaches not only how to make sugar skulls, but why people would make them in the first place.
One of the first things we learned is that Day of the Dead is a day to honor, remember and celebrate loved ones who have died — the skulls are not supposed to be scary. Families go to cemeteries and clean the gravestones of their deceased family members, and they build elaborate altars (like the one pictured above) with marigolds, a special kind of incense, photos, candles, skulls and food to call back and welcome the dead.
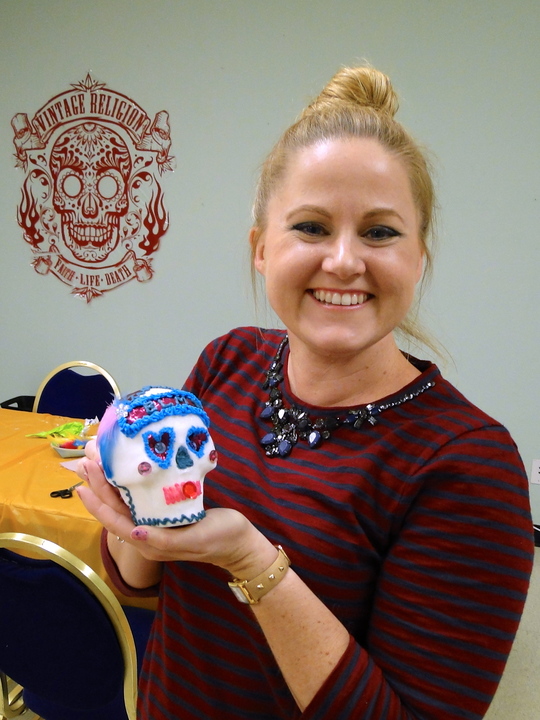
The artists who taught our class, Maryann and Ana, both grew up in Mexico, and as they were telling us about the tradition, they said they remember spending all day at the cemetery as children, preparing the graves of family members. They said the cemeteries had a festival atmosphere, because everyone would be there, and there would be music and food vendors, and many families would spend the night so they could be there when the sun rose.

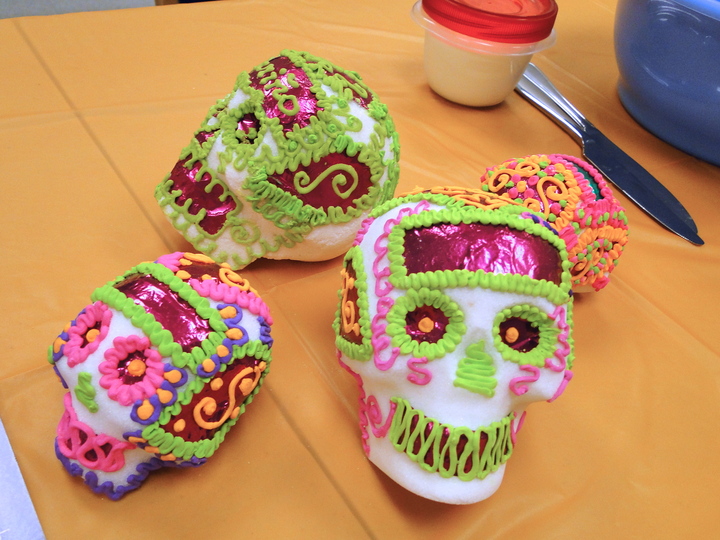
The skulls are an integral part of the Dia de los Muertos altar, and can be decorated however you like. Many families in Mexico have clay molds that have been passed down from generation to generation, but apparently it is very difficult to make the skulls using those molds (it involves boiling hot sugar syrup!) and they aren’t even available to purchase anymore. We made ours using plastic molds, which are inexpensive and make the process pretty easy (and safe).

We were able to practice making our own sugar skulls, but they take several hours to dry and set completely, so the skulls we decorated were not the same ones we put together. Our instructors also provided brightly colored royal icing, colored foil, feathers and sequins so we could personalize our sugar skulls.


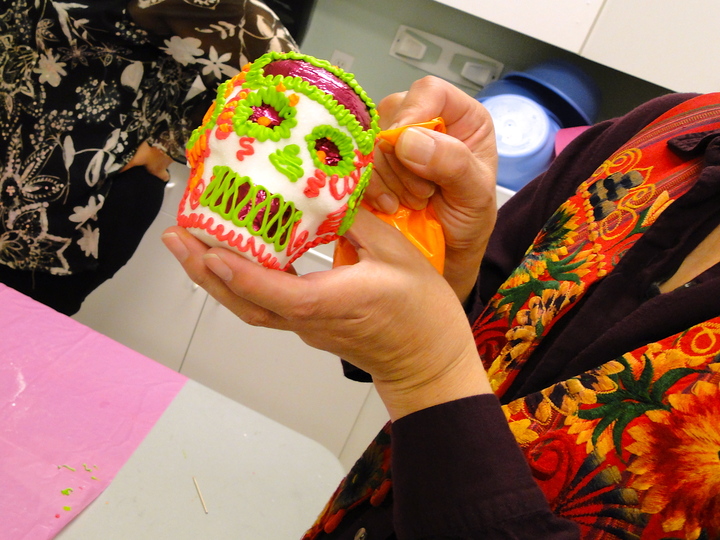
I didn’t plan mine out terribly well, but I knew I wanted to use the teal and aqua icings and some pink foil hearts. I also decided I wanted my skull to honor my maternal grandmother, Nanny, who died very unexpectedly on Halloween in 2010. She was a beautiful, brave, amazing woman and I miss her all the time. What I didn’t realize is that the day we took this class was her birthday.
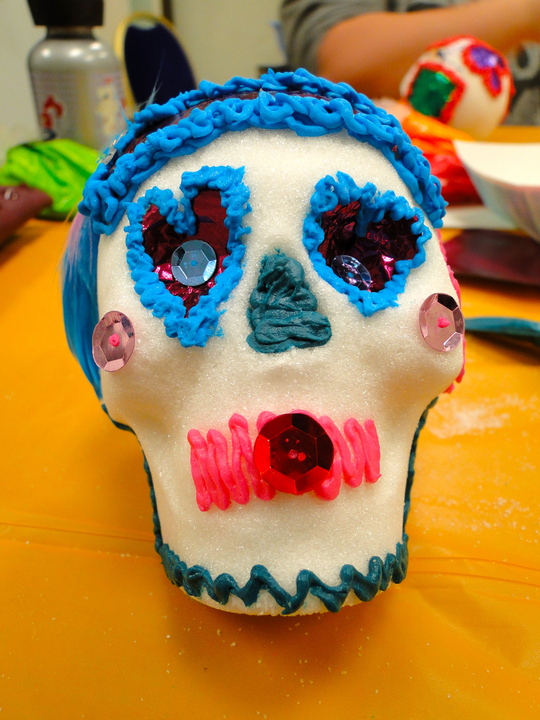

I had a hard time with the piping, but I’m pretty happy with how mine turned out. Still, after seeing some of the other skulls in the class, I wish I had thought it out a tiny bit better. I did buy a sugar skull mold, though, so I can always make more.
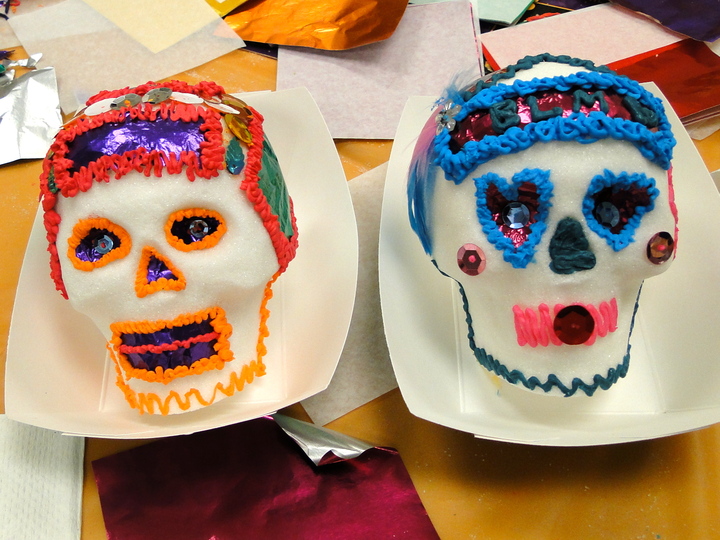
If you live in the San Diego area, I would definitely recommend trying to get in to one of the sugar skull classes at Vintage Religion. The instructors are great, we learned a lot about Dia de los Muertos, and it’s nice to have all the materials and frosting ready for you. But if you don’t live in an area where you could take classes, you can still try it. Check out the instructions below the photos of some of the amazing skulls made by others in our class, and let me know if you have any questions!
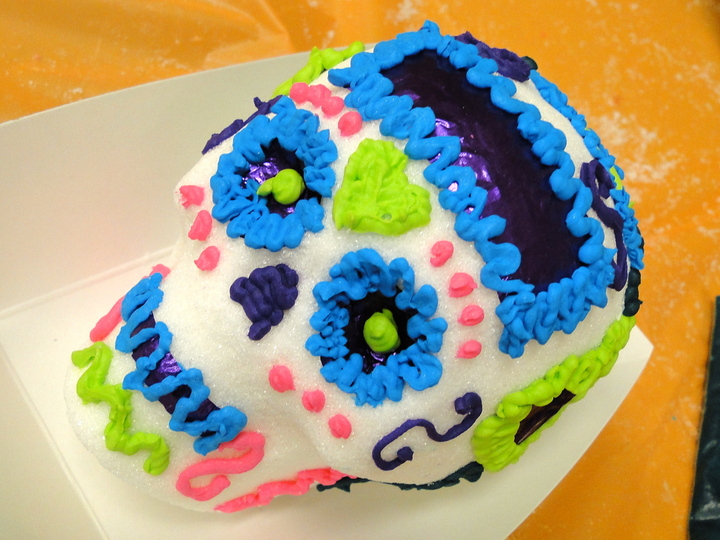

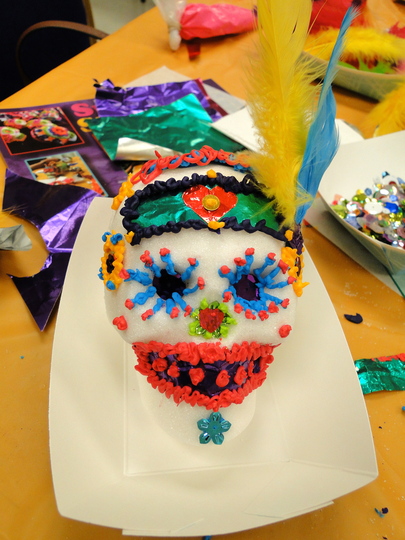

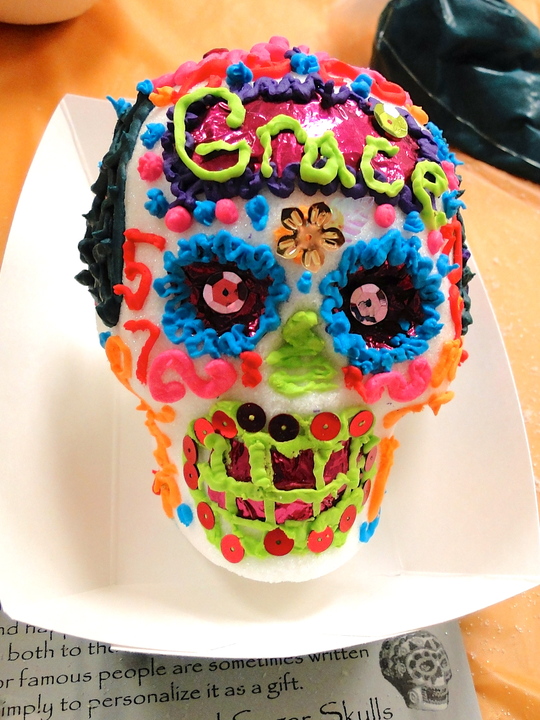
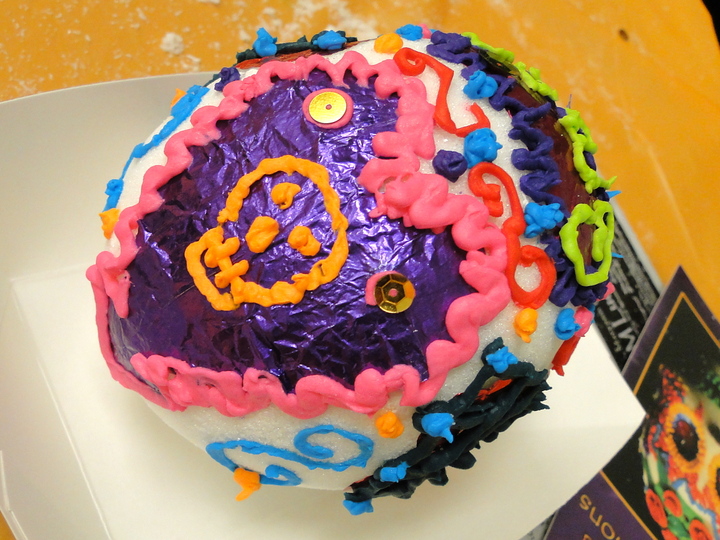


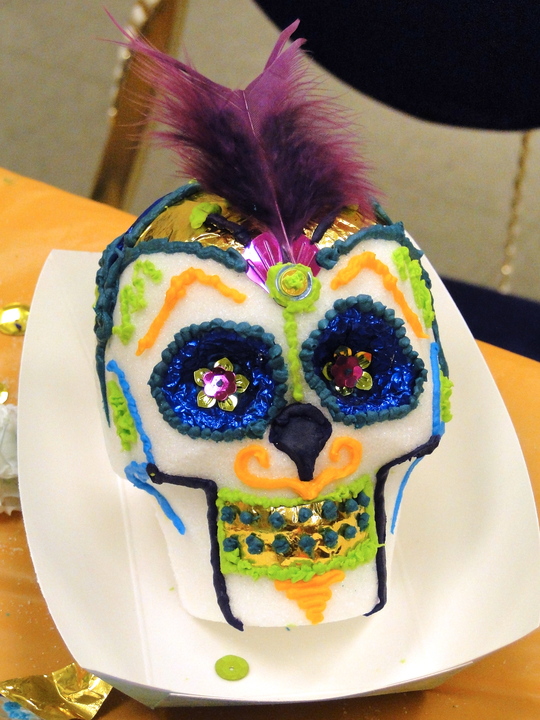

Isn’t it cool how different they all are? The one with the rose on the back was really gorgeous.
To make a sugar skull, you’ll need a skull mold, granulated sugar, meringue powder, water and a few pieces of dry cardboard (each a bit larger than the size of the skull). You’ll also need royal icing (recipe below) to put the two halves together and decorate the skulls. Don’t try to make these on a rainy day — the moisture in the air will make it impossible for the skulls to dry and set properly.
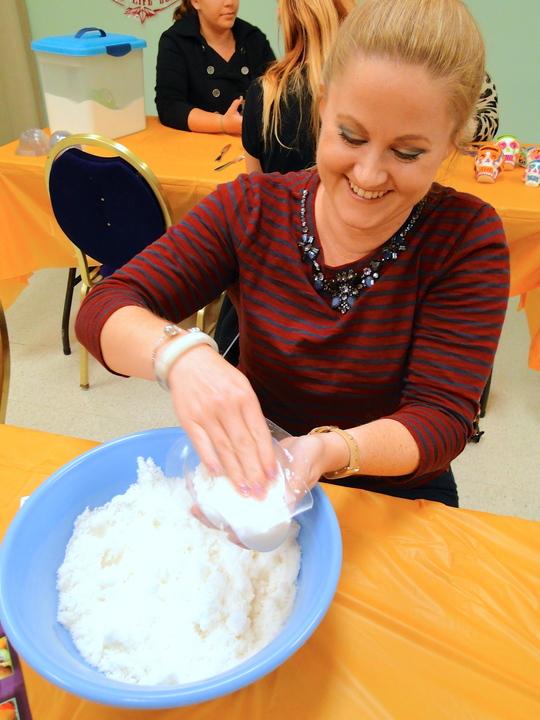
The amount of sugar mixture you need will vary based on the size of your mold, but the magic combination is 1 cup sugar, 1 teaspoon meringue powder and 1 teaspoon water.
For a skull mold the size we made, triple the recipe so you have 3 cups sugar, 3 teaspoons meringue powder and 3 teaspoons water. Mix the sugar and meringue powder together in a large bowl, using your hands, until it is well combined, then add the water. Use your fingers (in a crumbling/rubbing motion) to mix that together until the sugar mixture is the consistency of wet sand and holds together if you squeeze a handful of it tightly in your palm. DO NOT add more water.
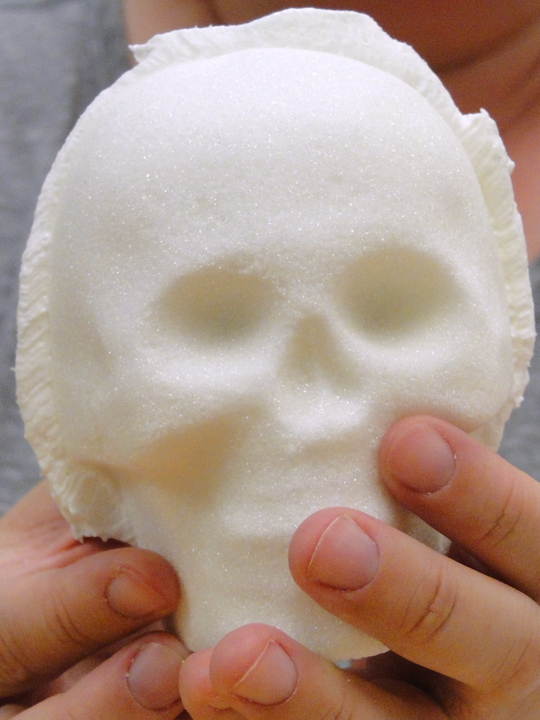
Press some of the mixture tightly into the nooks and crannies of the face part of the mold, then add more sugar and pack it into the mold tightly until the entire thing is full. Scrape the excess off with one of the pieces of cardboard so the sugar is level with the mold. Carefully turn the skull half onto the cardboard and allow it to dry, undisturbed, for 2 1/2 to 3 hours. Make the back of the skull the same way.
Once the skull halves have been sitting for 2 1/2 or 3 hours, carefully use a small teaspoon to scoop out some of the sugar that will be on the inside. You should scoop out some of the top part of the front of the face and the middle of the back, leaving at least an inch border everywhere (and making sure that you don’t scoop out any of the front that won’t be connected to the back).
Return the skull halves to the cardboard and let dry overnight.
To make royal icing for joining and decorating, put 1/2 cup meringue powder and 2 pounds of powdered sugar in a stand mixer fitted with the paddle attachment and mix well on low speed, then add 2/3 cup water and beat on medium high or high speed for nine minutes.
Put a small amount of the royal icing in a small container (like a plastic cup) and use a butter knife to spread the icing around the back half of the skull (try to do this in one or two strokes, rather than spreading and spreading, or the edge of the skull may start to dissolve).
Firmly press the halves of the skull together. Some icing will squeeze out around the edges, which is totally fine. Use your finger to wipe it/remove it in one swipe. Place the skull face down to dry.
Color the royal icing with gel food coloring and place it in plastic piping bags to decorate. Decorate the skull(s) with the colored icing, colored foil, sequins, feathers and whatever else you like, adhering everything with icing. Allow to dry for several hours or overnight.