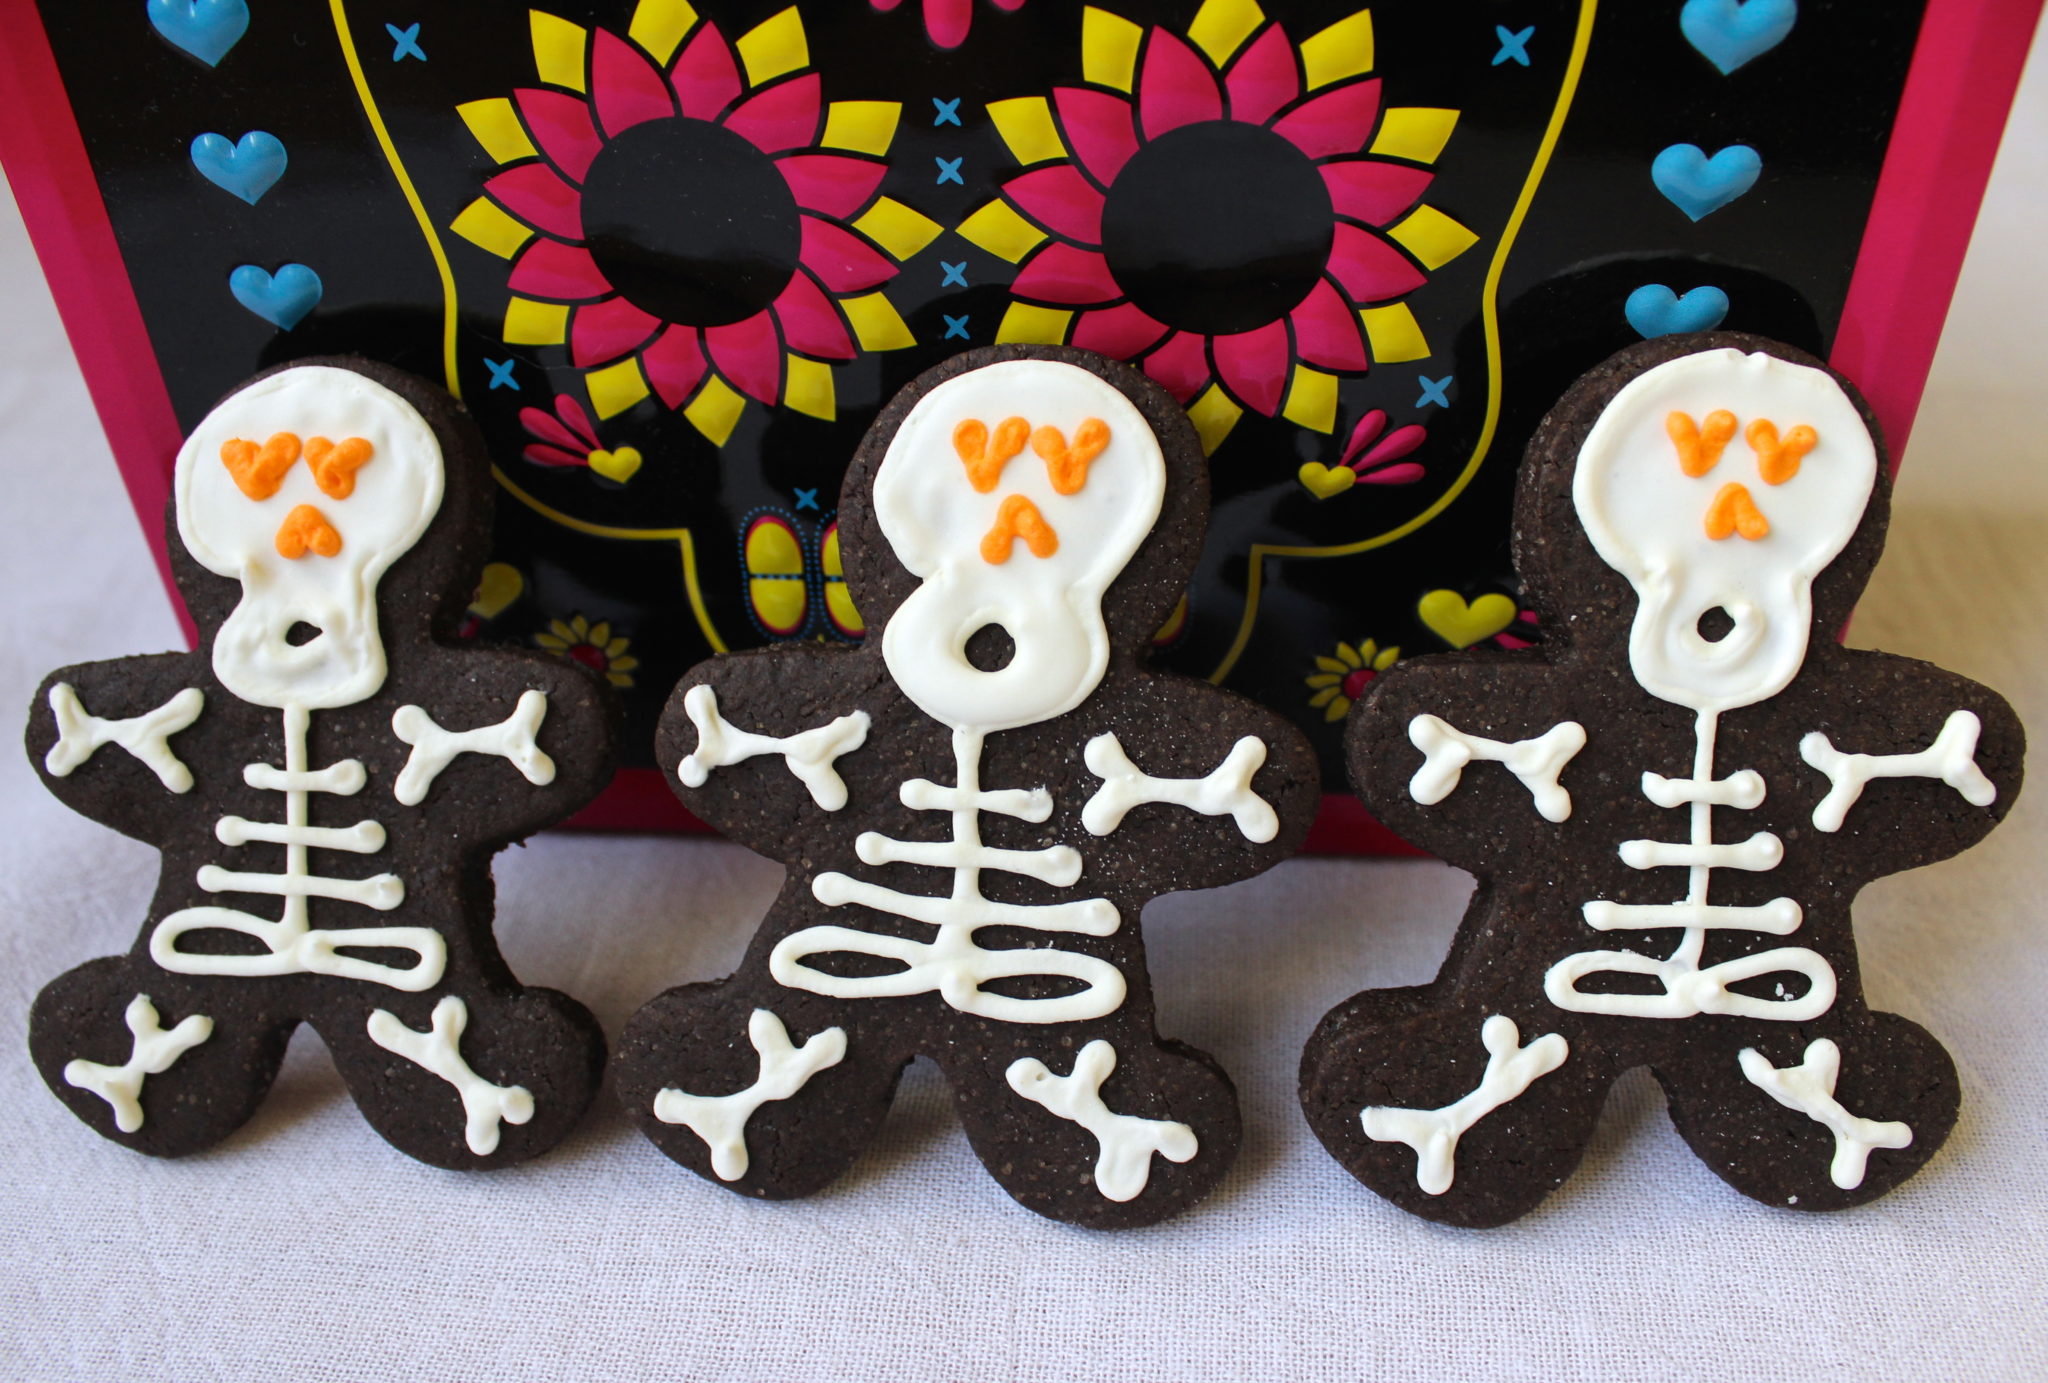
When we were living in San Diego County, I was lucky enough to be able to attend a sugar skull class and a Dia de los Muertos celebration. Both fueled my obsession with the beautiful designs on the traditional sugar skulls, but when I was thinking of making skeleton cookies that could work for Halloween or Dia de los Muertos, I realized that those designs are much too intricate for a tiny cookie. Instead, I decided to make Mexican chocolate-inspired skeleton cookies and give them orange hearts for eyes and noses, in a nod to the Mexican holiday but more geared toward Halloween.
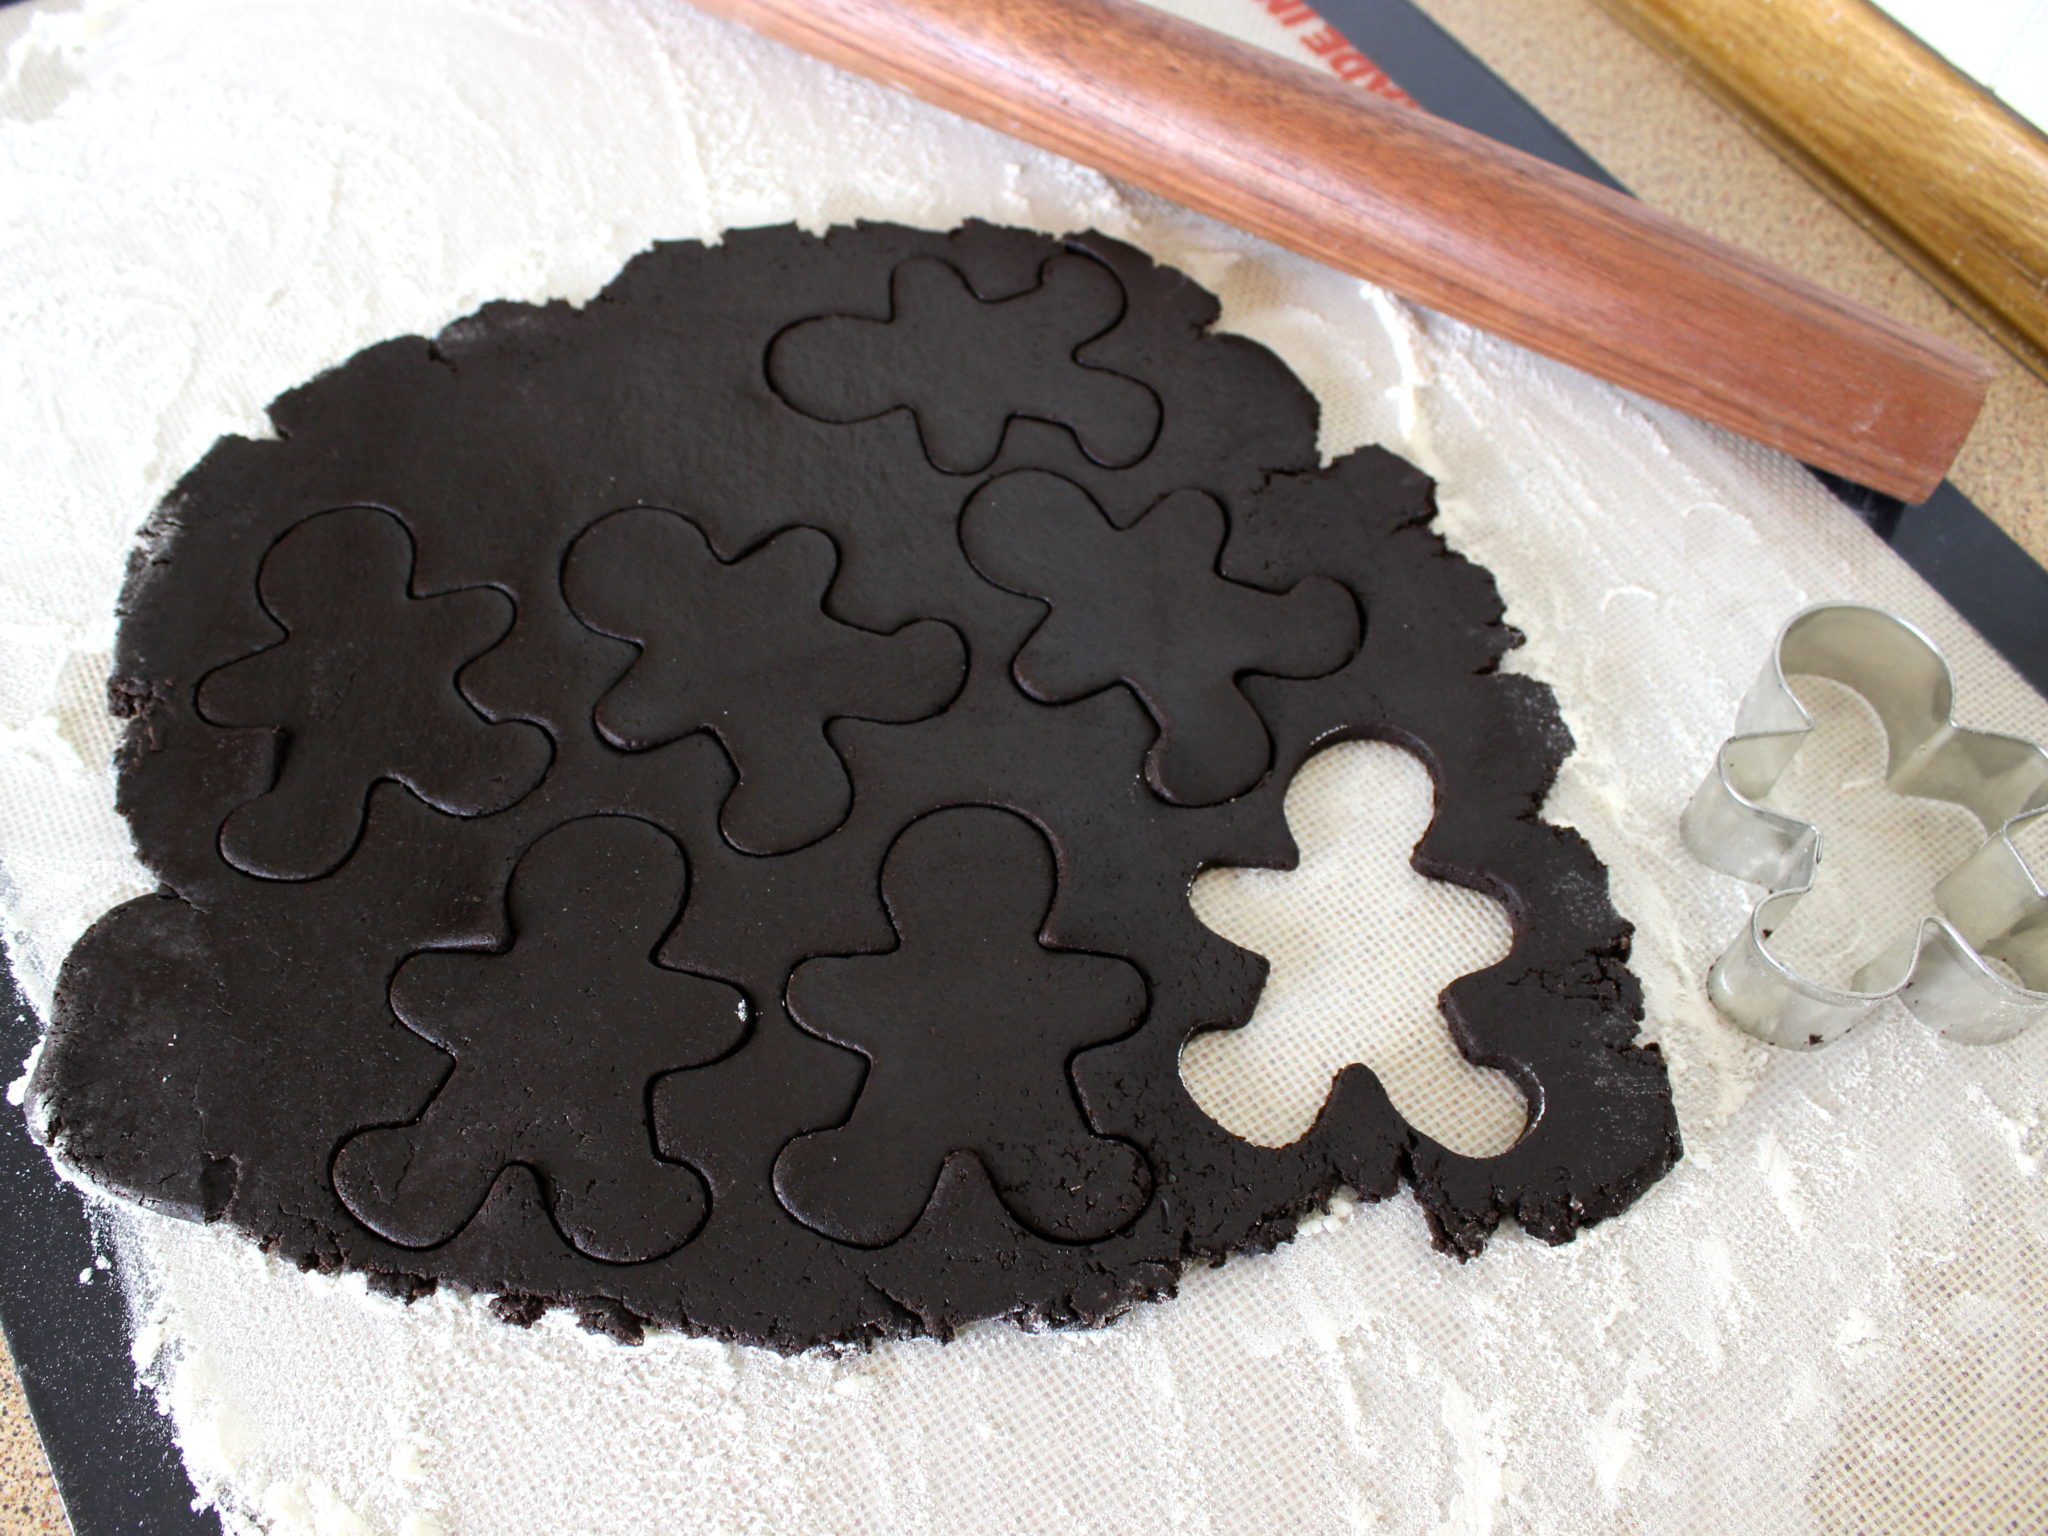
I have made this type of cookie many times before, and I absolutely love adding cinnamon to it — the chocolate makes them taste like brownies, and the spice adds something really special. You don’t need to have any special Halloween or skeleton cookie cutters for this, just a gingerbread man shape. The one I like to use is on the small side (cuter that way!), but if yours is bigger, you may be able to make your skeletons more detailed.
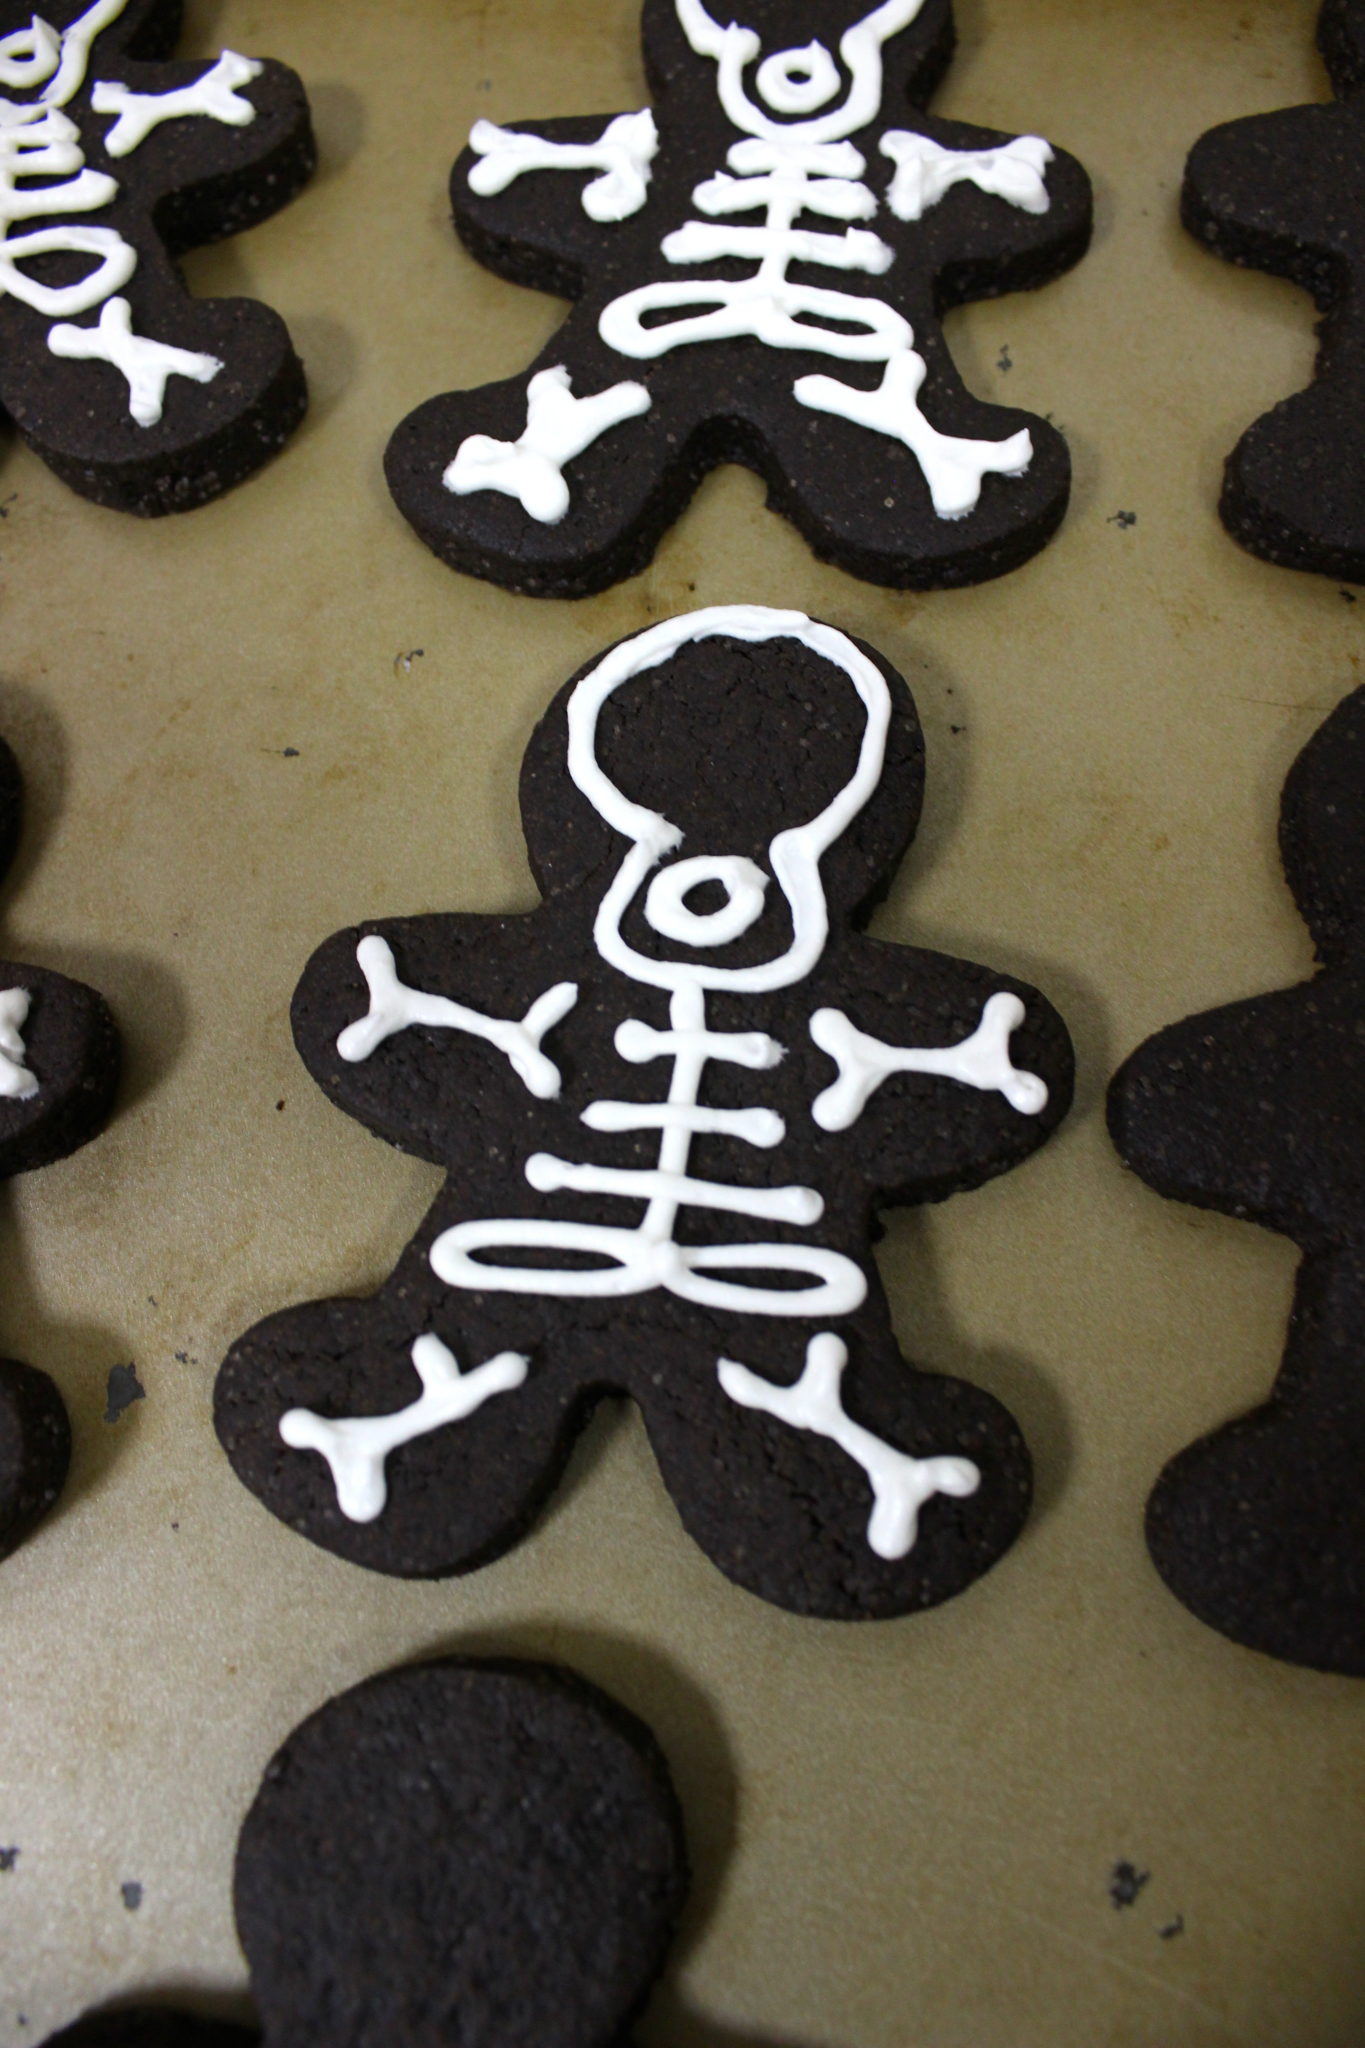
Drawing the skeleton is not as hard as you might think (probably because it is not anywhere close to being anatomically correct!), and you can obviously do it however you’d like. I started with the outline of the skull, then drew the spine, pelvis and rib cage, then the arm and leg bones. I wanted to do little dots for fingers and toes, but I kept making the arms and legs a little too long by accident, so there wasn’t room.
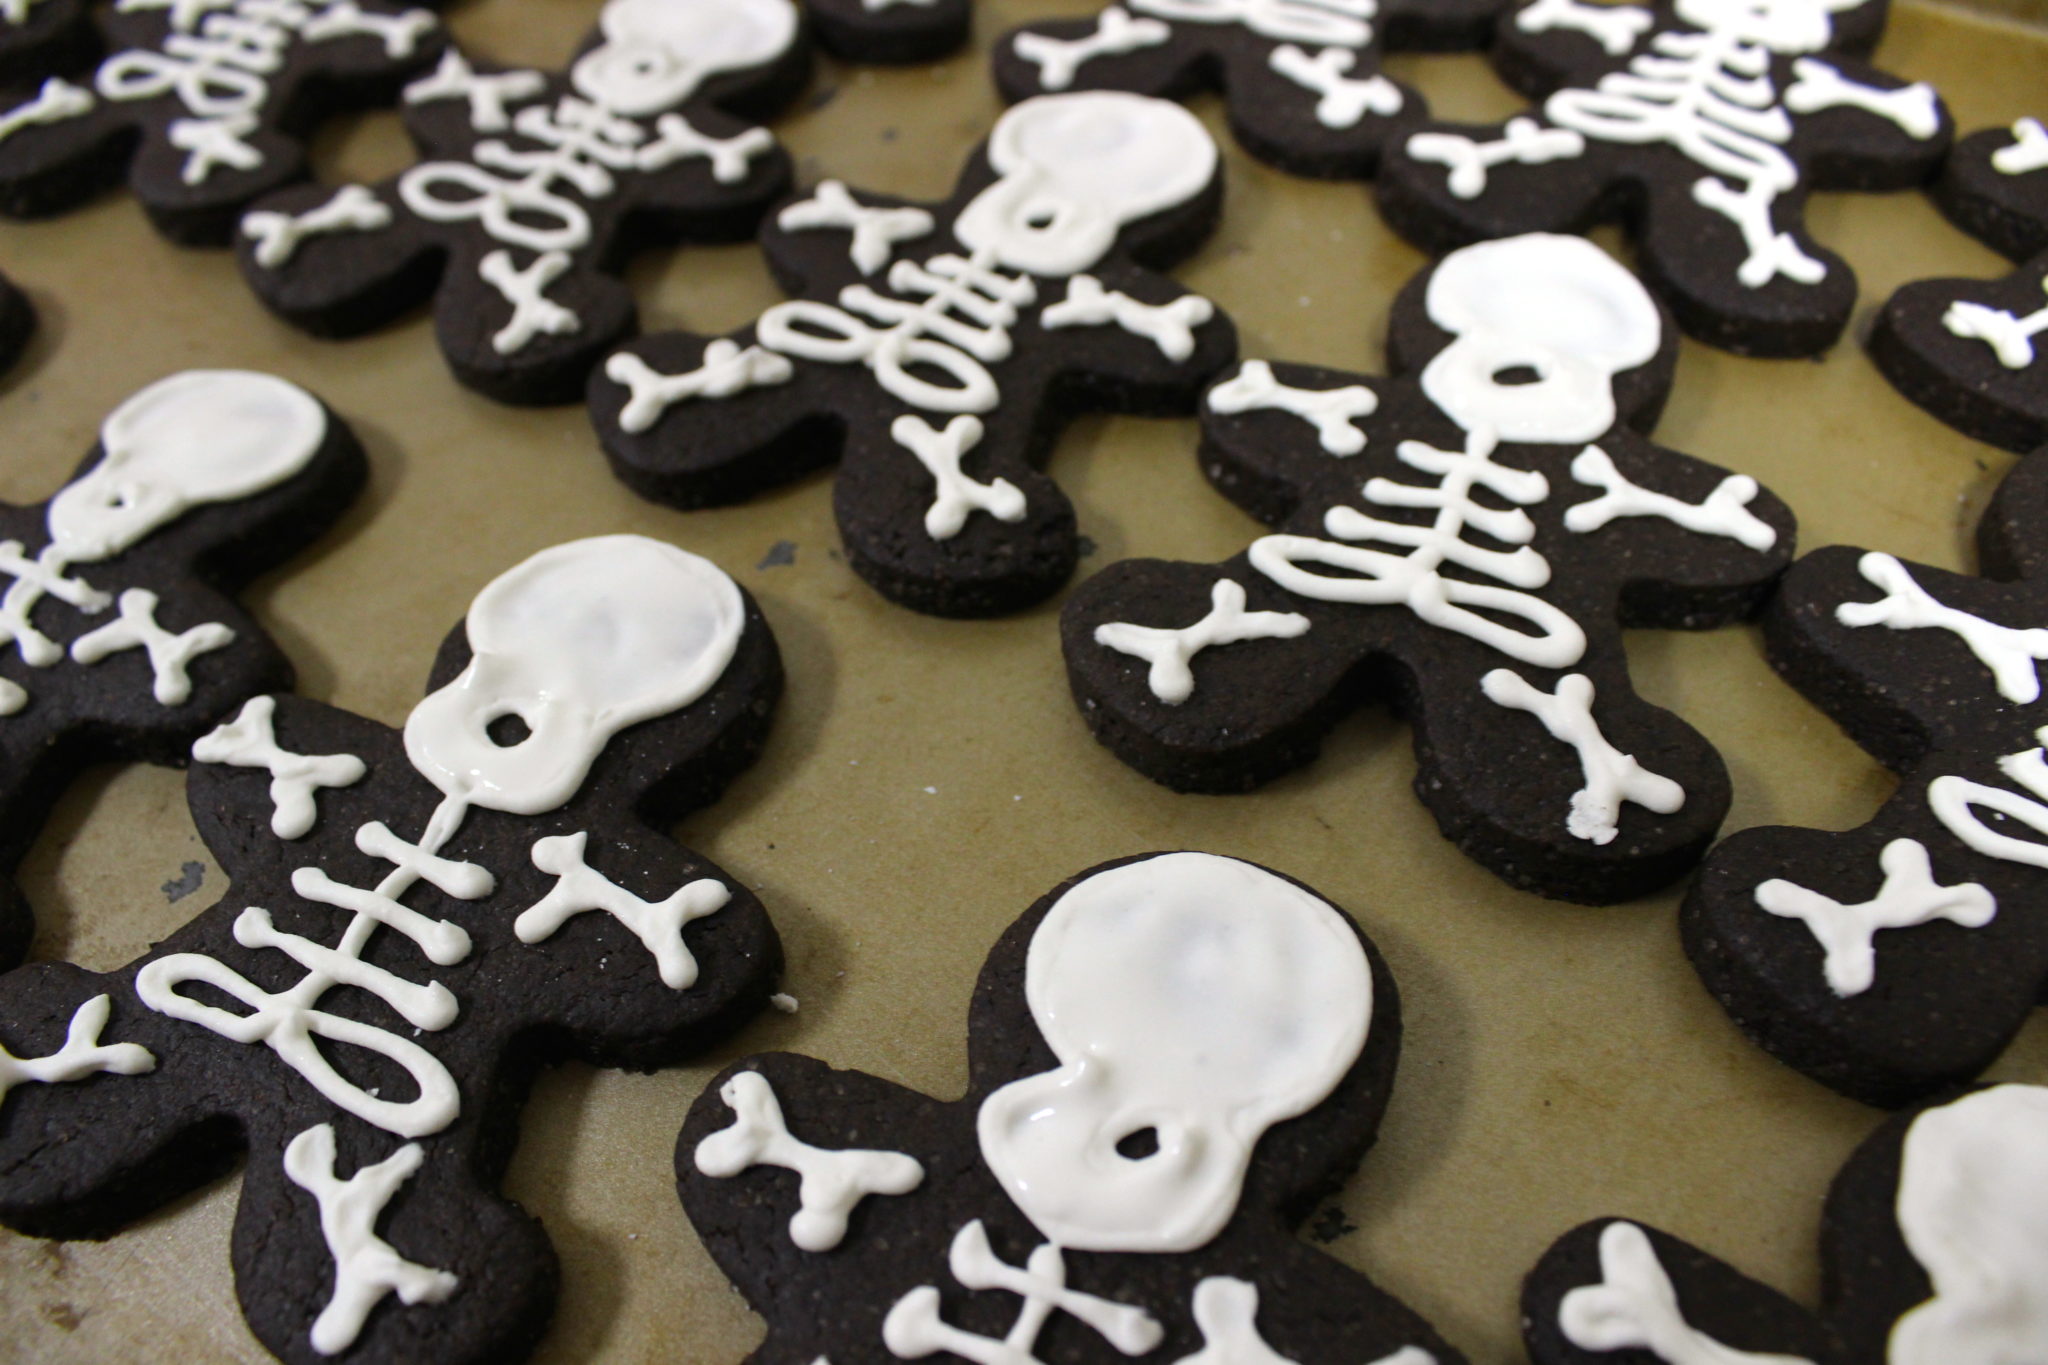
After I had drawn all the skeleton outlines, I filled in the skulls with thinned white icing (roughly the consistency of maple syrup). After that dried, I piped the orange hearts on them for eyes and noses.
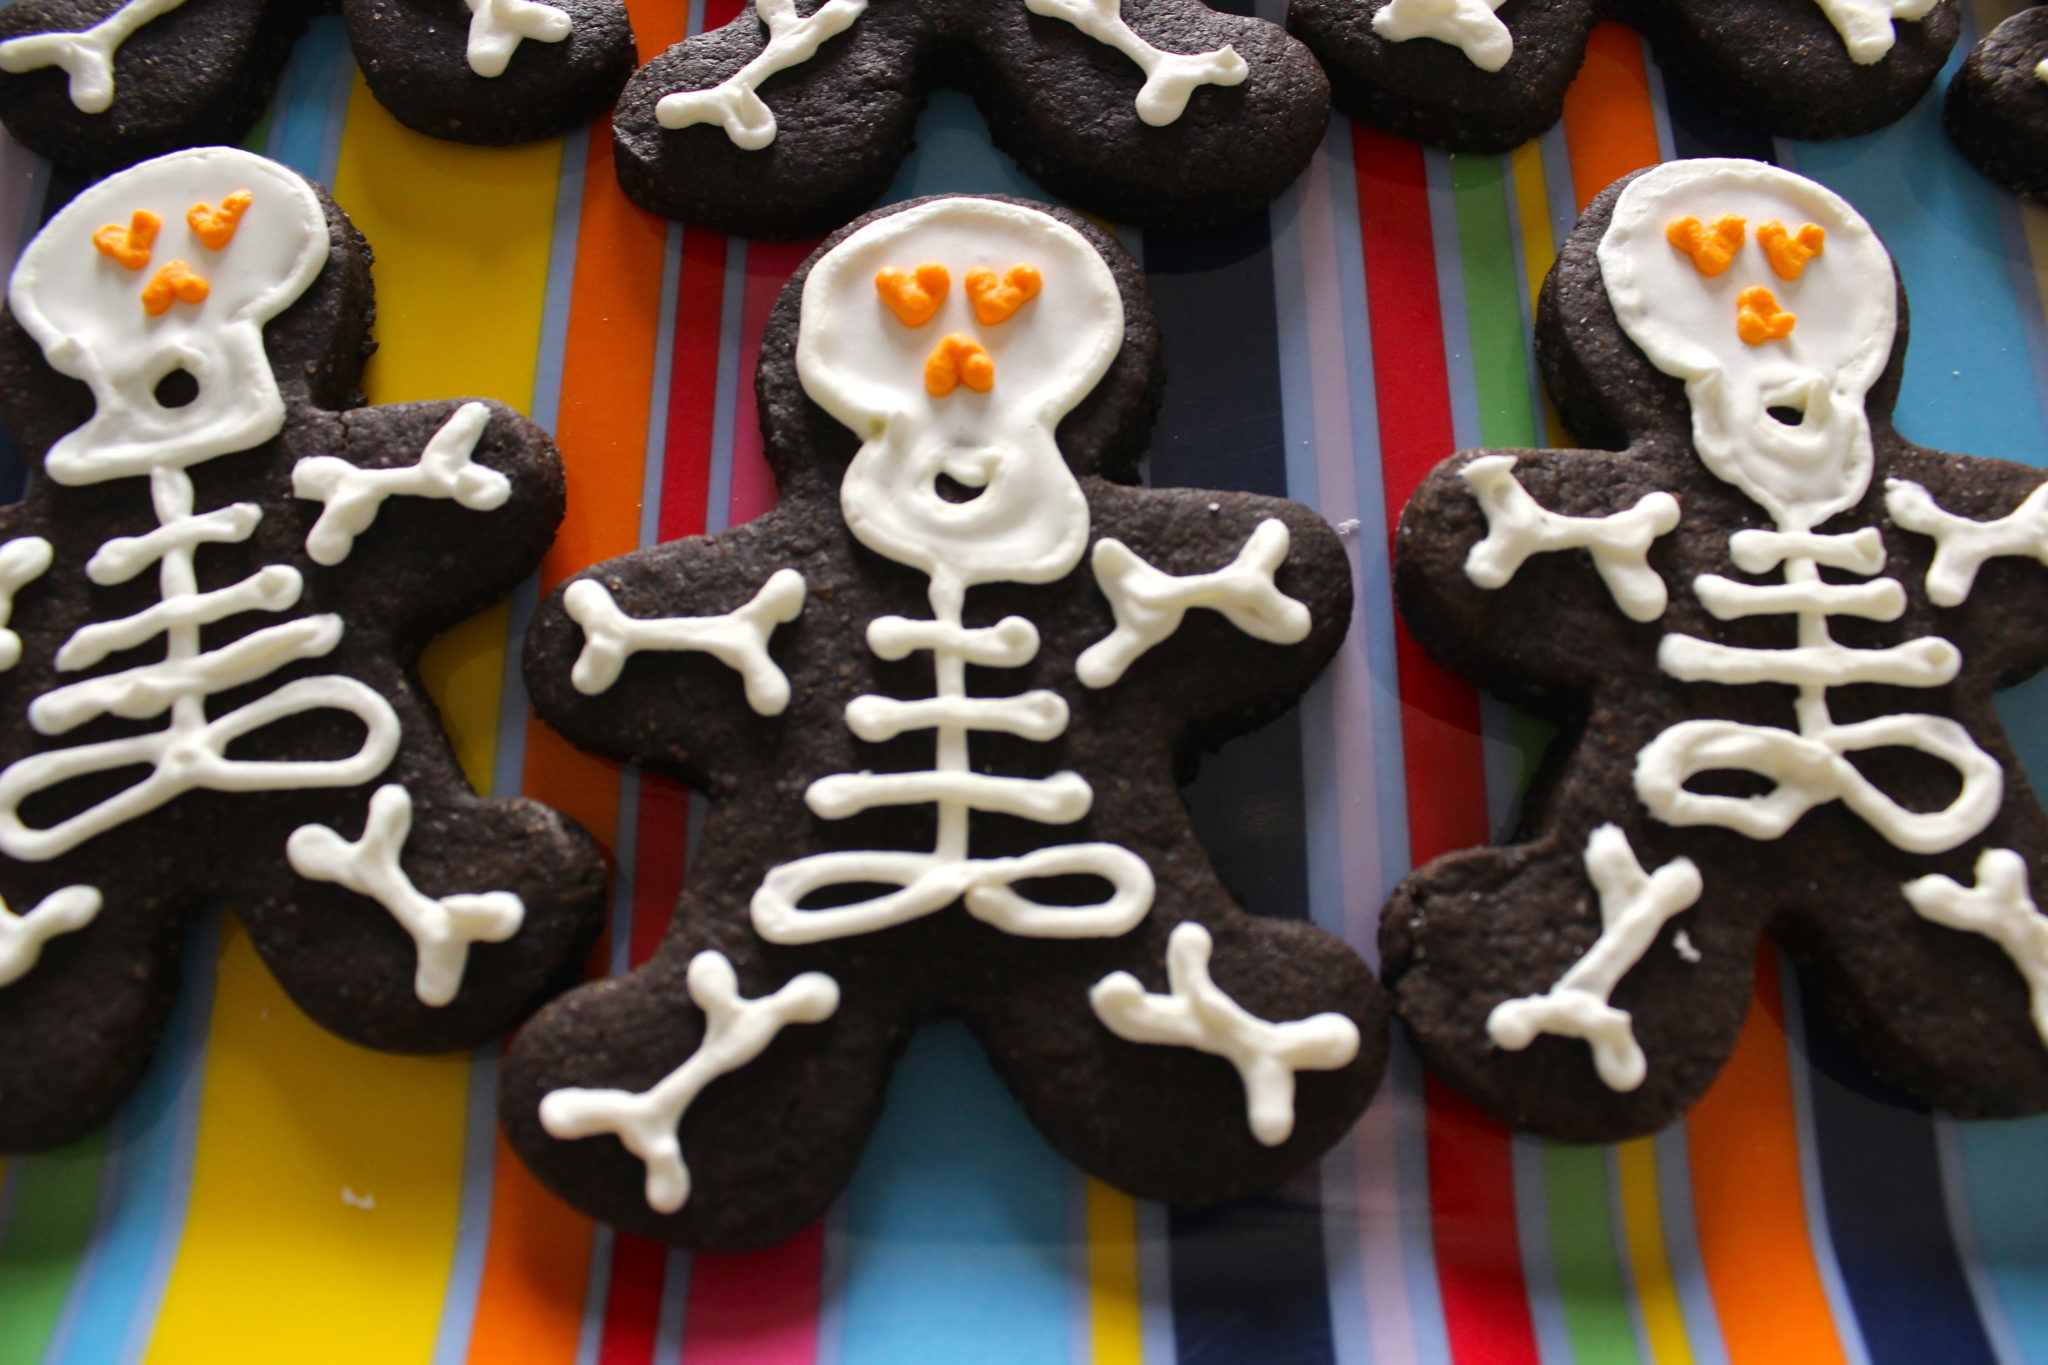
I think they ended up pretty dang adorable! And they tasted great, too. Perfect for Halloween OR Dia de los Muertos!
Chocolate-cinnamon skeleton cookies (Recipe adapted from The Smitten Kitchen Cookbook, makes about 38 thick-cut 3 1/2-inch tall cookies)
3 cups all-purpose flour (plus more for rolling)
2/3 cup unsweetened cocoa powder (I used Hershey’s “special dark”)
3/4 teaspoon salt (table salt is fine)
1/2 teaspoon baking powder
1/2 teaspoon cinnamon
2 sticks unsalted butter (let the sticks of butter sit out on the counter at room temperature for at least an hour beforehand, but don’t microwave them or otherwise melt the butter)
1 1/2 cups sugar
2 large eggs
1 1/2 teaspoons pure vanilla extract
Icing (recipe below)
Measure the flour by spooning it into a dry measuring cup and then gently dragging a knife across the top to level — don’t smoosh it down into the cup or use the measuring cup to scoop it.
Pour the measured flour, cocoa powder, salt, baking powder and cinnamon into a medium mixing bowl. Use a whisk to stir and combine the dry ingredients. Set aside.
Place the butter and sugar in the bowl of a stand mixer fitted with the paddle attachment or in a large mixing bowl (if using a hand-held electric mixer instead). Beat the butter and sugar together for several minutes, starting at a low speed to combine them and then increasing to a medium or medium-high speed. Keep beating until the mixture is a lighter color and it looks fluffy.
Add one egg and beat for a few seconds to combine. Use a spatula to scrape down the sides of the mixing bowl, then add the second egg and beat again to combine. Add the vanilla and beat for about a minute, until the mixture looks homogeneous.
Gradually add the flour-cocoa mixture to the butter-egg mixture and mix just until the ingredients look combined (I do this by adding about a third of the dry ingredients and turning on the mixer for about 20-30 seconds, just until the flour and cocoa look wet, then adding another third and so on. Don’t add the whole dry mixture at once or the mixer will make the flour and cocoa explode up onto you and your kitchen counter).
Divide the cookie dough into two roughly equal parts and wrap each well with plastic wrap (I usually shape the dough into rounds and sort of smoosh them down inside the plastic). Refrigerate the dough for at least an hour, but overnight is fine.
When ready to bake the cookies, line two or more cookie sheets with parchment paper or silicone baking sheets. Preheat the oven to 350F. If the cookie dough has been in the fridge overnight, let it sit on the counter for a few minutes.
Prep a flat workspace (such as the kitchen counter) by making sure it’s clean and then dusting it lightly with flour. Unwrap one of the cookie dough rounds and place it on the floured surface. Dust a little flour over the surface or rub some flour on the rolling pin.
Roll the cookie dough out to about 1/4-inch thickness and cut using a gingerbread man-shaped cookie cutter. Place about 1 1/2-inches away from each other on prepared cookie sheets and bake for 8-10 minutes, or until the edges are firm and the centers are a bit puffed.
Remove the cookies from the oven, allow to cool for a few minutes, then transfer to a wire cooling rack until completely cooled.
Royal icing (makes more than enough to decorate the cookies)
1 pound powdered sugar (also called “confectioners sugar”)
4 teaspoons powdered egg whites (usually available with the baking supplies, but meringue powder works, too)
1/3 cup water
1 tablespoon lemon juice
1 teaspoon vanilla
food coloring gel (optional – I used Americolor bright white and orange)
2 piping bags (I use the disposable kind), 2 tips, 2 couplers and 2 rubber bands
Prepare two piping bags, both with relatively small tips (Wilton #2 or #3 are good — bigger is a little easier to use, I think). Set all the cookies out on clean cookie sheets or trays.
Place the powdered sugar and powdered egg whites in the bowl of a stand mixer fitted with the paddle attachment and turn on low for a few seconds to combine. With the mixer still going on low, gradually pour the water, lemon juice and vanilla into the bowl.
Once the powdered sugar is all wet, turn the mixer up to medium or medium-high speed and beat for a few minutes, watching after the first minute or so until the mixture gets past the liquidy phase and looks glossy and firm. (You may need to scrape down the sides of the bowl at some point to get everything well combined). You can check whether it’s mixed enough by turning off the mixer and pulling the paddle attachment up. If the peaks stand straight up or just bend a little at the top, it’s ready.
Seperate out a small portion of the icing into a seperate bowl (like 1/4 or less of the total icing), use the food coloring to make it the shade of orange you’d like, and use a spatula to put the icing into a piping bag (I like to twist the end of the bag and use a rubber band closure, and use a tip cover thingy to keep it from dyring out). Add white food coloring (if using) to the remaining icing and beat until it’s the color you’d like. Test the icing on a plate or napkin to make sure it’s easy to pipe, then use the icing to make the outline of the skeleton on all of the cookies.
The way I drew the skeletons: First the skull and circle for the mouth. Then, spine, pelvis, and ribs. Last, arm and leg bones. Once all the skeletons are drawn/outlined, add a few drops of water to the white icing in the bowl (you can scoop/squeeze extra icing from the piping bag if you’d like) and stir, adding just a teaspoon or two of water at a time and stirring after each addition, until the icing is the consistency of maple syrup — you want it thick, but spreadable.
Use the thinned white icing to fill in the skulls (minus the mouth). You can use a toothpick, a teaspoon, or a little paintbrush — whatever you have available.
Let the filled-in skulls dry for a few minutes, then use the orange icing to draw hearts for eyes and upside-down hearts for noses. Allow cookies to dry for several hours before packing into an air-tight container.