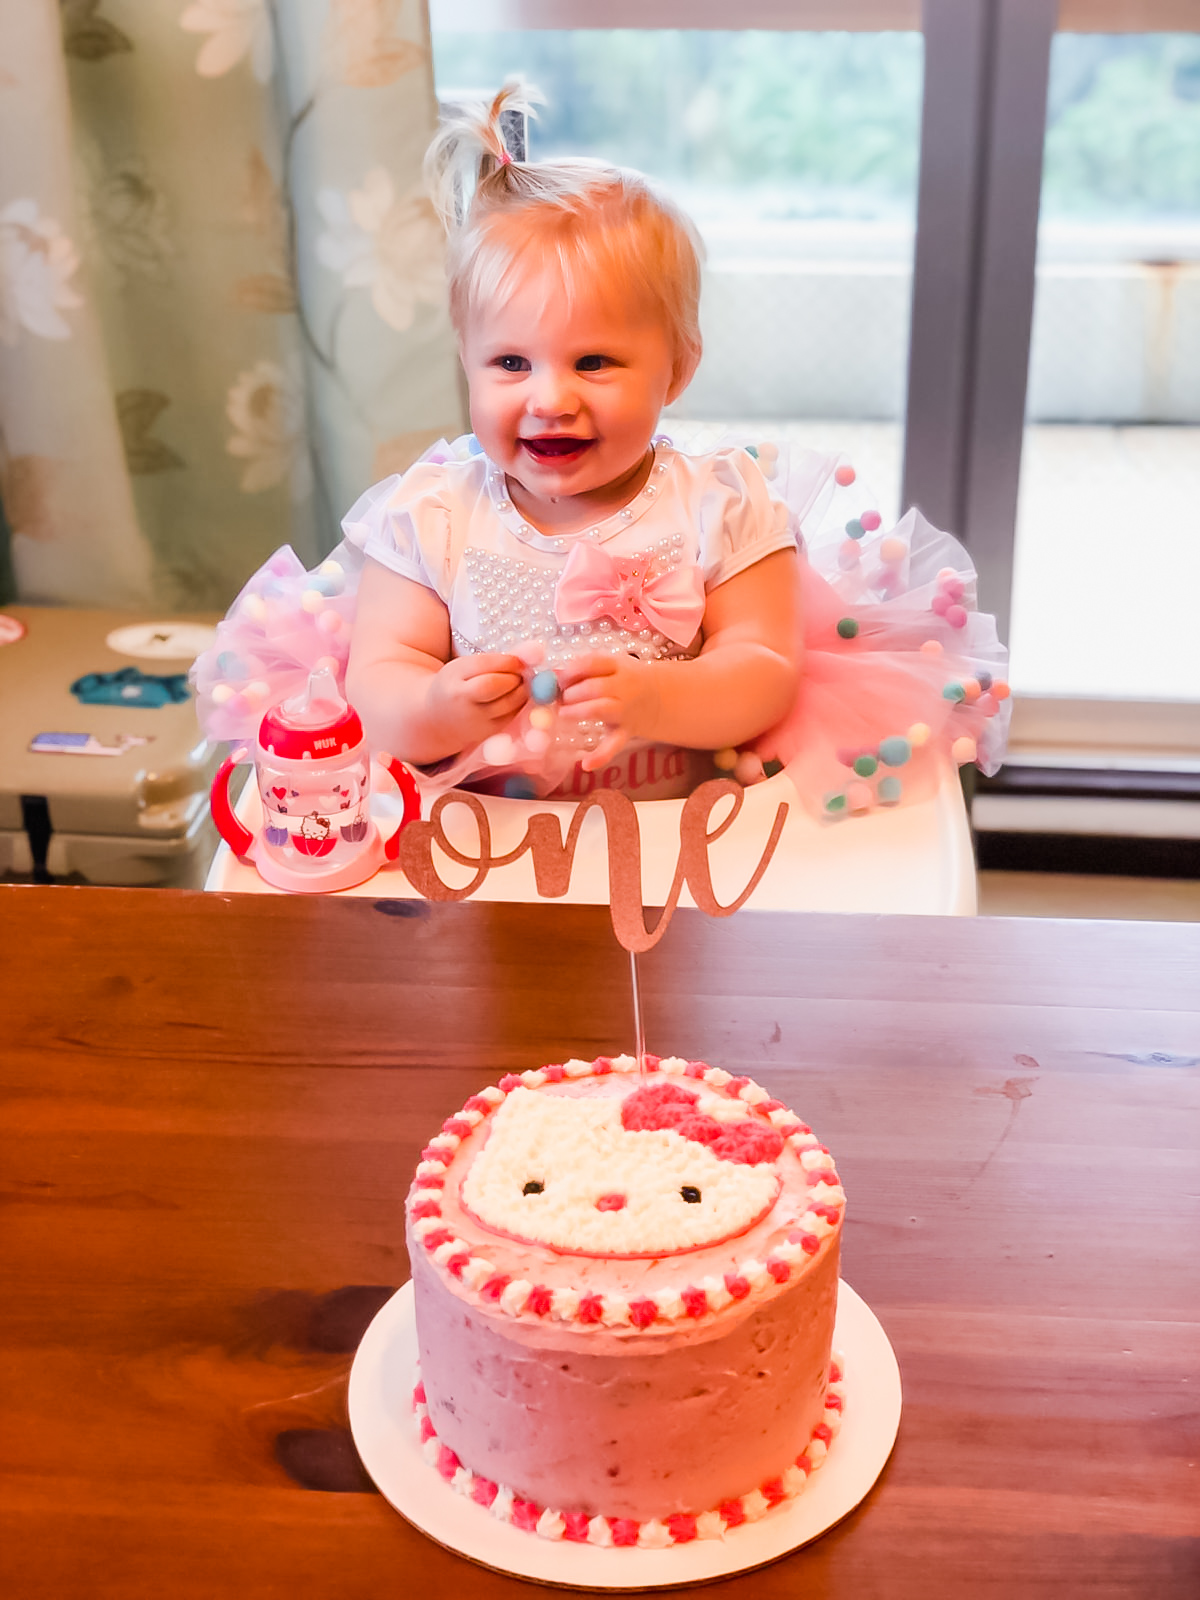
I’m not sure how other people come up with the themes for their children’s first birthday parties, but I was inspired by a stuffed animal. A Hello Kitty doll in a cherry blossom kimono, to be exact. Since Arabella was born during the mainland cherry blossom season and this may be her only birthday (other than the actual day of her birth) in Japan, I wanted something Japanese. And my love of Hello Kitty is no secret. So a Hello Kitty cherry blossom cake seemed like the perfect thing for our kawaii little sakura.
But planning a Hello Kitty + cherry blossom themed party in Japan was not as easy as I had anticipated. I found some Hello Kitty and cherry blossom items at Daiso and on Japanese Amazon, but had to do some serious Pinterest searching to find a cherry blossom cake that I thought I could modify and make at home. I ended up improvising on the design, but I was thrilled with how it turned out.
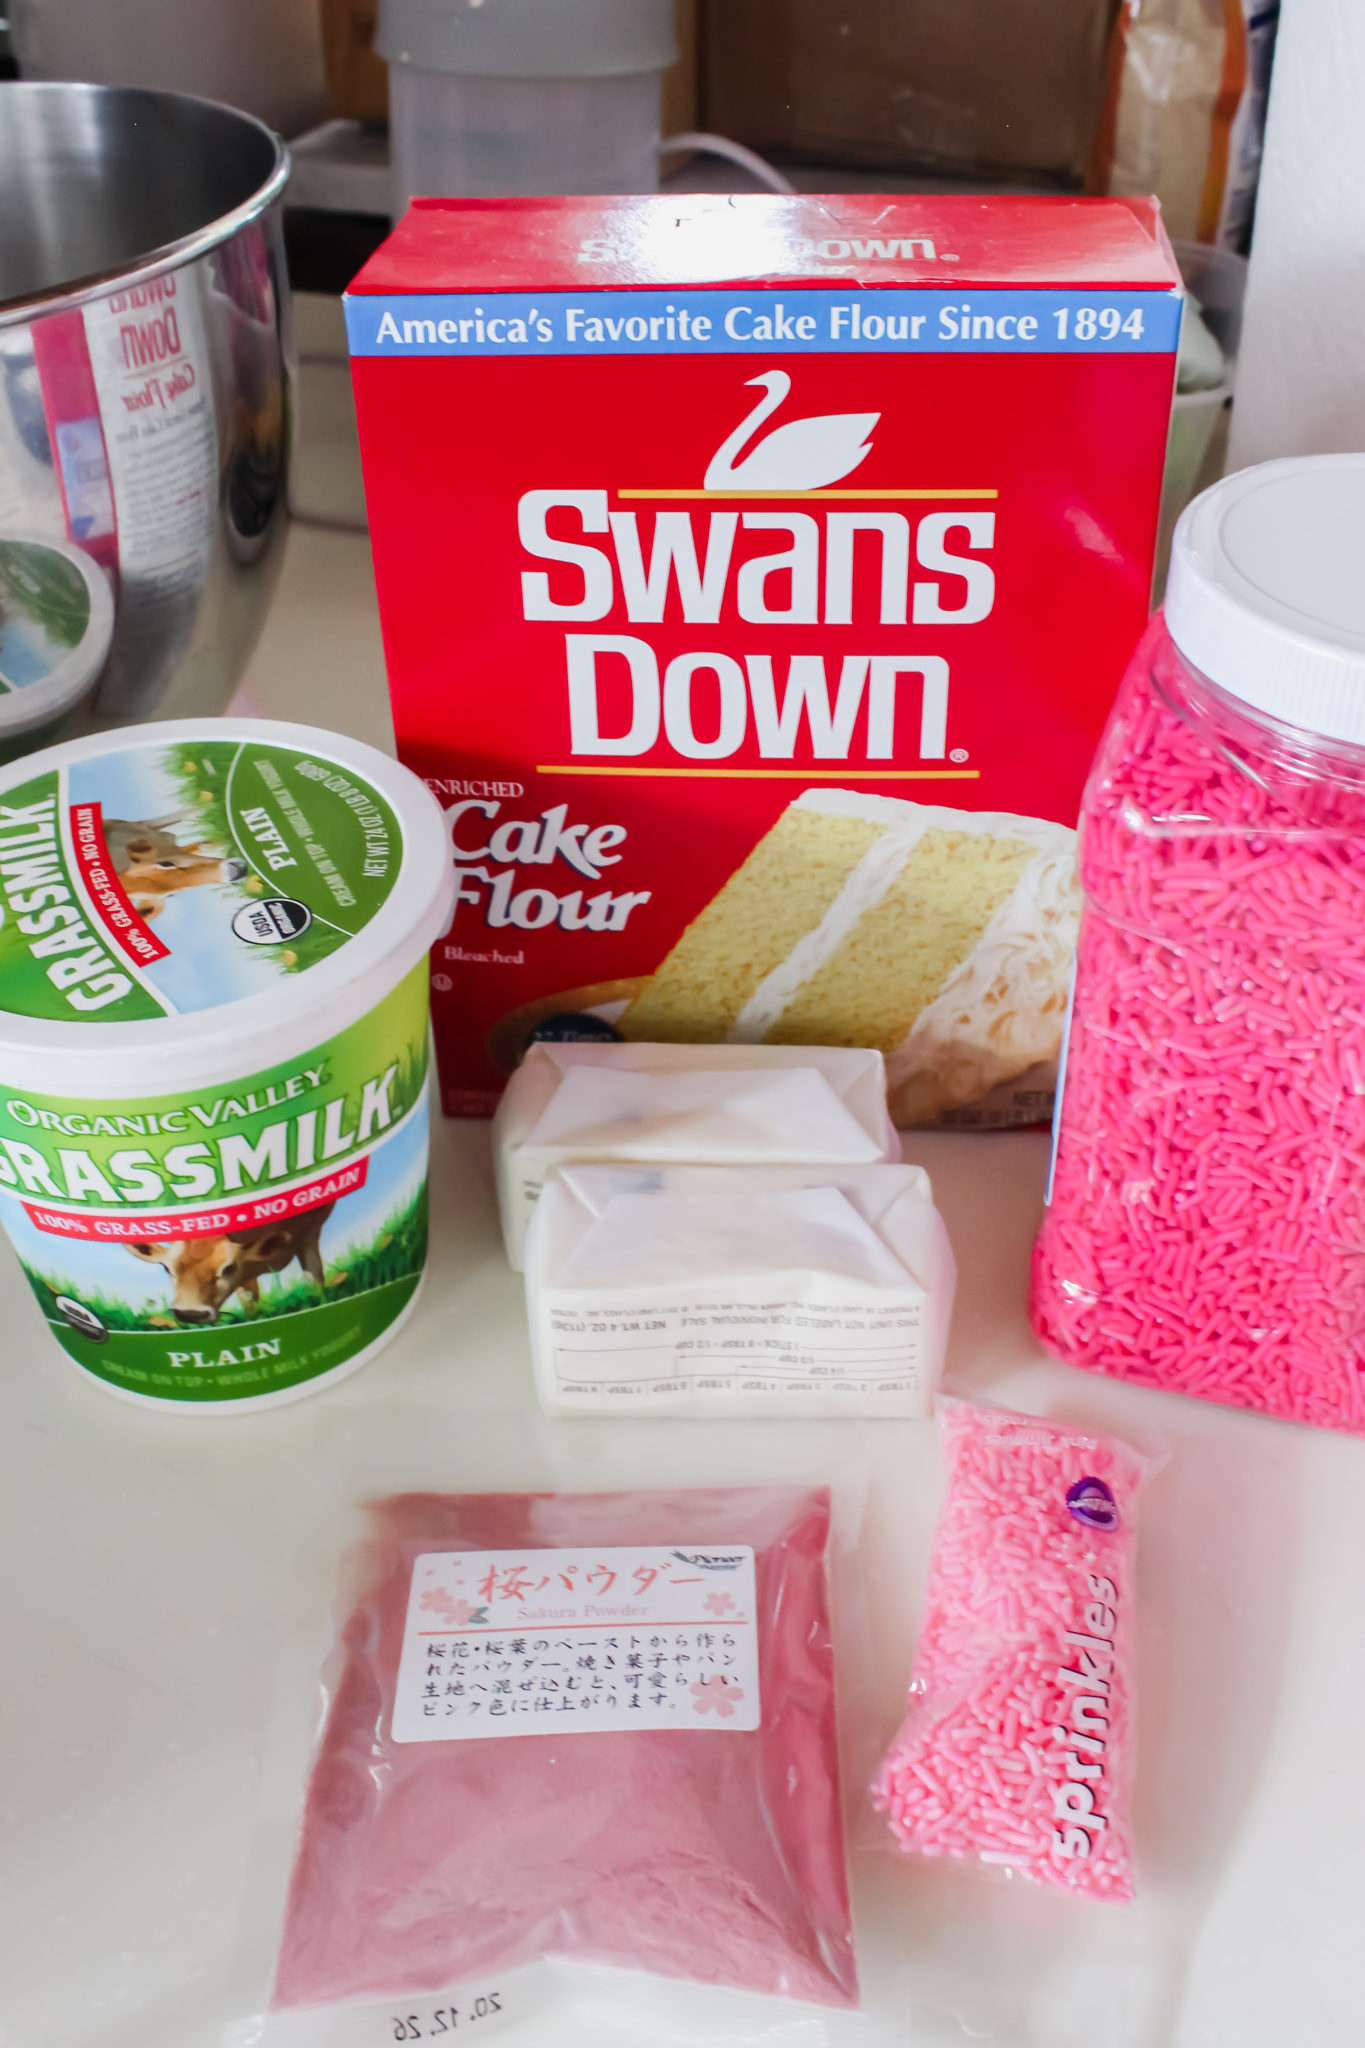
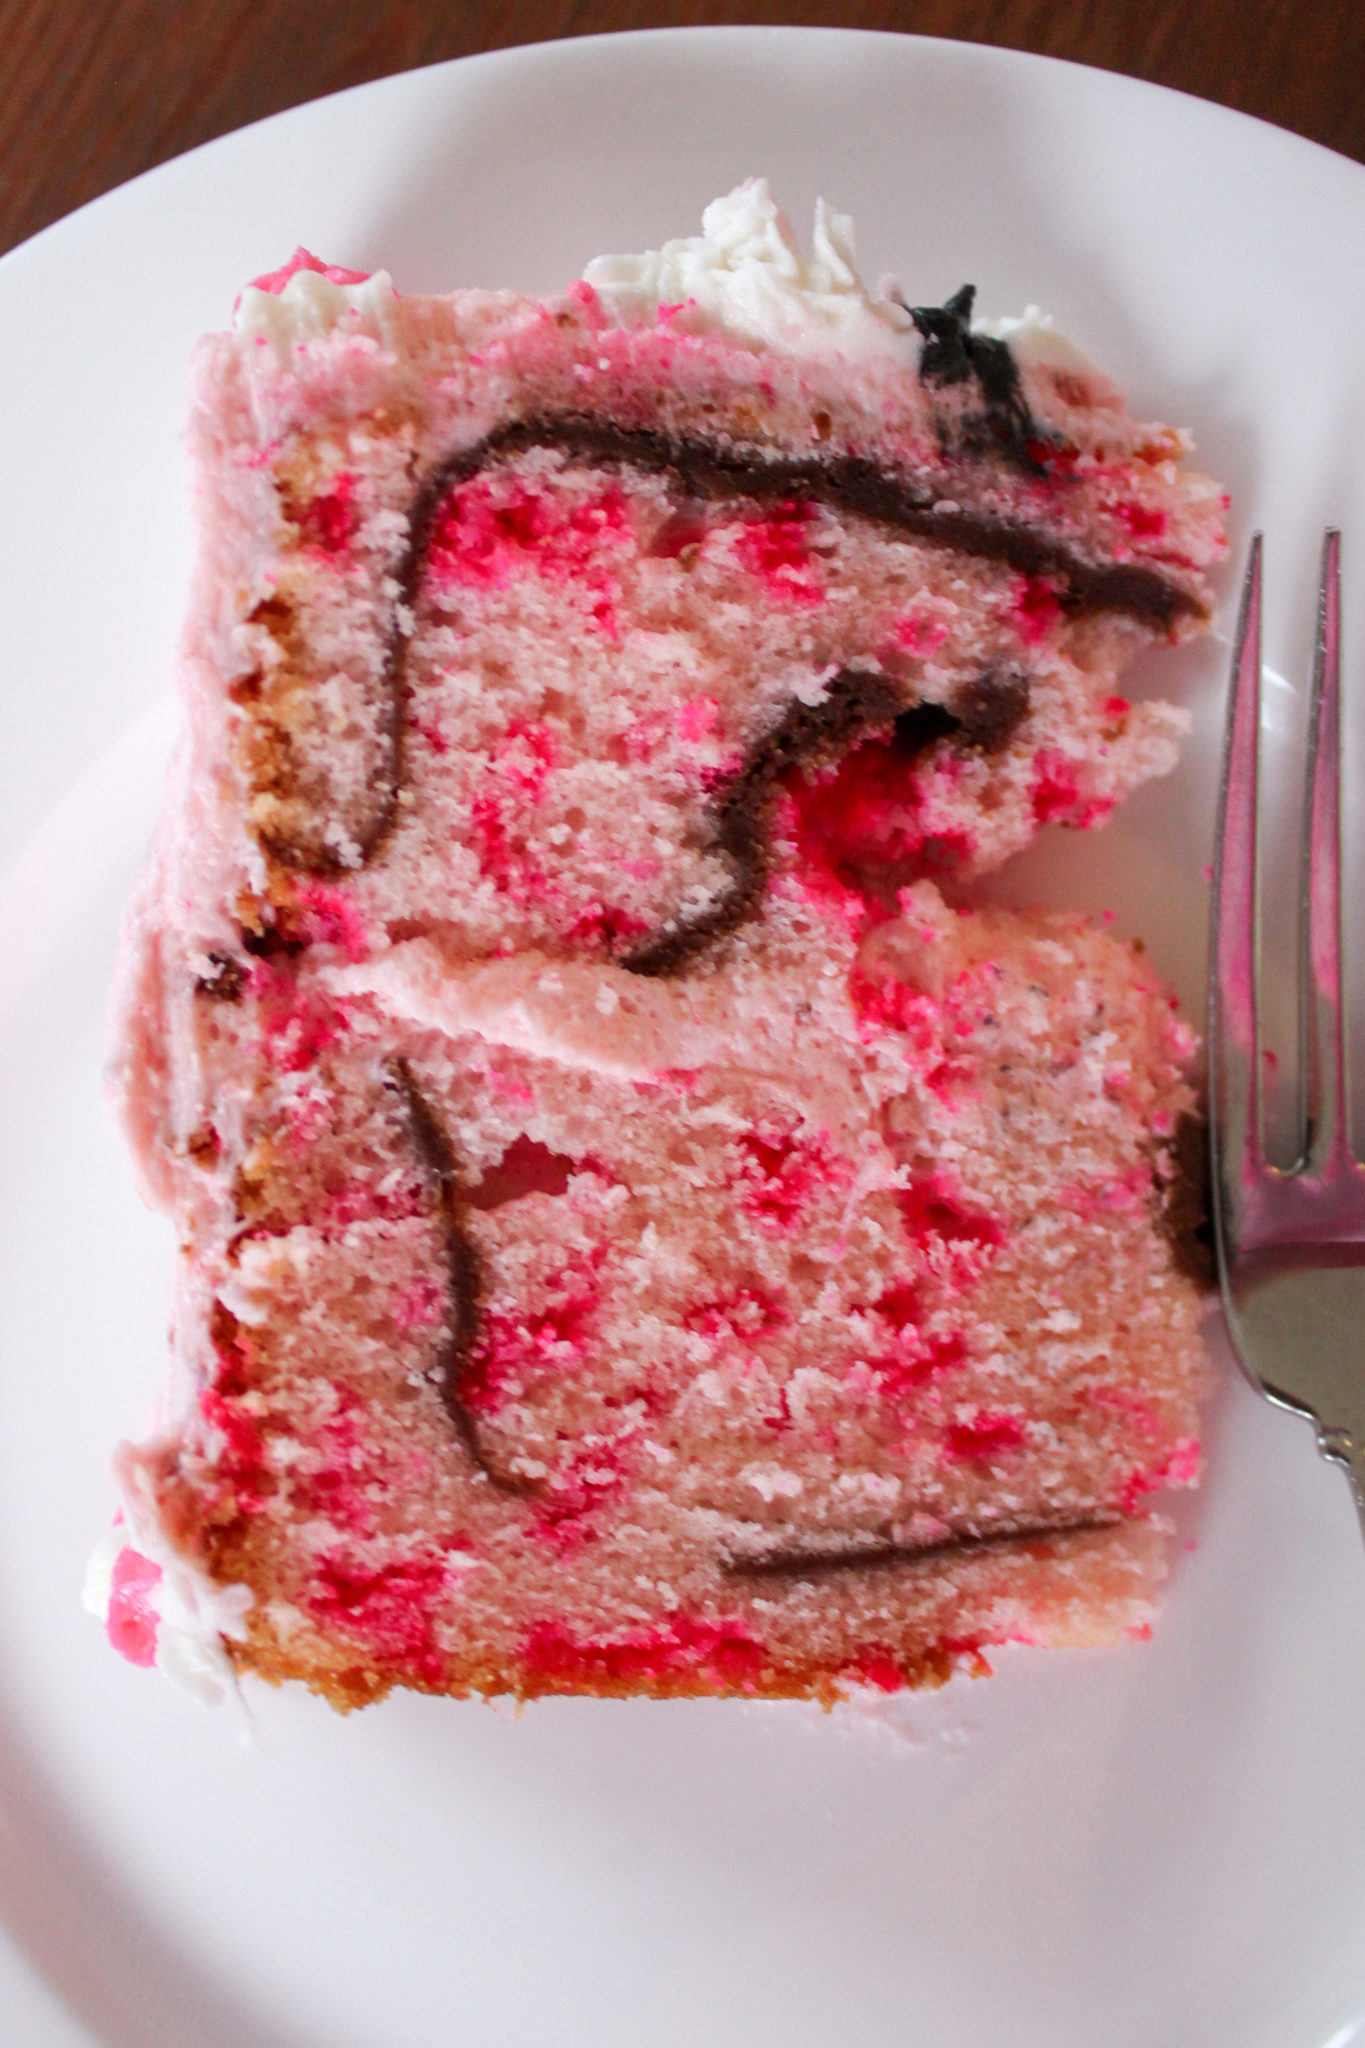
The inspiration and idea for the cake itself came from Buttermilk by Sam. Her cake and photos of it are absolutely gorgeous, and I recommend you check them out if you’re interested in making a cherry blossom cake. I used her method and her recipe for the chocolate part of the cake, but used my own recipe for the rest; mine has sakura powder in the cake and strawberry buttercream, because strawberries are Arabella and Hello Kitty’s favorite.
The keys to making the inside look like a cherry blossom tree are the chocolate cake batter (which I could have done a better job with) and pink sprinkles. I used two different shades of pink sprinkles, but one is definitely sufficient. The sakura powder is totally optional, and leaving it out will mean your pink sprinkles will stand out more.
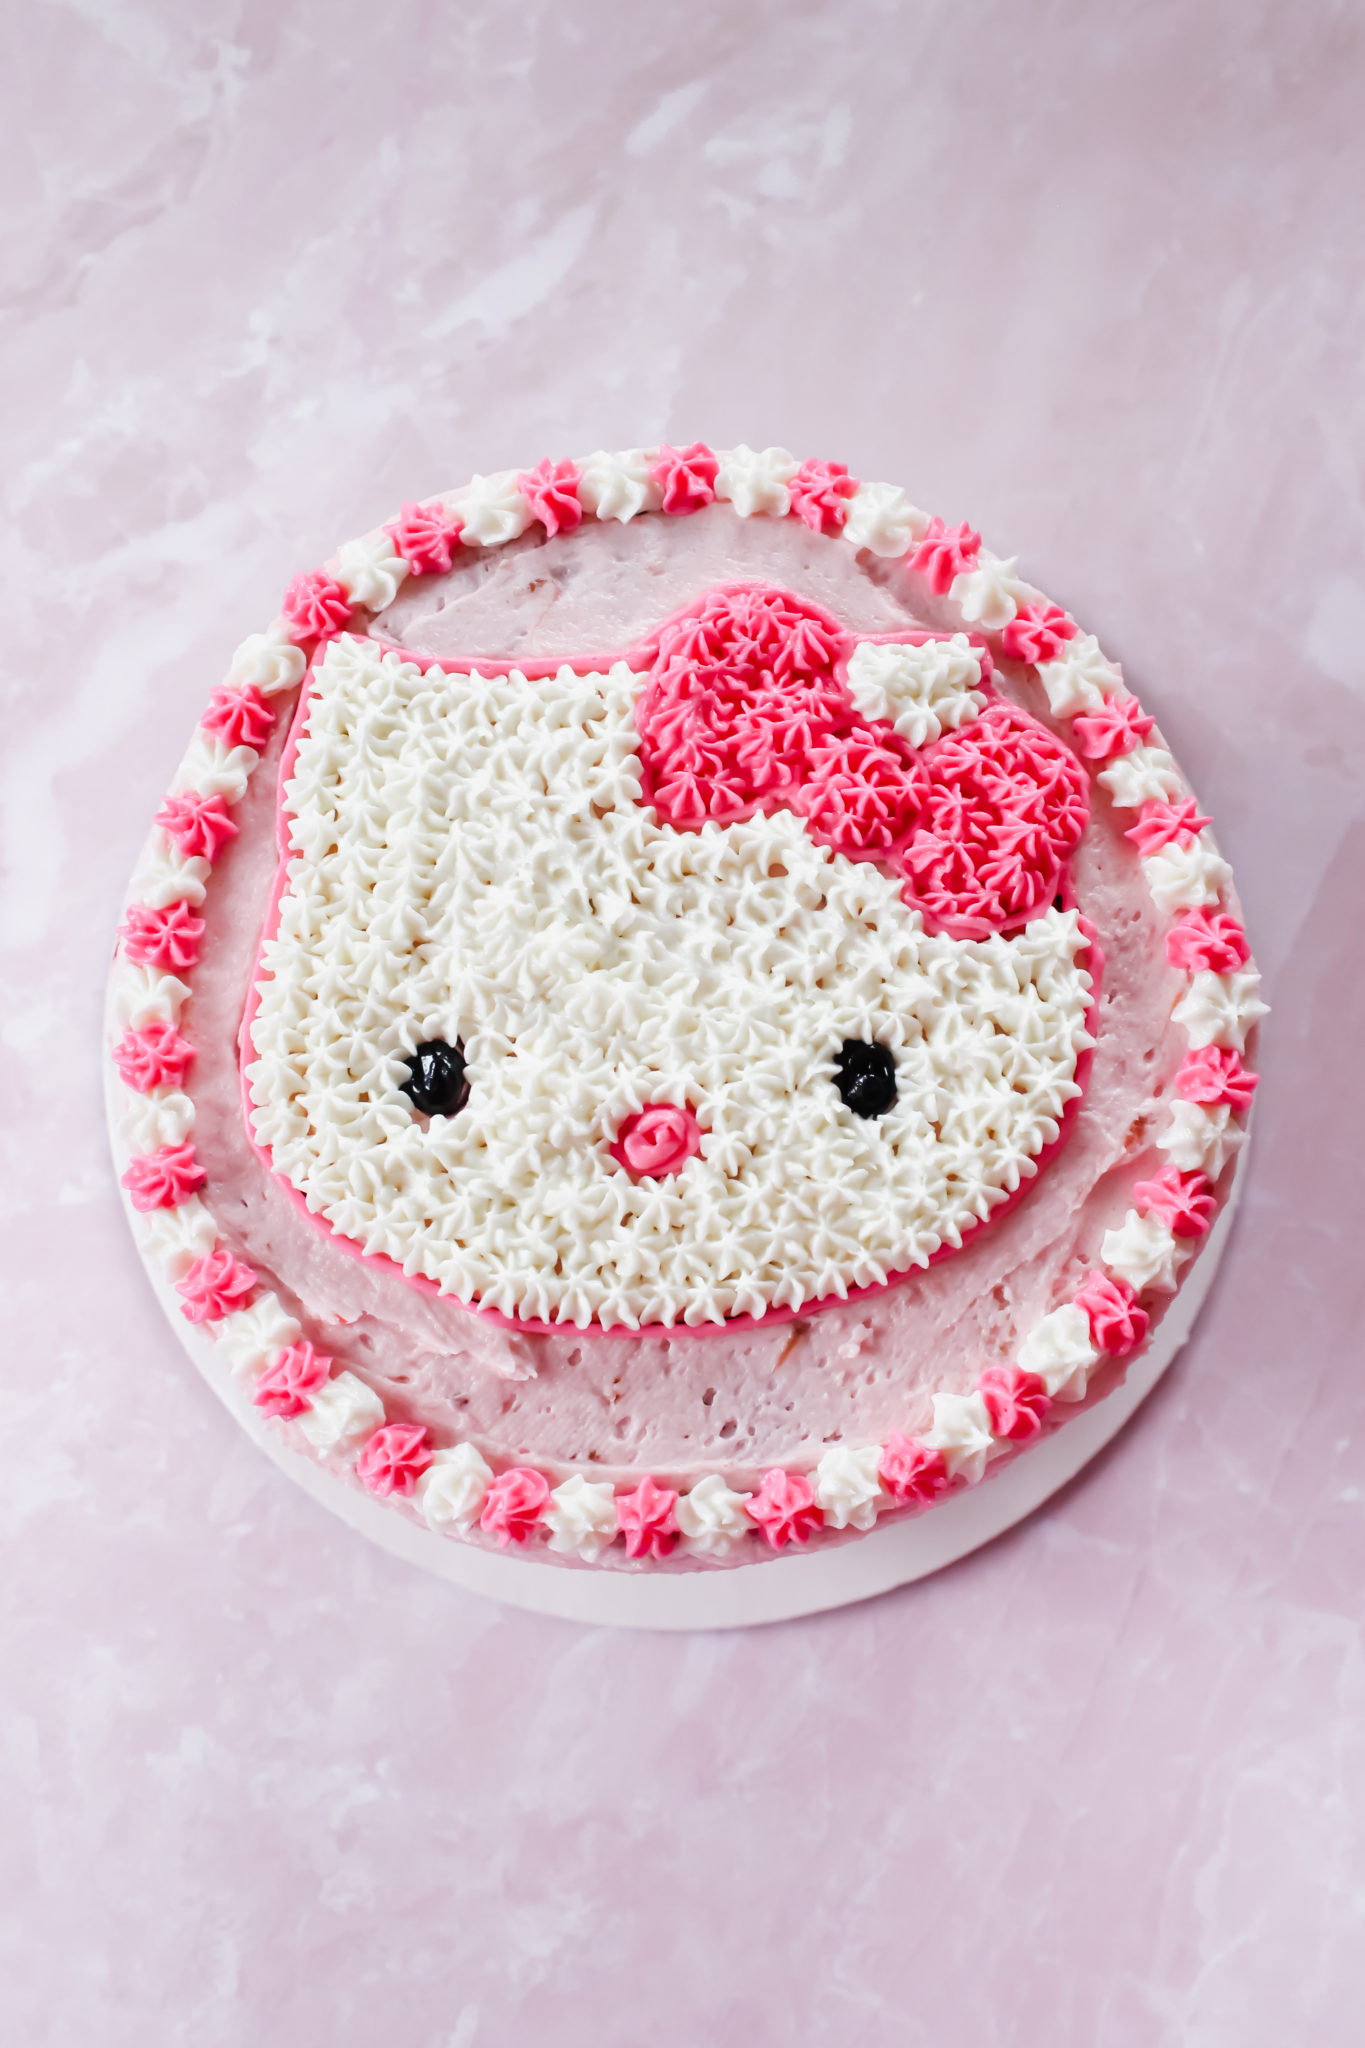
I was concerned about decorating the cake, but after looking in a Hello Kitty cookbook, I realized that using a star tip to pipe her face on top of the cake would be the easiest way. I have a plastic sandwich cutter that is shaped like Hello Kitty’s face, so I pressed that down lightly on the top of the frosted cake, then used the indent as an outline. It worked like a charm!
I did have some issues when baking this cake, because I made too much batter for the pans I was using. Then, because there was too much of the light pink batter, I didn’t put enough chocolate batter in. The cake did still look like cherry blossoms, but it’s not as obvious as Buttermilk by Sam’s. I have fixed the overflowing batter situation for the recipe below, but try to do a better job than I did at drizzling in the chocolate batter when you make yours!
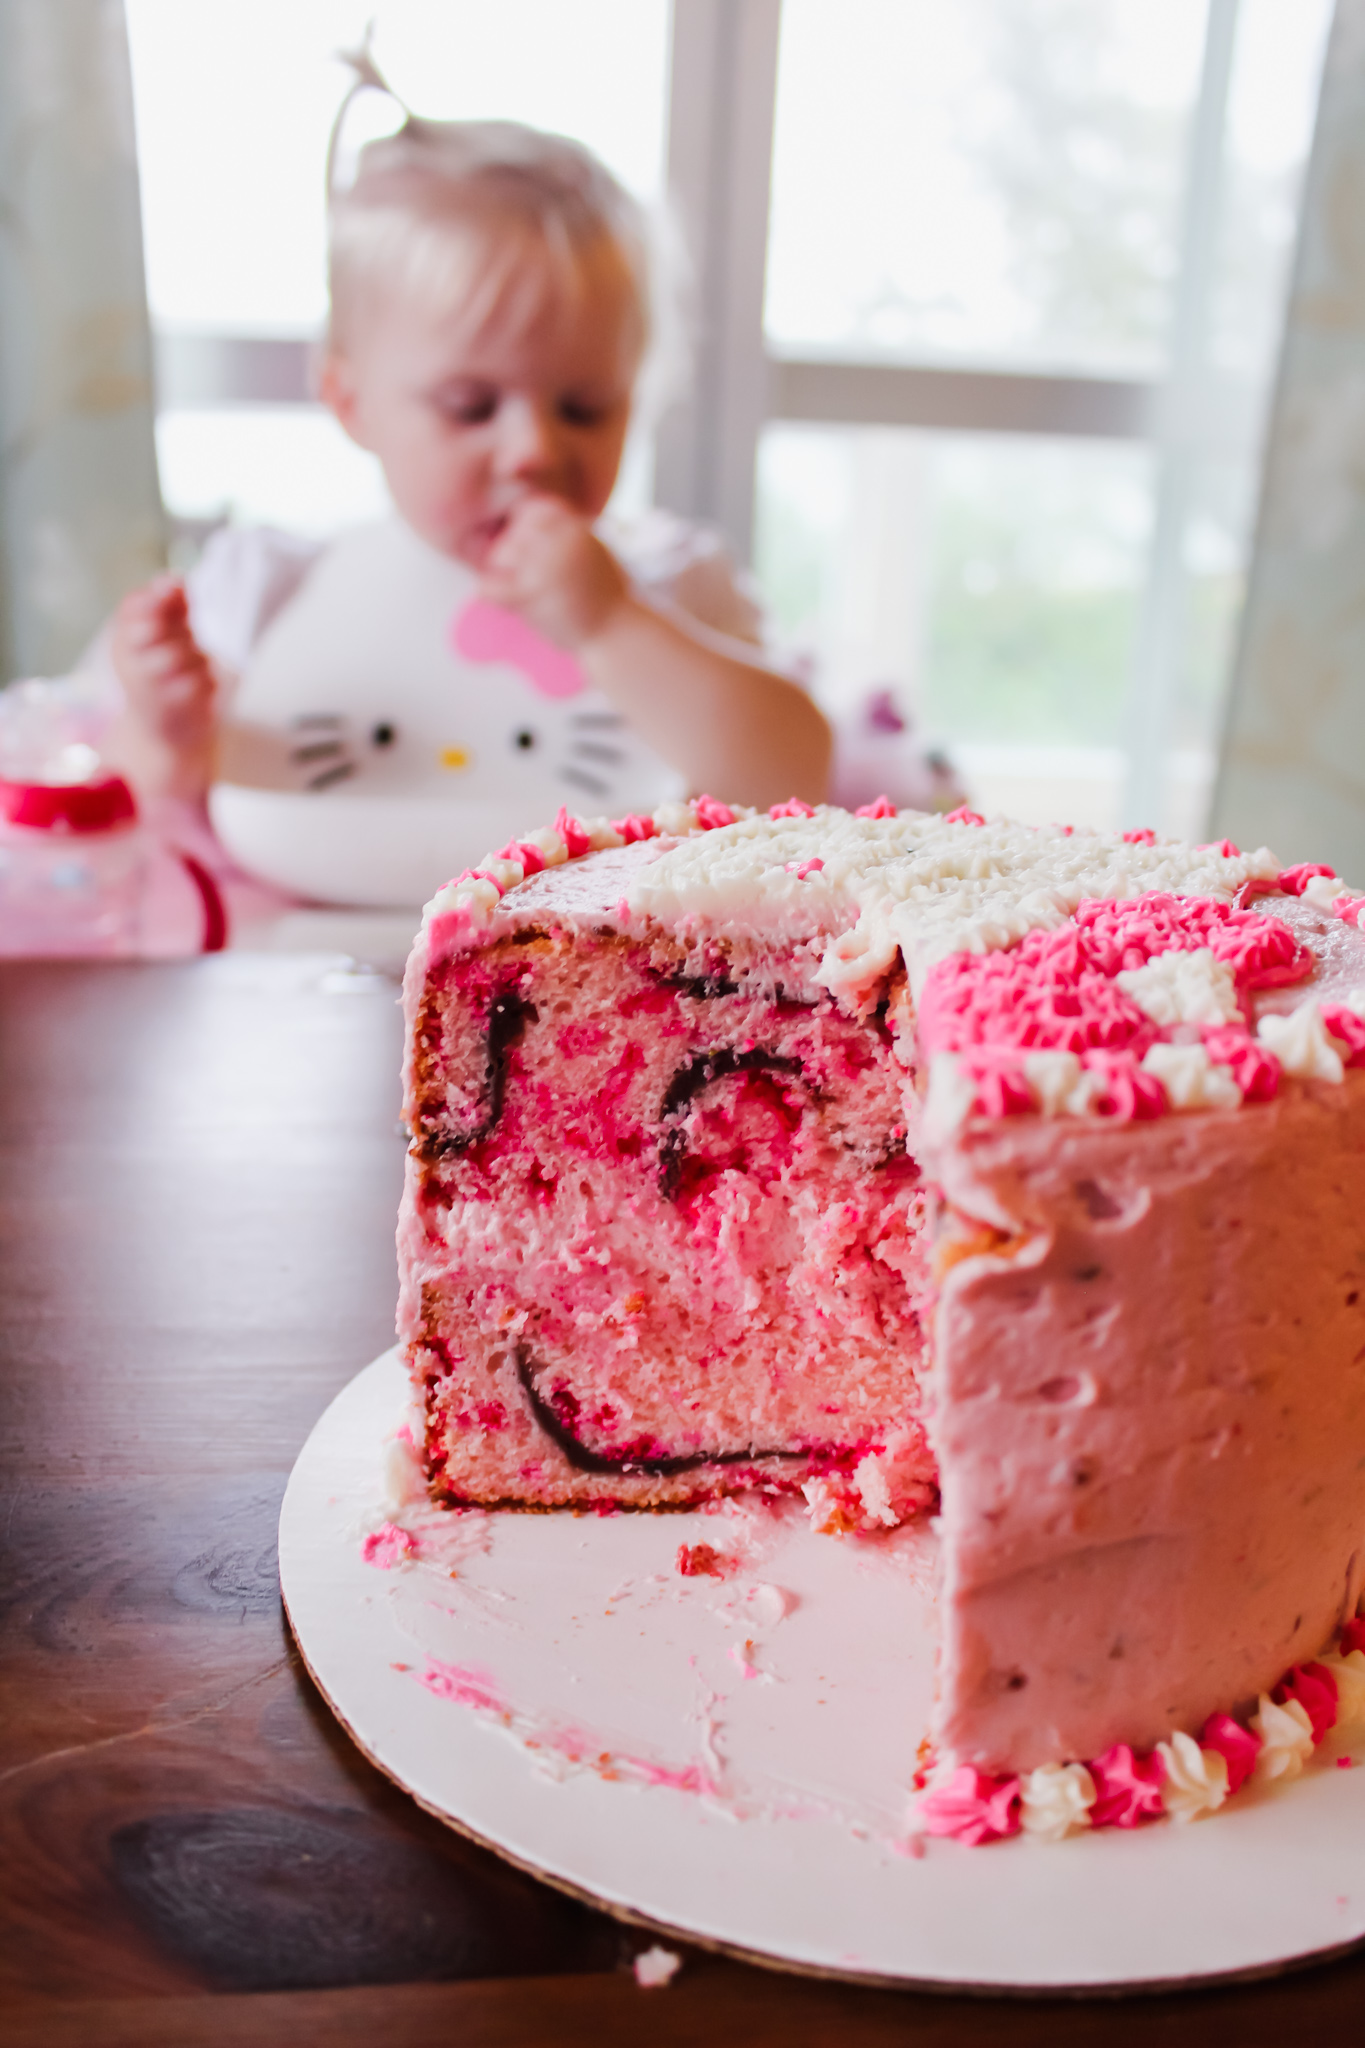
Of course, the most important thing is that Arabella liked her Hello Kitty cherry blossom cake. It was her birthday, after all! And she definitely did — after barely touching the smash cake for her birthday photos, she ate a whole piece of this!
Hello Kitty cherry blossom cake
Makes a 2- or 3-layer 6-inch round cake. For a larger cake, use this recipe for the main cake but add four tablespoons of sakura powder and eliminate the almond extract. You will not need to double the chocolate batter recipe.
Concept and chocolate batter adapted from Buttermilk by Sam. Sakura cake recipe adapted from King Arthur Flour.
Sakura cake
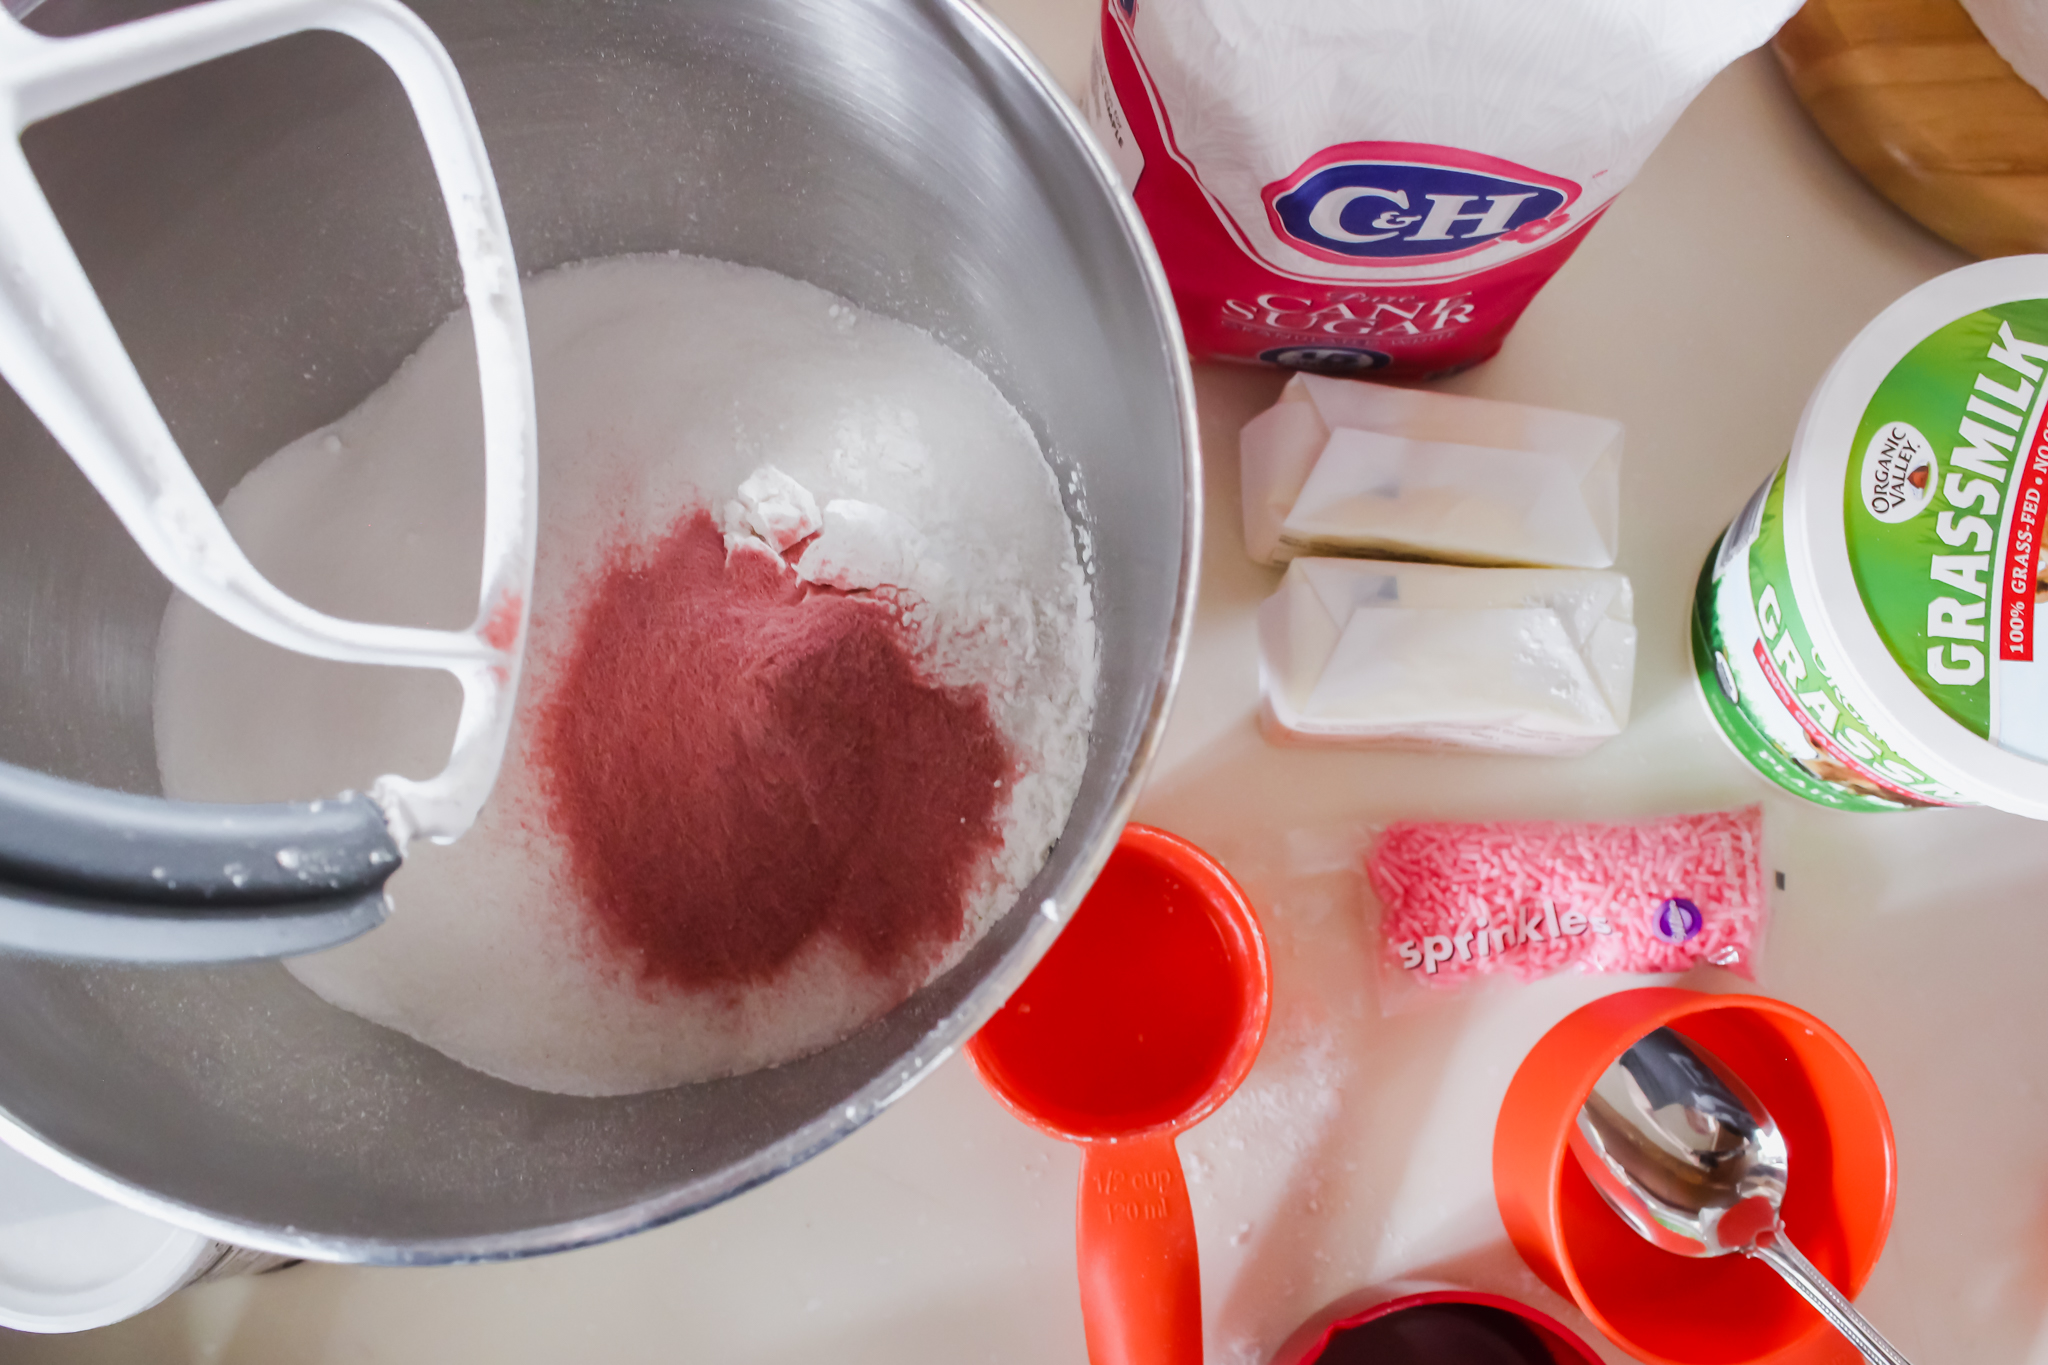
1 1/3 cups cake flour
3/4 cup granulated sugar
1/2 tablespoon baking powder
1/4 teaspoon salt
2 tablespoons sakura powder (optional, but you can order some here if you’d like)
6 tablespoons unsalted butter, at room temperature
1 large egg white and 1 whole large egg (save the unused egg white for the chocolate batter!)
1/2 cup full-fat yogurt or whole milk
1 teaspoon vanilla extract
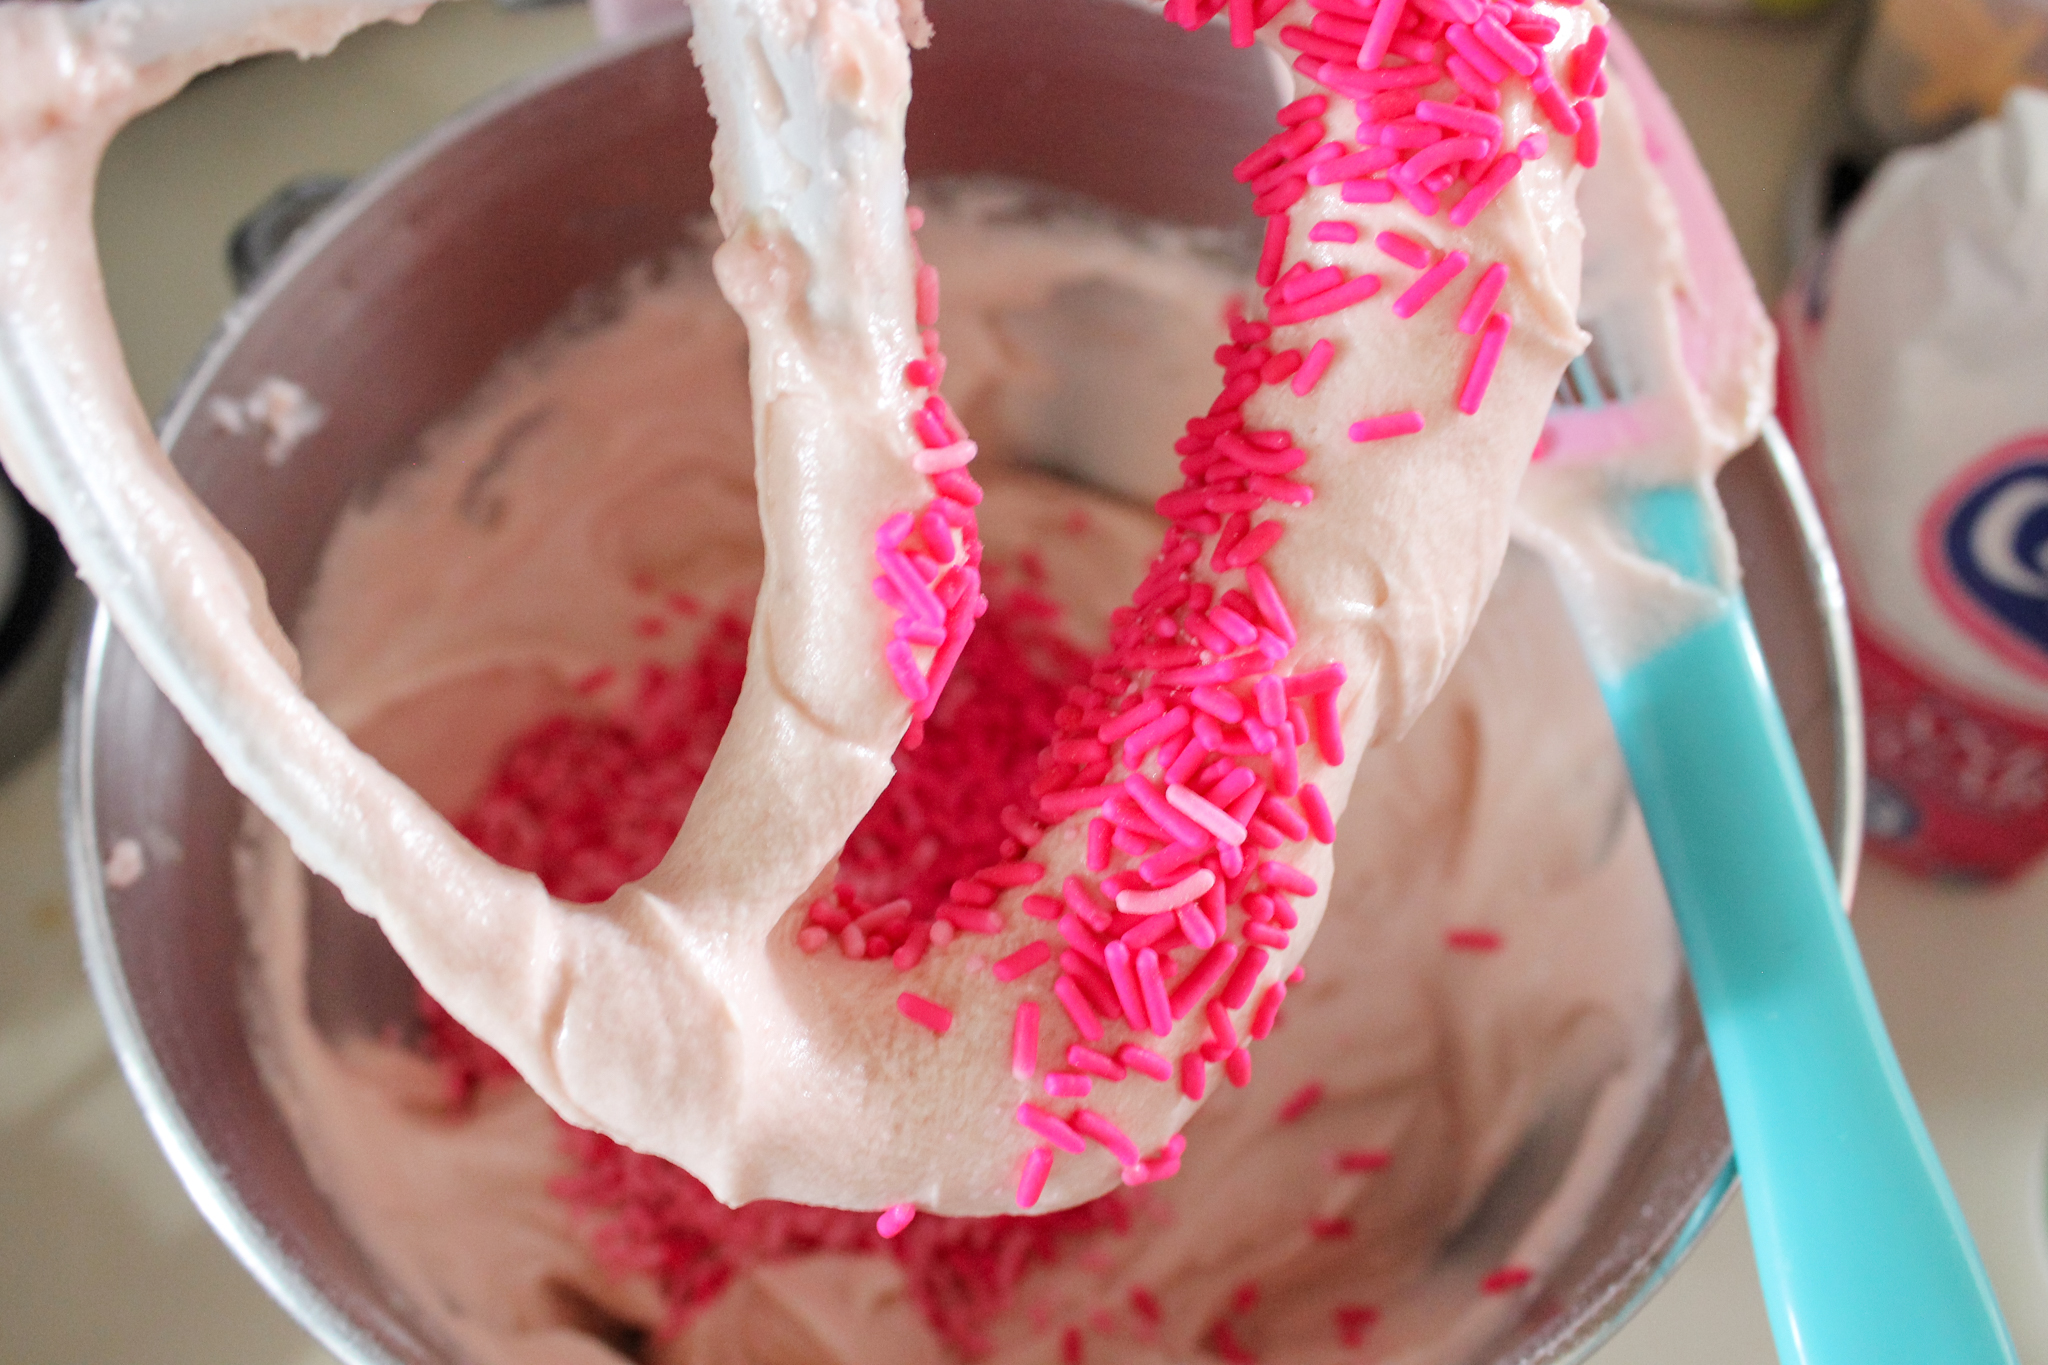
1/2 cup pink sprinkles
Preheat the oven to 350F and butter and flour two or three 6-inch round pans (if you have parchment paper, cut it to fit into the bottom of the pans. Then butter the pans, line them with the parchment, and butter that, too).
Place the cake flour, sugar, baking powder, salt and sakura powder to the bowl of a stand mixer or a large mixing bowl (if using a handheld electric mixer) and mix on slow speed to combine. Add the butter and beat until the mixture looks like wet sand or forms a paste.
Add the egg white and beat well to combine, then scrape the sides and bottom of the bowl with a spatula, add the whole egg and beat for a few minutes.
Stir the yogurt (or milk) together with the vanilla in the measuring cup, then add it to the batter slowly, about 1/3 at a time. Continue beating for about two minutes after all of the liquid is added, then scrape the sides and bottom of the bowl with a spatula, add the sprinkles, and mix to combine.
To bake the cake, make the chocolate batter and put it in a piping bag or plastic sandwich bag and cut a small hole in the corner. Pour just enough of the batter with pink sprinkles into the cake pans to cover the bottoms (you will probably have to smooth it with the spatula), then pipe some random wobbly (not straight) zig zags on top of it with the chocolate batter. Pour a bit more sprinkle batter on top, then zig zag some more chocolate on top.
If you still have sprinkle batter left and the pans are not full, spread that evenly on top again. (Don’t fill the pans all the way to the top, because the cake will rise and make a mess. This should not make too much sprinkle batter, particularly if you are making three layers, but if you’re worried, keep a little bit and use it to make a cupcake or two with the leftover chocolate batter).
Bake for 20-25 minutes, until the top center of the cake bounces bake when you poke it lightly with your finger. Cool in the pans on cooling racks for about 10 minutes, then turn out onto the cooling racks and allow to cool completely. Once the cake layers have cooled, use a serrated knife or a cake leveler to slice off a little bit of the rounded tops and make it flat (try not to cut too much, or you’ll remove the chocolate branches!).
Chocolate batter
2 tablespoons unsalted butter, at room temperature
1/4 cup granulated sugar
1 egg yolk
1/2 teaspoon vanilla
1/4 teaspoon baking soda
1/3 cup all-purpose flour
1 1/2 tablespoons unsweetened cocoa powder
1/2 cup buttermilk
Place the butter and sugar in a medium bowl and use an electric mixer or whisk to beat them together until fluffy. Add in the egg yolk, vanilla and baking soda and beat on high until well combined. Add the flour, cocoa and buttermilk and beat or stir just until combined.
Strawberry buttercream
3 sticks unsalted butter, at room temperature
2-2 1/2 pounds powdered sugar
2 teaspoons vanilla
3-4 heaping tablespoons strawberry jam
milk
Beat the butter in the bowl of a stand mixer, using the paddle attachment, until it’s nice and fluffy. Add 2 cups of powdered sugar and beat just to combine. Add another 2 cups and beat to combine. Then add 2 more cups and beat to combine. Add the vanilla 2 teaspoons of milk and beat, then taste the frosting. If it tastes sweet enough, beat it at high speed for a few minutes, until light and fluffy. If not, continue adding powdered sugar a cup or so at at time until it tastes sweet, then beat at high speed until light and fluffy. Remove about a third of it and set aside for decorating the cake.
Now, add three heaping tablespoons of strawberry jam and beat to combine. Taste the frosting and add another tablespoon or two of strawberry jam if you want a stronger strawberry flavor. Add additional milk a tablespoon at a time if needed to make the frosting a more spreadable consistency, or add powdered sugar a half cup at a time if the frosting is too runny.
To assemble and decorate the cake:
You’ll need a cake plate or cake circle, the baked cake layers, all of the frosting, pink gel food coloring, two piping bags with couplers and small open star tips (I used Wilton #18), one small round tip (I used Wilton #3) and some black decorating frosting or gel (I would recommend just buying this already made). It is also much easier if you have a Hello Kitty cookie cutter, stencil, or sandwich cutter.
Place one cake layer on a cake plate or cake circle, cut side down, and spread a generous layer of strawberry frosting on top. Place the second layer on top, also cut side down, and cover the cake in a thin layer of frosting, filling in any gaps between the layers. Put the cake in the refrigerator for 15-20 minutes, then remove and cover the cake in another layer of strawberry frosting, making sure to smooth the frosting as much as possible.
Put the cake back in the refrigerator while you separate the reserved plain frosting into two roughly equal parts. Use pink food coloring gel to tint whichever of the bowls of frosting has a little less. Use a spatula to put the frosting in two separate bags fitted with small star tips.
Take the cake out of the refrigerator and press the sandwich cutter or cookie cutter down lightly in the center of the top of the cake to give yourself an outline to follow. If using a stencil, use a toothpick to make the outline.
Using the white frosting, pipe stars all around the edge of Kitty’s face and the edges of her bow. Outline her eyes and nose. Then fill in the rest of her face with white stars, all very close together so no strawberry frosting is showing. Next, use the pink frosting to outline and fill in Kitty’s bow.
Now, pipe stars all around the top and bottom edges of the cake, alternating between pink and white (I actually usually do one color all the way around, then fill in the spaces with the other color, but you can do it whichever way you choose).
Once that is done, change the tip on the bag of pink frosting to the small round tip. Use the pink frosting to fill in Kitty’s nose and outline her face. Finally, use the black decorating icing to fill in Kitty’s eyes.
Store cake in the refrigerator until 20-30 minutes before serving.
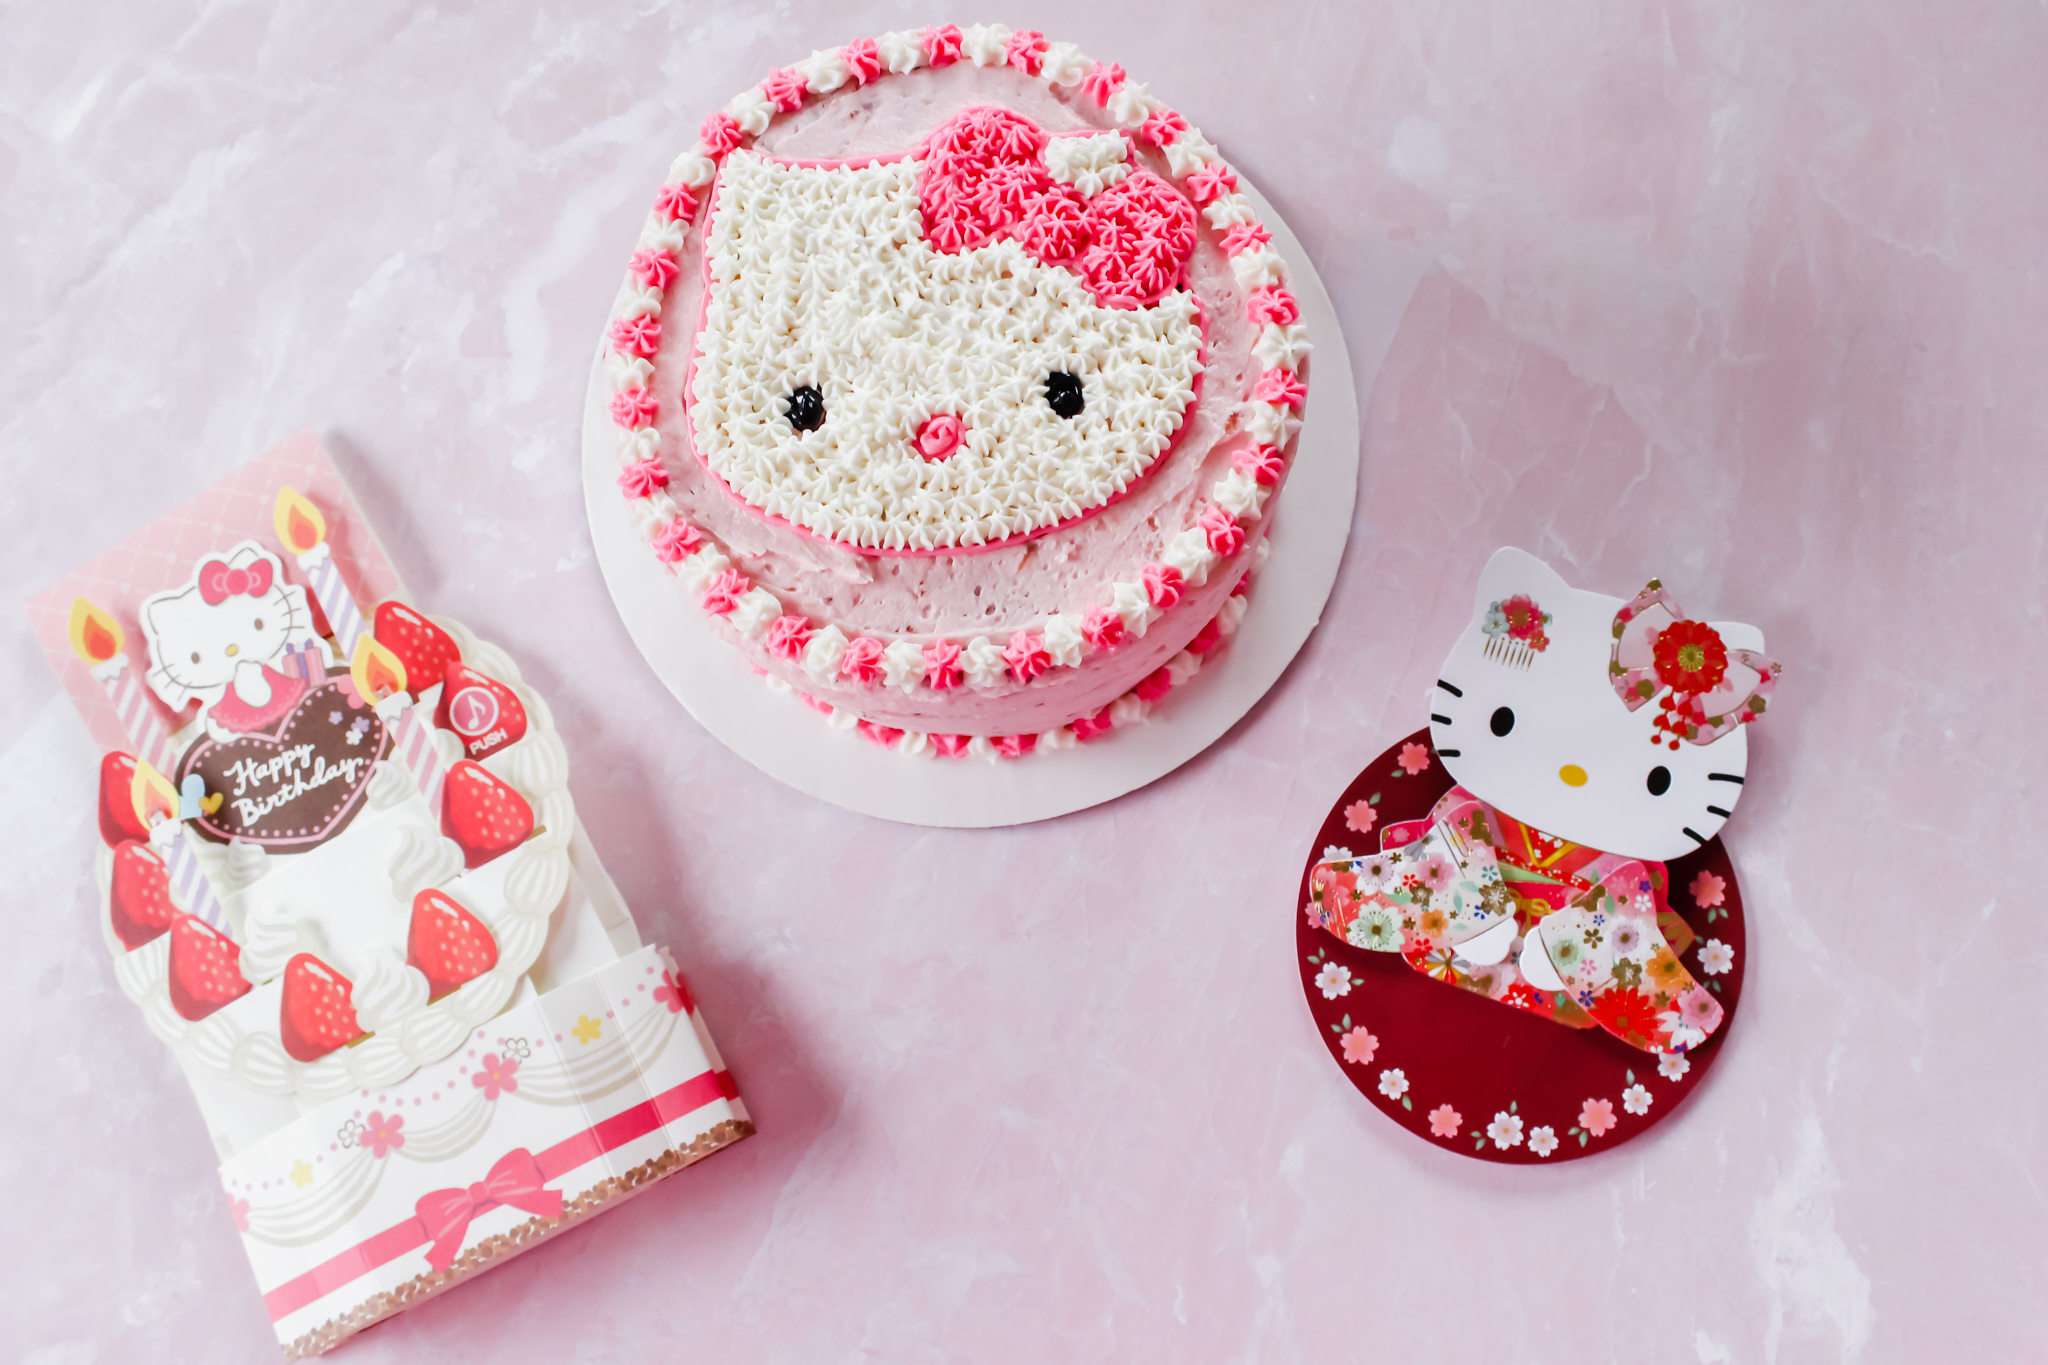
Arabella’s personalized Hello Kitty birthday outfit and tutu is from Baby Decore Boutique on Etsy. Her bib and the cake topper are from Amazon. Please note that many of the links in this post are affiliate links.