Last year, I made myself a unicorn cake for my birthday. This year, I wanted something a little different. I thought about baking a hummingbird cake (one of my faves) or trying a new flavor… but then I realized that the perfect cake for a red-headed aquaholic like me was a mermaid cake. An ombre mermaid birthday cake.
I used my go-to white cake recipe, and I would recommend you do the same, but you can really use any white cake recipe you wish. One that doesn’t contain any egg yolks will be a bit less teal and more blue, which certainly isn’t a bad thing, but you can always add a drop of teal or green food coloring gel if you’d like.
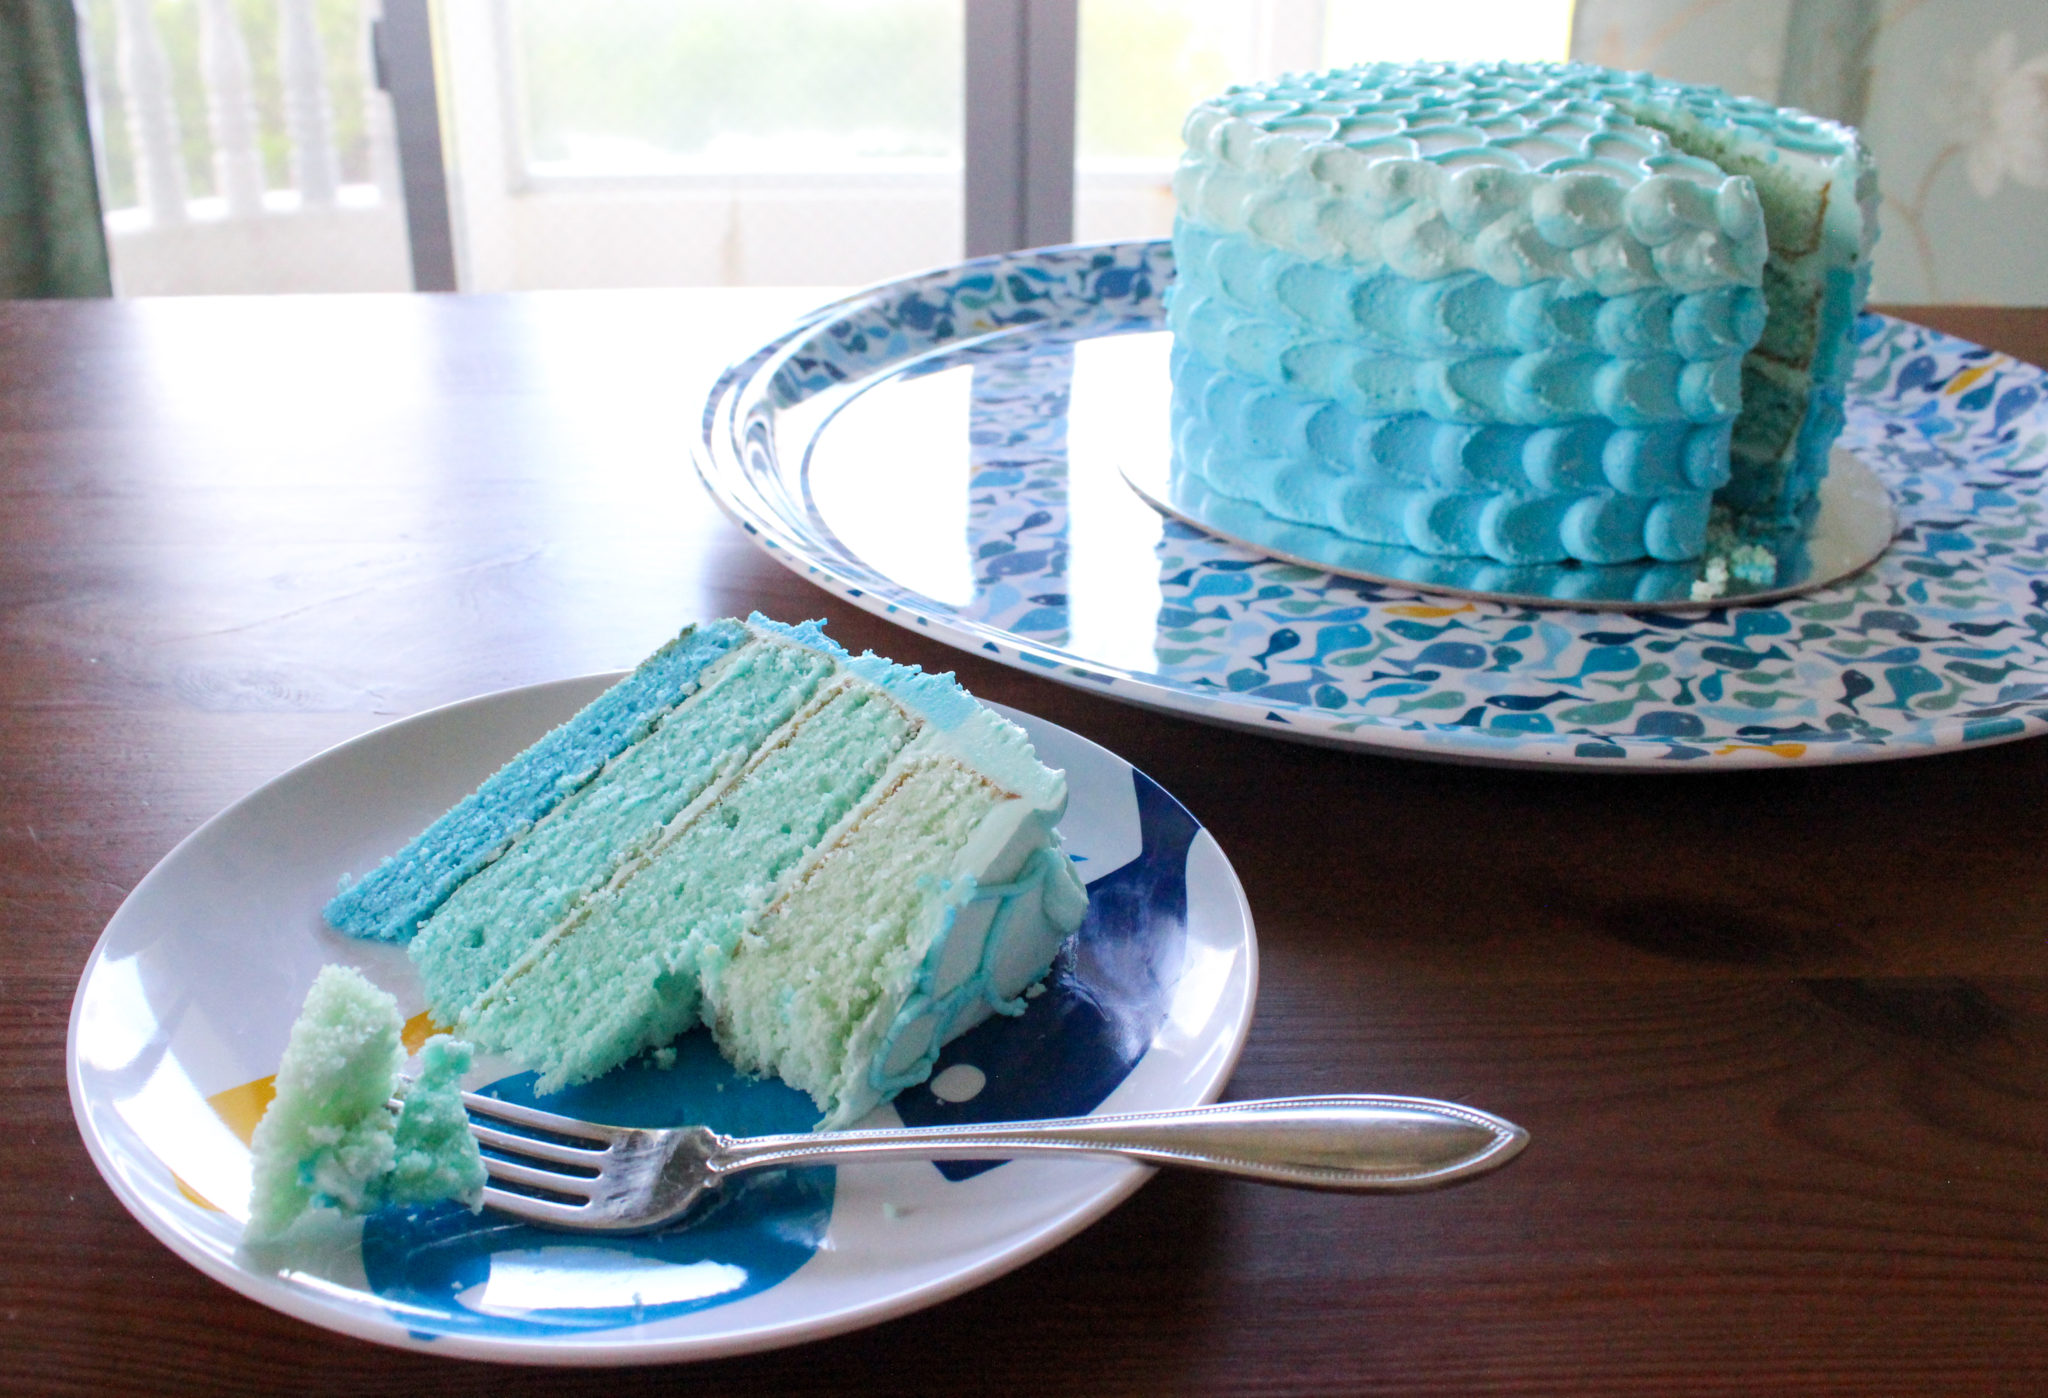
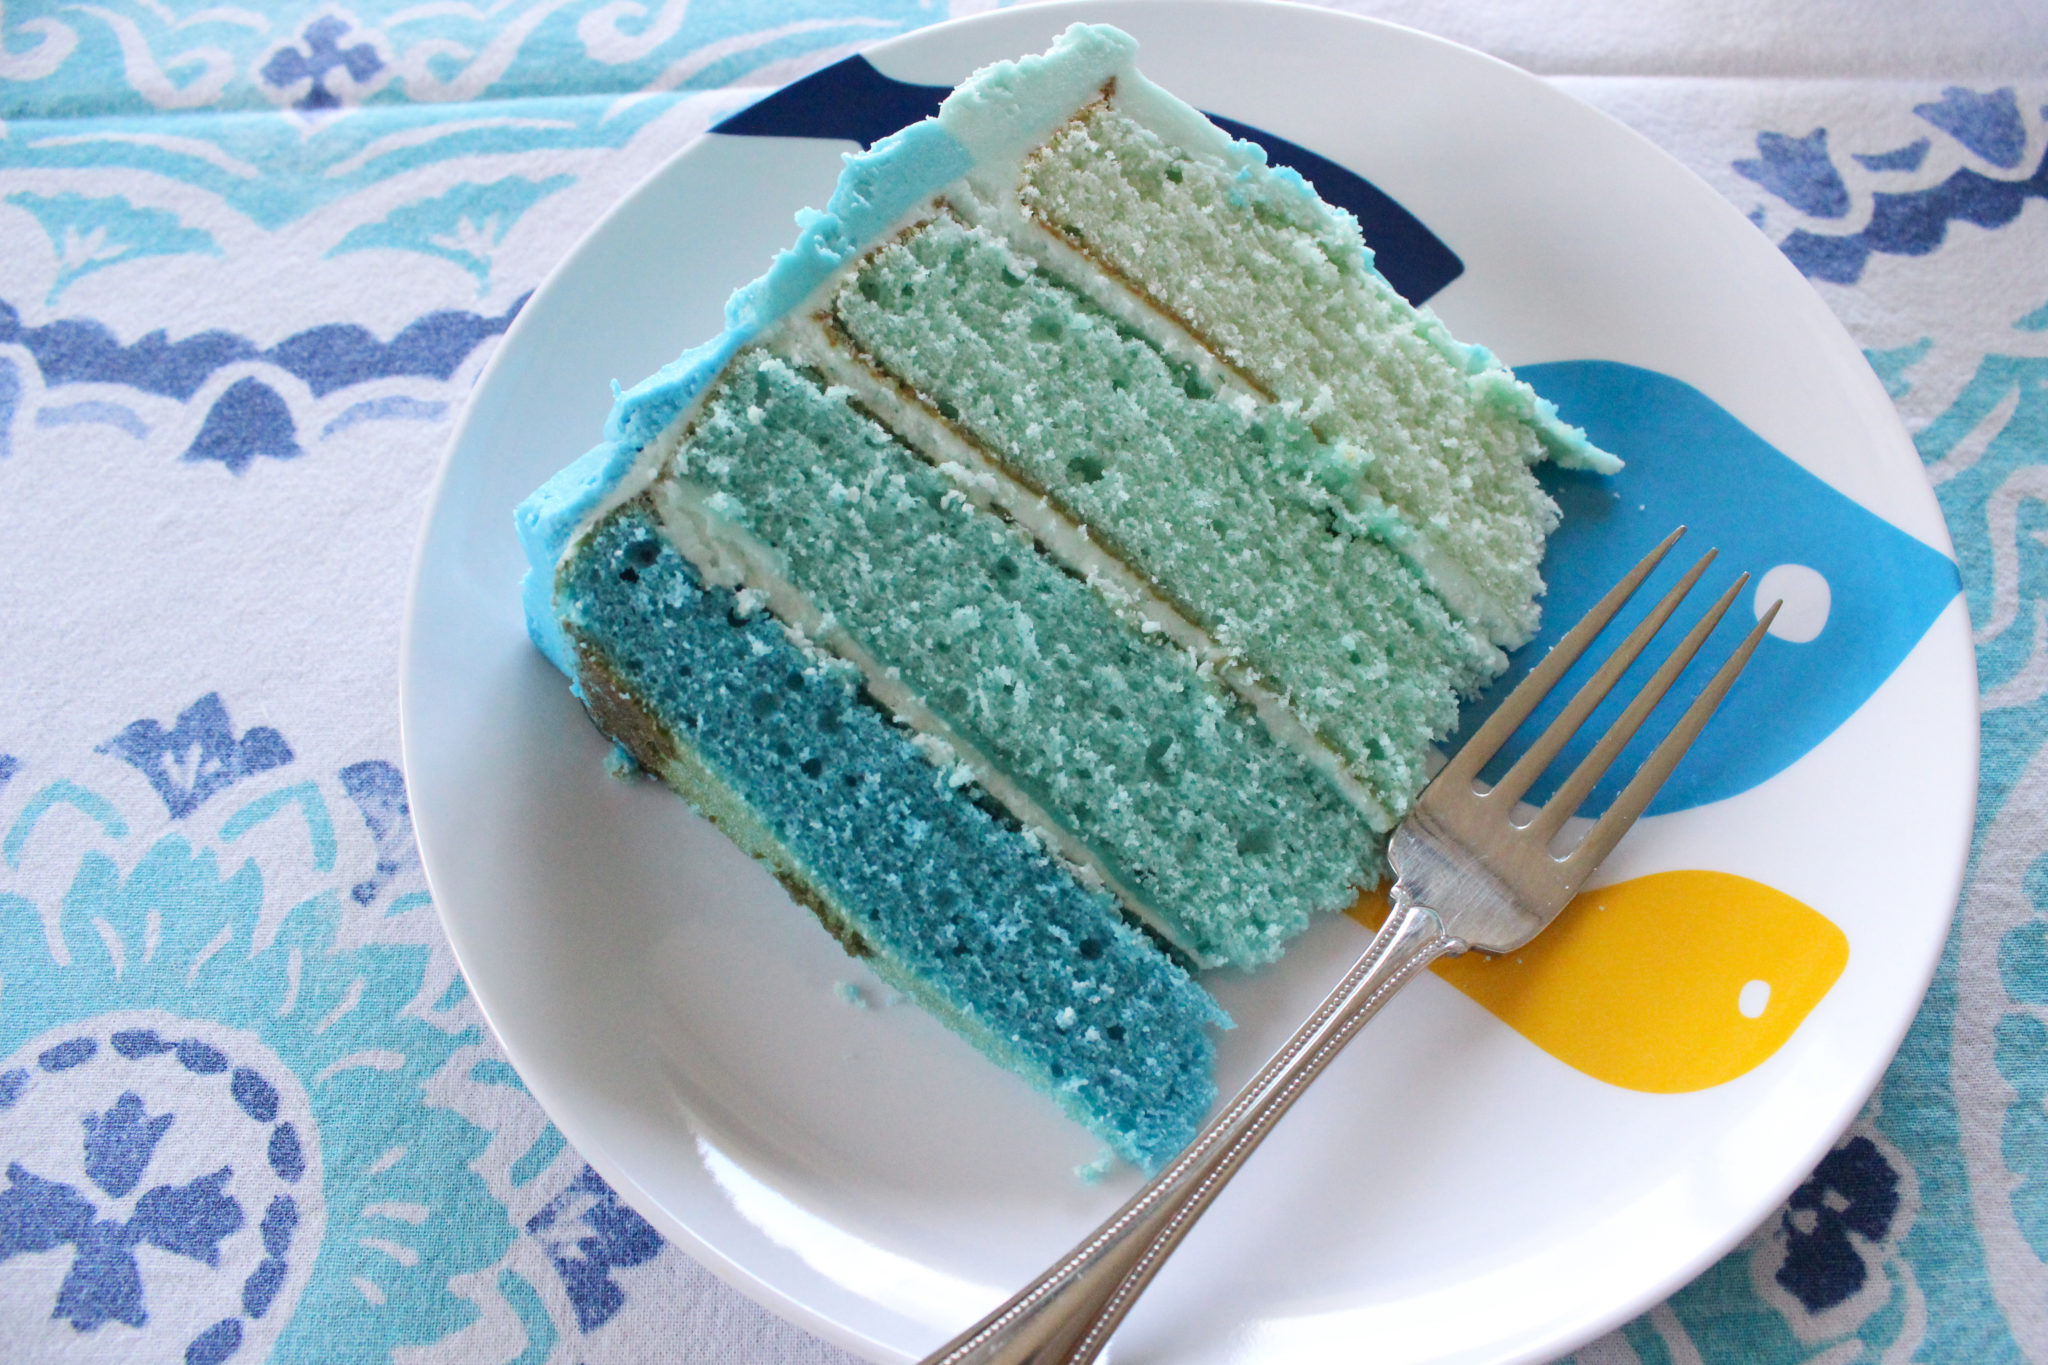
Making an ombre cake is one of those things that looks kind of complicated but really isn’t. However, if you decide to make more than three or four layers, be careful that you don’t mix up the order of the cake layers. Trust me, those middle layers can get confusing once baked.
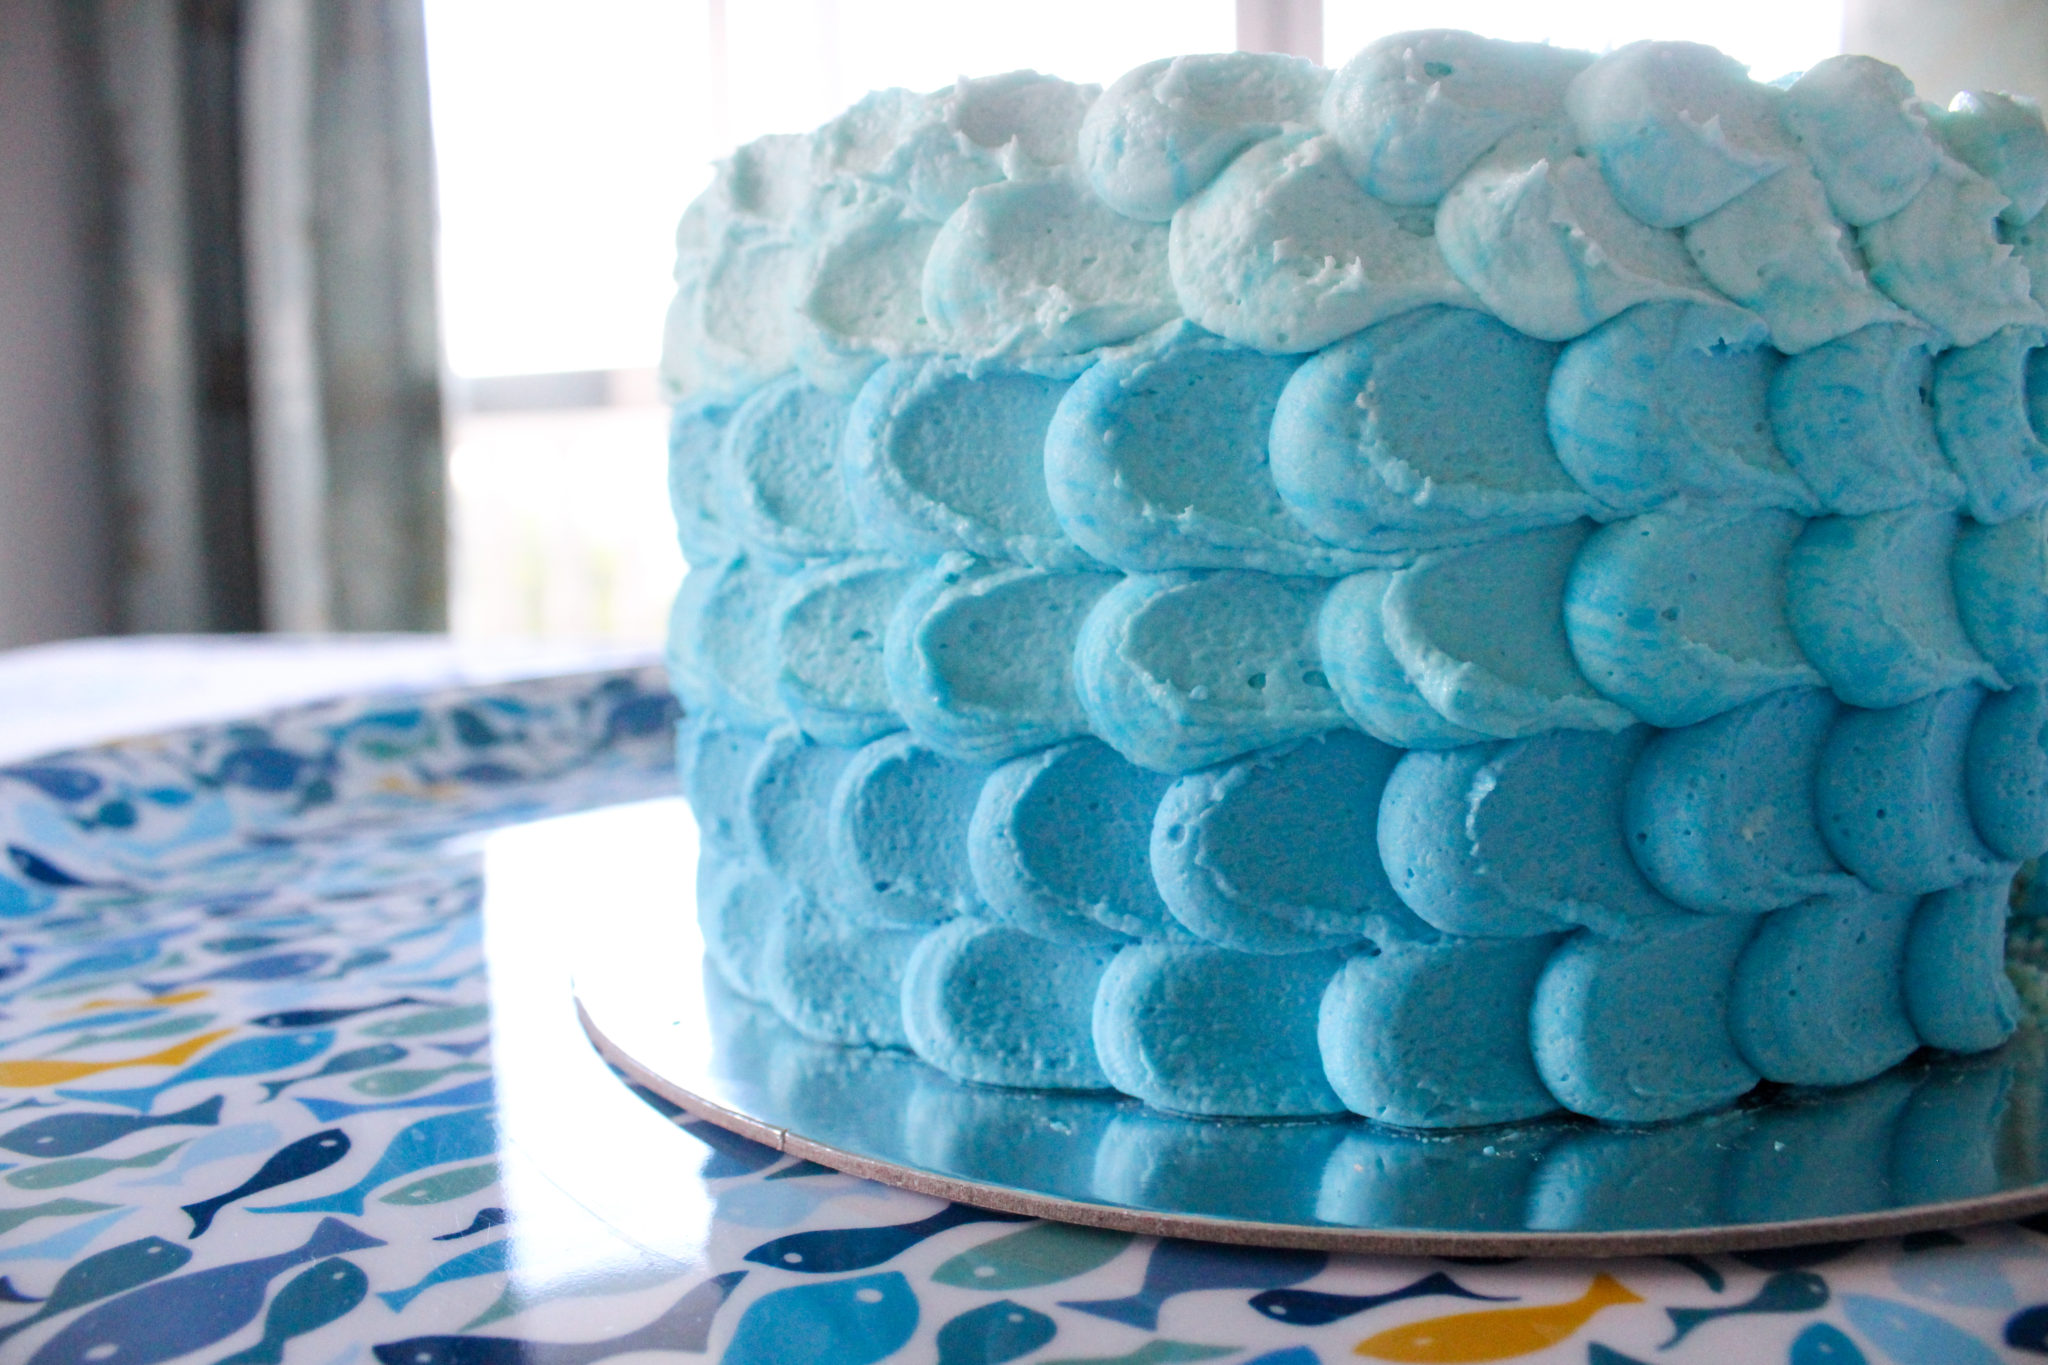
I put the darkest layer on the bottom to make it more like the ocean — the darker the blue, the deeper the water.
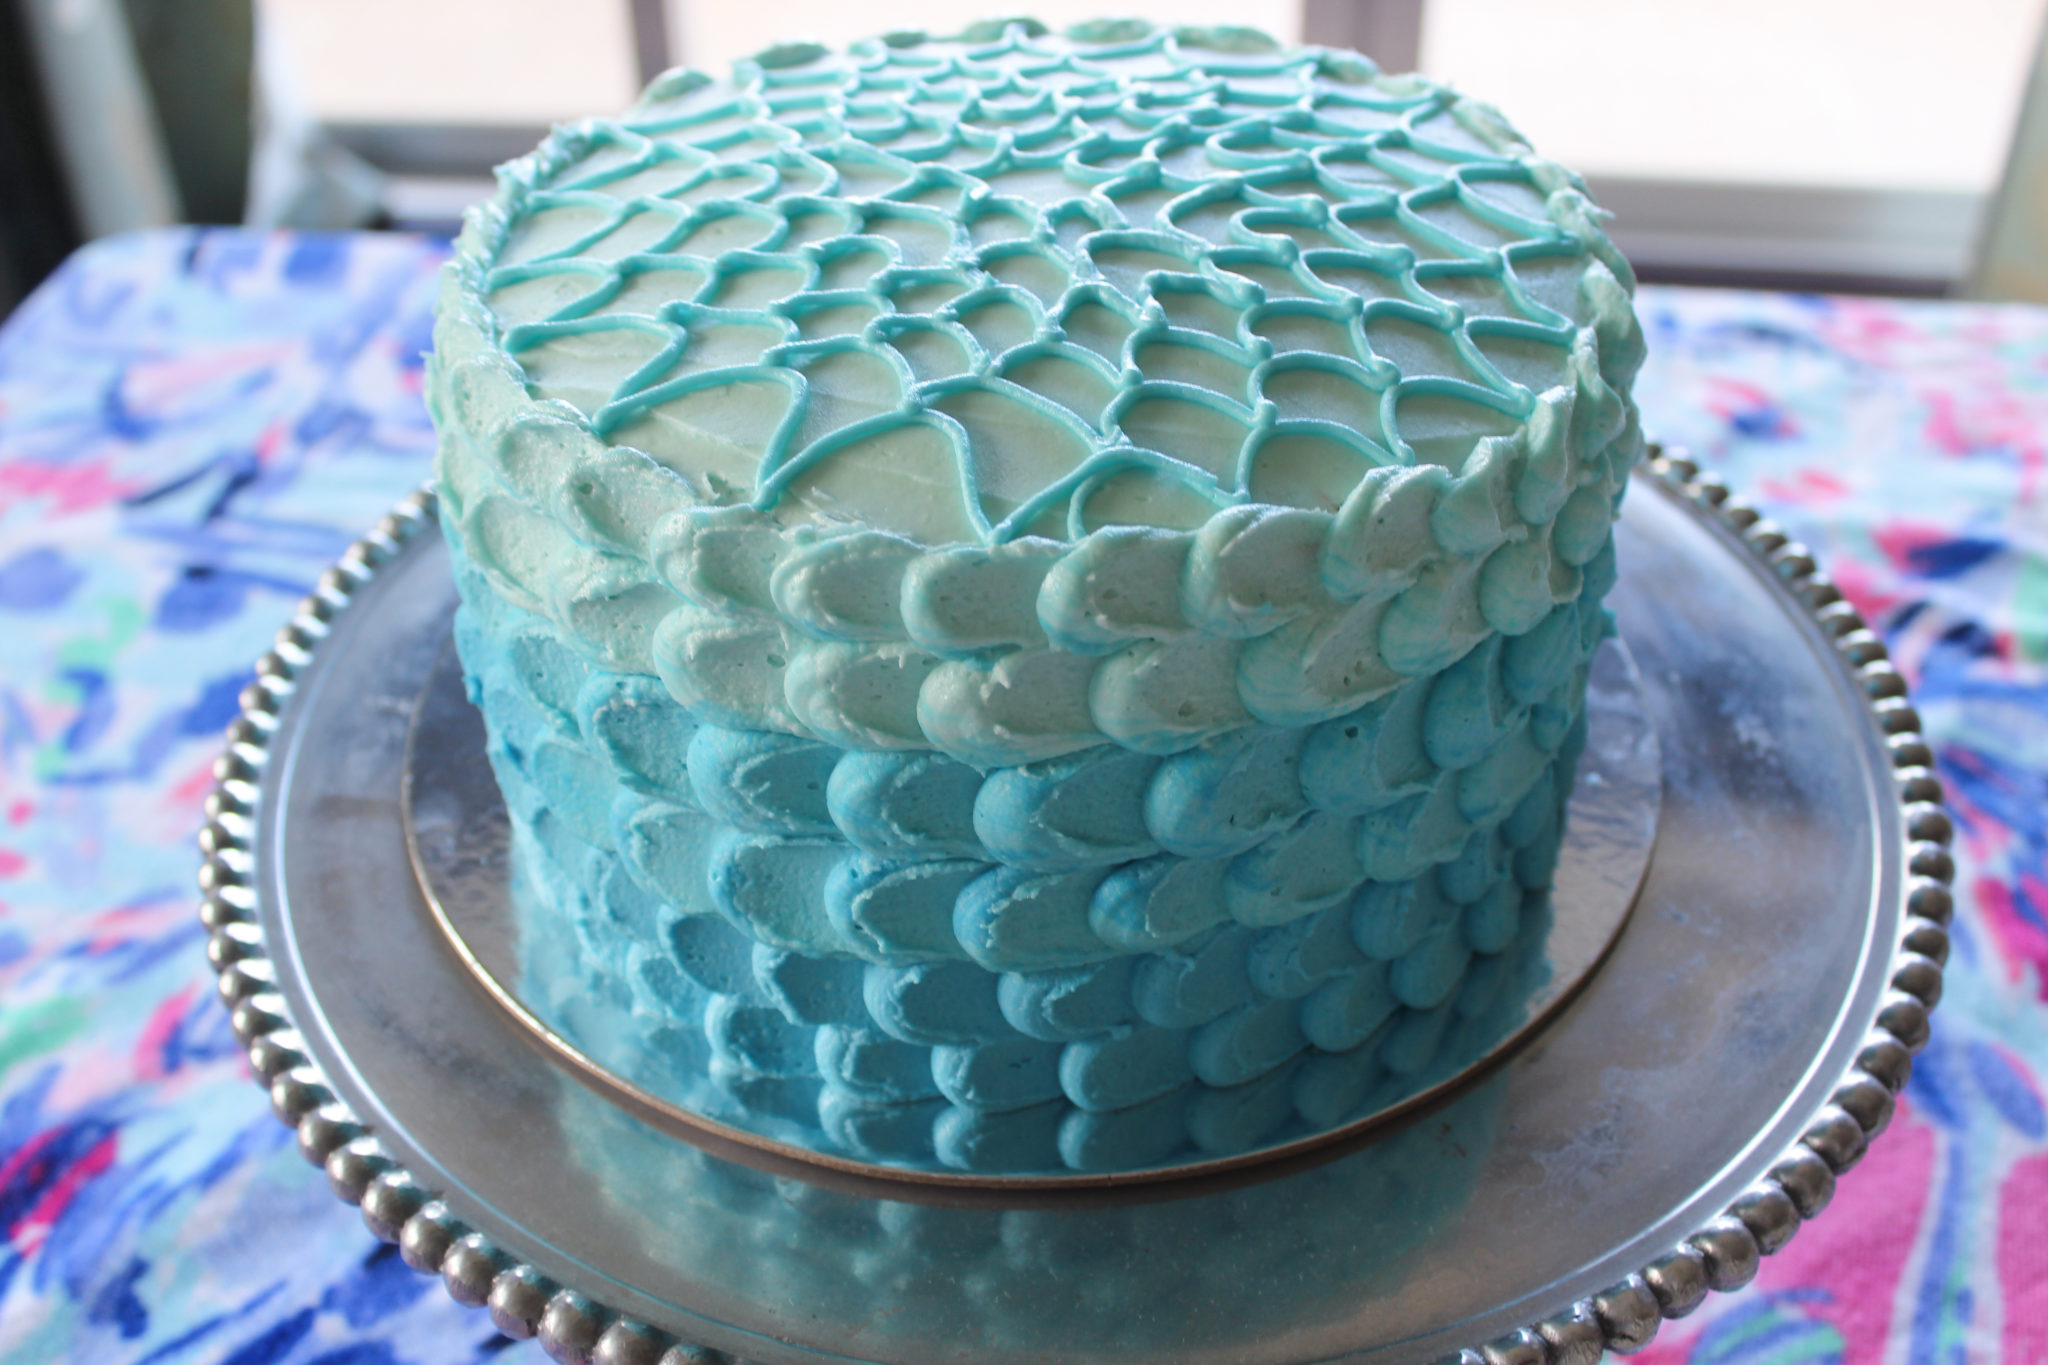
The frosting design around the side of the cake also looks scarier than it is. I had never done this particular method before, and it turned out looking pretty great, if I do say so myself.
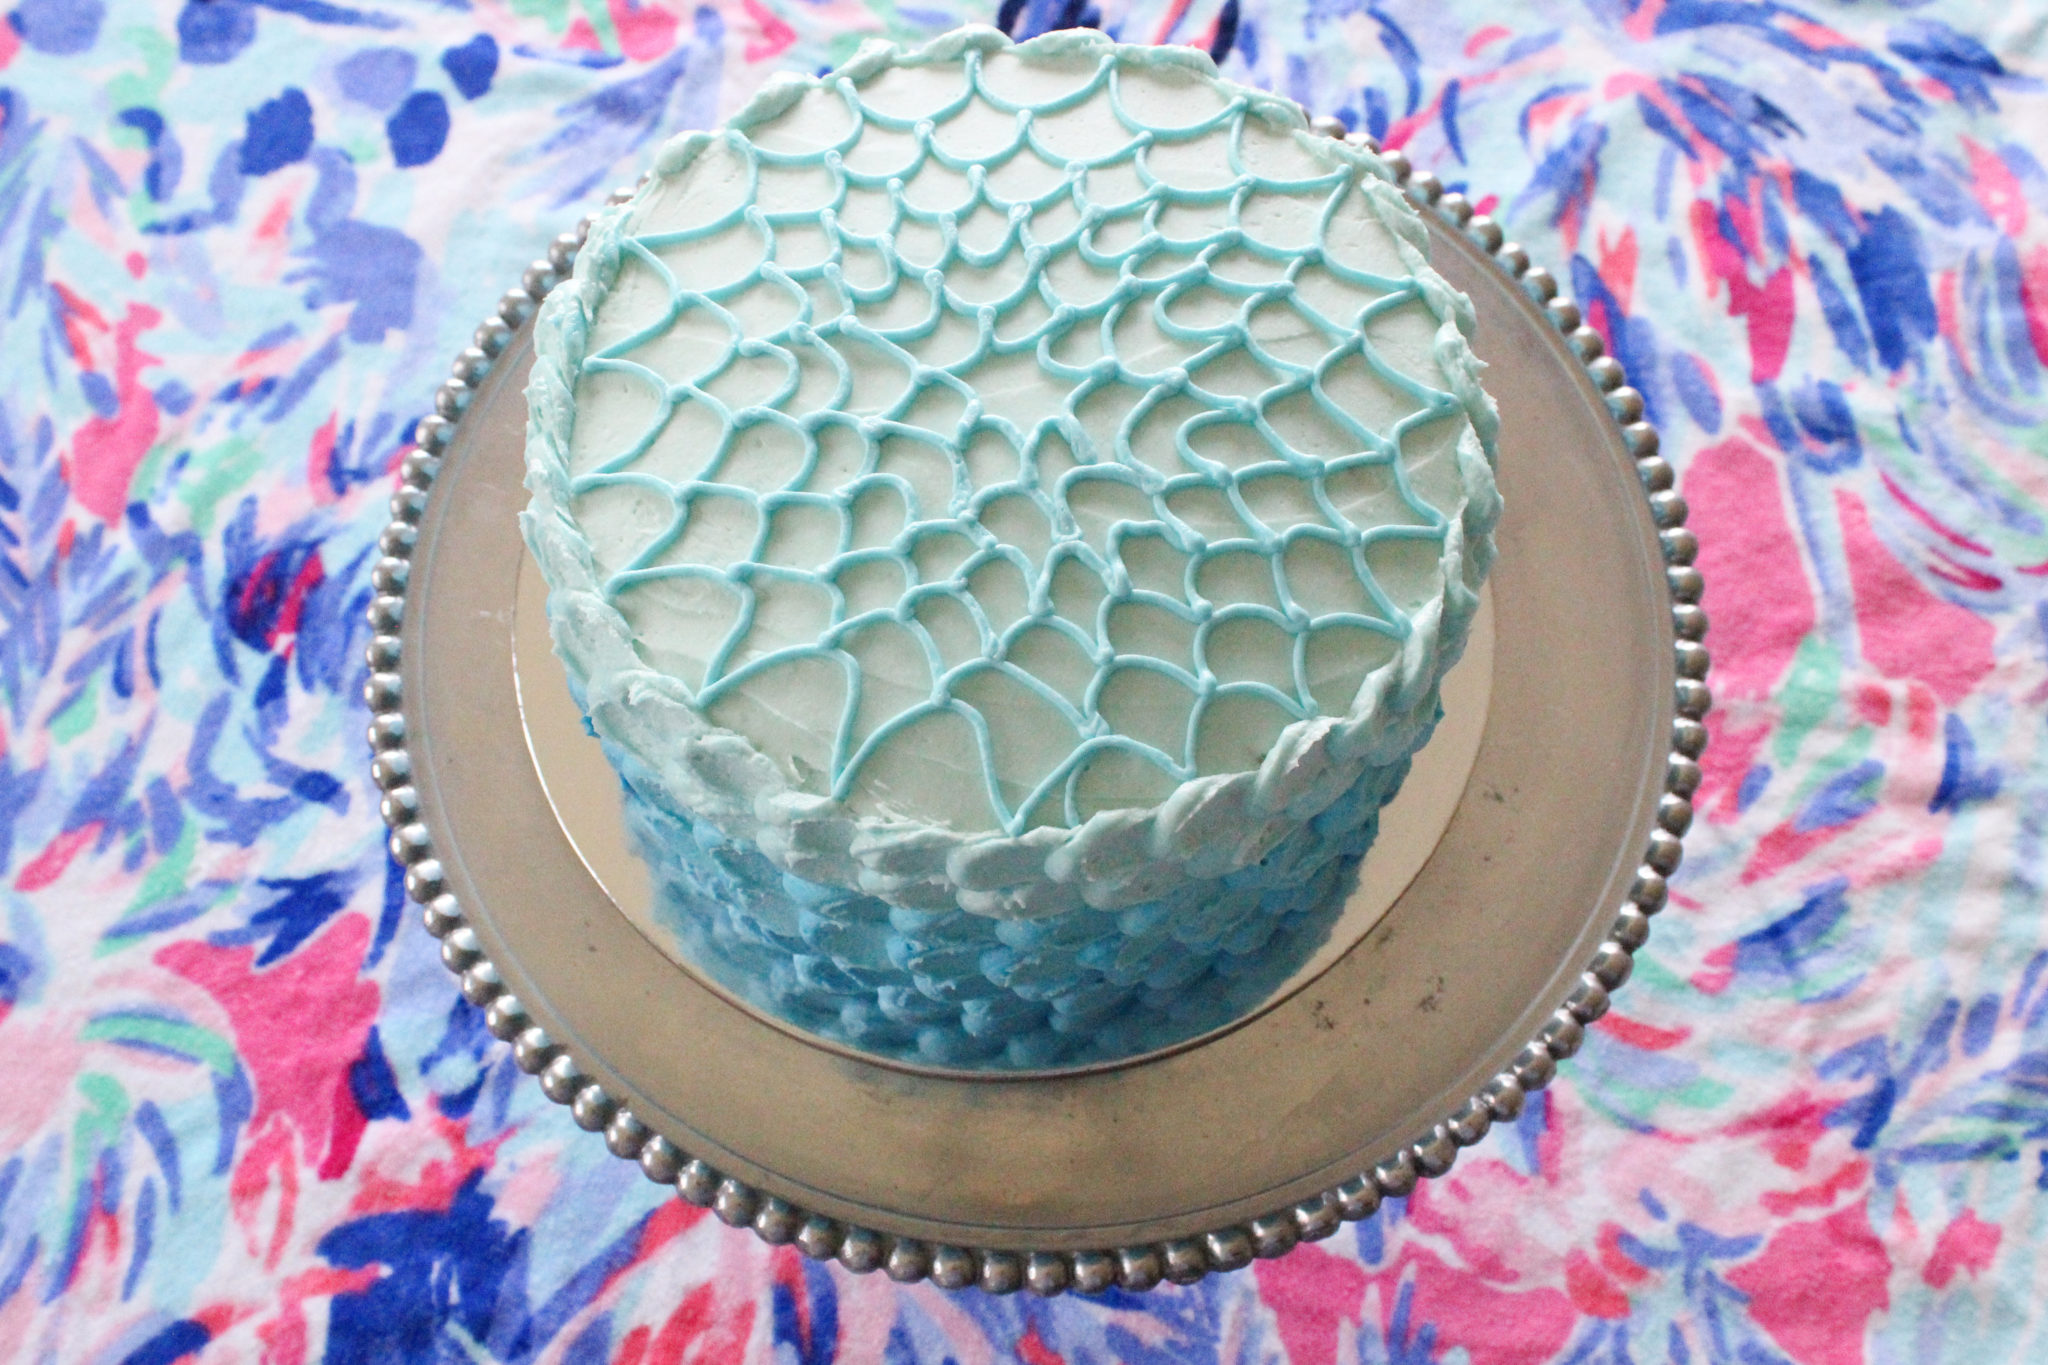
As for the top, you can pipe some mermaid scales on there like I did, or you can toss a handful of pretty sprinkles and/or a cool cake topper on top and call it a day. I would have used a cake topper myself, if I had been able to decide on one early enough to order.
Ombre mermaid birthday cake
You’ll need:
Enough white cake batter for a 4-layer 8-inch round cake (I used this recipe; you could double it if you’d prefer a taller cake)
Blue food coloring (gel is better than liquid; I used Americolor sky blue and added a teeny bit of violet in the darker two layers to make it more blue and less yellow)
A lot of frosting (recipe below)
Three piping bags or large plastic bags and at least one large round piping tip and coupler (I used a Wilton 1A tip)
An icing spatula (you may be able to use a butter knife or small serving knife for this, but I haven’t tried)
For the cake: Butter four 8-inch round cake pans and cover the bottoms in parchment paper, then butter the parchment paper (I only have two of this size, so I baked the layers two at a time). I would also recommend you weigh your measuring bowl with a food scale before you make the cake batter.
Once your cake batter is ready, add two or three drops of the blue gel food coloring to the batter and mix to blend. If the batter doesn’t appear light blue, add another drop or two. Pour 1/4 of the cake batter into one of the prepared pans (you can figure this out exactly by weighing the bowl of batter on a food scale, subtracting the weight of the bowl and dividing by 4… Then put the cake pan on the scale, zero it out and pour batter in until you’re at that number. I was going for 12.09 ounces of batter per layer. But, you can also put all of the batter in a big measuring cup and divide the total by 4, or just eyeball it).
Now, add a few more drops of food coloring to the batter, mix to combine, and if it’s visibly darker than the first pan of batter, pour the same amount of batter in the second pan that you did the first.
Continue, adding a few more drops of food coloring to the batter each time, until you have four pans of cake batter that are gradually darker shades of blue. Bake the cakes, then transfer the pans to a cooling rack for a few minutes. Flip the cakes onto the cooling racks to cool completely. (If you’re using the pans more than once, make sure the pan is completely cool before you use it again).
Once the cake layers are cool, you can wrap them in plastic wrap and put them in the fridge or freezer while you’re making the frosting (or even overnight). That will make them a little easier to handle when stacking.
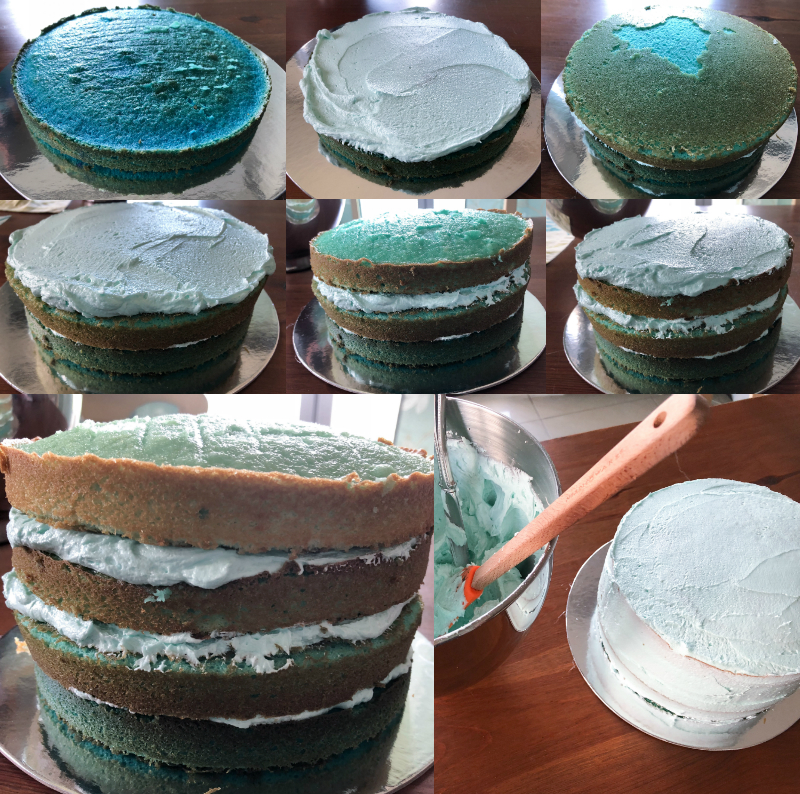
To make the frosting, use the recipe below or your own recipe. Once the frosting is the desired consistency and flavor, use a few drops of the blue food coloring to dye it a light blue color. Use the light blue frosting to assemble the cake, starting with the darkest layer on the bottom and using a progressively lighter layer each time. Once the cake is assembled, cover the entire thing in a thin layer of the light blue frosting. Stick the roughly frosted cake in the fridge for 20-30 minutes.
Once the cake has chilled, spread another layer of the light blue frosting on the top of the cake and smooth it out. Then separate the remaining frosting into three roughly equal parts (you can use a food scale for this if you’d like).
Leave one of the bowls of frosting light blue, but add a few drops of blue food coloring to the other two bowls, so that one is a medium blue and one is a darker blue. Put the darkest blue in a piping bag fitted with the large round tip.
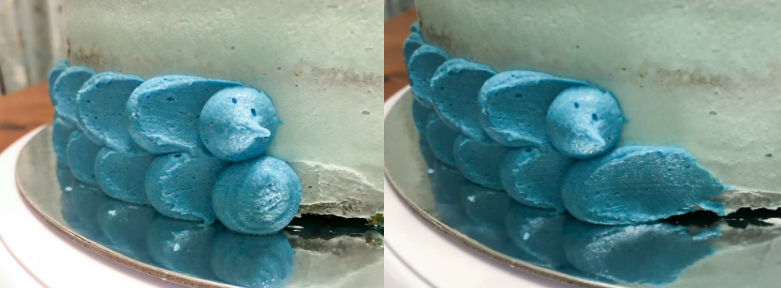
Pipe two dots (one on top of the other, or slightly staggered) onto the bottom of the cake, then use an icing spatula to gently drag the frosting out and make it look like a petal or a fish scale. (See photo below) Continue with two more dots, dragging them out before piping the next two.
Once you’ve made it all the way around the cake with the darker blue frosting, repeat with the medium blue frosting. Then use the light blue frosting to finish the sides of the cake. If you want the same sort of swirly color effect that my cake had, you can use the same piping bag and tip for all of the colors of frosting without washing it in between (just squeeze as much of the previous color out first as you can).
If you want to pipe the pattern on the top of the cake, save some medium blue frosting after you do the sides of the cake. Put it in a piping bag fitted with a smaller tip (I used a Wilton #3) and pipe a fish scale pattern on the top of the cake. Place the cake in the fridge for 20-30 minutes to allow the frosting to set.
Frosting
4 1/2 to 5 U.S. sticks of unsalted butter, at or near room temperature
2-3 pounds of powdered sugar
2 teaspoons of real vanilla extract
whole milk, as needed
Beat the butter in the bowl of a stand mixer fitted with the paddle attachment (or beat in a large mixing bowl with a hand-held electric mixer) on medium-high speed until fluffy. Add about two cups of the powdered sugar and mix on low speed to combine, then add two more cups of powdered sugar and the vanilla and mix on low speed to combine (you can turn it up to medium or high speed after it’s all combined, but if you start on high, the powdered sugar will go everywhere).
Add two more cups and mix to combine. You should have added about 6 cuts or roughly a pound and a half of powdered sugar by now. Taste the frosting to see if it’s sweet enough. If not, or if the frosting seems too soft, add another cup of powdered sugar and taste again. Continue adding one cup at a time until the frosting tastes the way you like it.
Once the frosting tastes perfect, beat on high speed for a few minutes to make it very light and fluffy. At that point, if it seems too stiff to spread, add a few teaspoons of milk and mix (on low speed at first!) to combine, then beat on high speed for another minute or two.